
Over the years, friends and family have come to expect DIY gifts from me like lip balm, soap and even laundry detergent. Making gifts for holidays, birthdays and other special occasions not only saves me money, but it also allows me to exercise my creative muscle and spread the word that a natural DIY lifestyle really is simple.
However, while I’ve loved making natural gifts to give my loved ones, I haven’t so much enjoyed the packaging part. Traditional wrapping paper didn’t seem quite fitting for something I’d made myself and I wasn’t quite sure what else to do.
Thankfully, I’ve had a lot of practice over the years, and thanks to many websites, especially Pinterest, I’ve learned some tricks that have helped me beautify my DIY gifts.
1. Tags
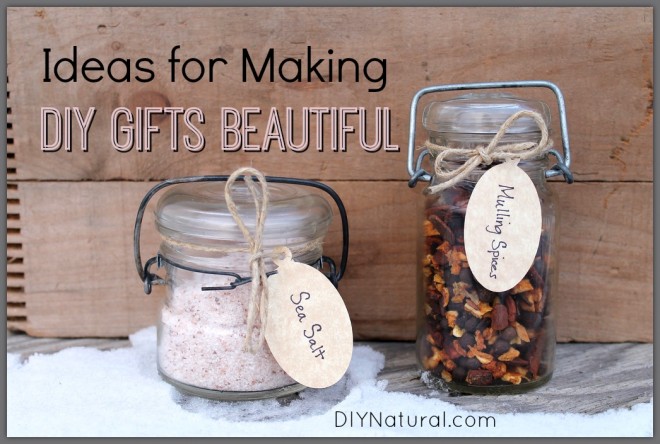
For gifts that you want to include ingredients and/or recipes, use a gift tag made with card stock or a label, depending on what you’re giving the gift in. You can find plain pre-made gift tags or you can make them yourself. (Especially if you have a Cricut, which easily cuts them out for you.)
If you prefer to stick a label on the gift you’ve made, you can also find fancy labels in all sizes, like circular kraft labels that look very “natural” or even chalkboard labels that you can write on with chalk.
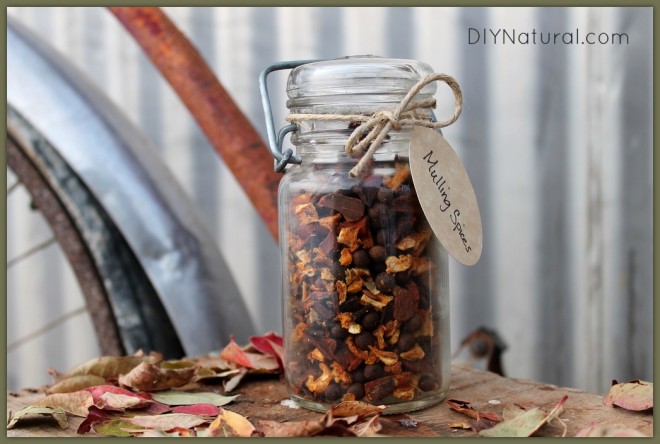
2. Jars and Bottles
I’m obsessed with quite fond of glass jars and bottles. They have so many uses, including packaging for DIY gifts. There are many edible gifts in jars you can give, but you can also use them for things like laundry detergent, herbal bath salts and homemade lotion.
Bottles are naturally great for all things liquid, be it homemade dish soap, flavored kombucha or homemade vanilla extract. You can wrap them or present them as is.
3. Bags
If parting with your jars and bottles is difficult (I understand), try using bags instead.
Brown paper coffee bags (like these) are perfect for things like mulling spices, bath salts, loose leaf teas (like the sleepy tea found here) and even laundry detergent. You just need to print off a custom label with ingredients and directions and stick it on the front of the bag.
Fabric bags are also great for the same thing. You could make or buy muslin, cotton or burlap bags in many sizes to package your DIY gifts.
4. Wrapping
Traditional wrapping paper can be expensive and wasteful. And in my house, way too easy for little kids to rip through prematurely (no matter whose gift it is).
Instead, I prefer wrapping presents in fabric or packaging paper and tying on some jute twine or ribbon and a gift tag. If I use fabric, it’s usually with something that I put in the middle of a scrap of fabric and then pull all four sides up around it. I then secure it with the twine or ribbon.
With the packaging paper, I use it as I would normal wrapping paper. I’ll either leave it plain brown, or let the kids decorate it with stamps or drawings.
5. Stamps
You can make a gift look extra special with just a stamp and some heavy-duty paper or a fabric bag of some kind.
If you want to give some soothing bath herbs, for instance, try packaging them in a muslin bag or brown paper coffee bag. Use a stamp and ink to personalize whichever option you choose (make sure you get the right ink for the project, of course).
You can also personalize your gift tags, wrapping paper and homemade stationery with stamps.
6. Molds
Certain gifts, like homemade bar soap or chocolate lotion bars, need to be poured into some sort of mold. Typically, I use a silicone muffin tray or the rectangular soap mold my husband made me. However, if I know the batch I’m making will be mostly gifts, I’ll change it up a bit with a special mold.
There are lots of fun molds available, including geometric shapes, floral molds and even animal molds.
7. Scents
One of my favorite tricks I’ve learned is to scent Christmas (or other special occasion) cards with essential oils.
Put your cards in a sealable bag or container. On a cotton ball or wadded up piece of cotton fabric, apply 2-3 drops of cinnamon essential oil (or any other oil you love). Place the cotton in the bag with the cards, seal it, and wait 24 hours. Your cards will smell amazing. (Find 100% pure essential oils here.)
This idea isn’t limited to stationery. I’ve made a lot of things “giftable” by adding one or more essential oils for a special scent, including laundry detergent and Epsom salts.
What’s your favorite way to beautify your DIY gifts?
*******


Hi, I truly enjoy Shalom Mama, and I have learned a lot about making home products from scratch.
I make soap also, but I use glycerin, goat’s milk, and castile soap base. I buy it in 5 lb. blocks. I have found that an old crock-pot is ideal for melting the soap base. You can ladle it out into a measuring cup in whatever quantities you wish and add your color, emollients and scents that you prefer. Then, go on to another batch, in whatever quantities you want. This has cut hours off my soap-making. Also, I have a dedicated hair-dryer that I use to get the soap out of the molds. A few quick passes with the hair dryer set on high, and one can ease the soap out of the mold easily, without a lot of effort.
My favourite way is definitely jars, tags and some sort of twine. Love your idea of a stamp, definitely gotta look into that!