This DIY herb drying rack is the perfect space-saving solution to dry your herbs. It is affordable and useful and is made from simple household items.
Drying Your Harvest
As the dog days of summer approach, my garden grows taller and taller! Flowers are blooming, tomatoes are ripening, and I am running out of room on my drying rack.
Right now I have more calendula than I can dry and spearmint for days. Because I need more herb drying rack space, I started digging around my craft supply closet to find something that could make a suitable solution.
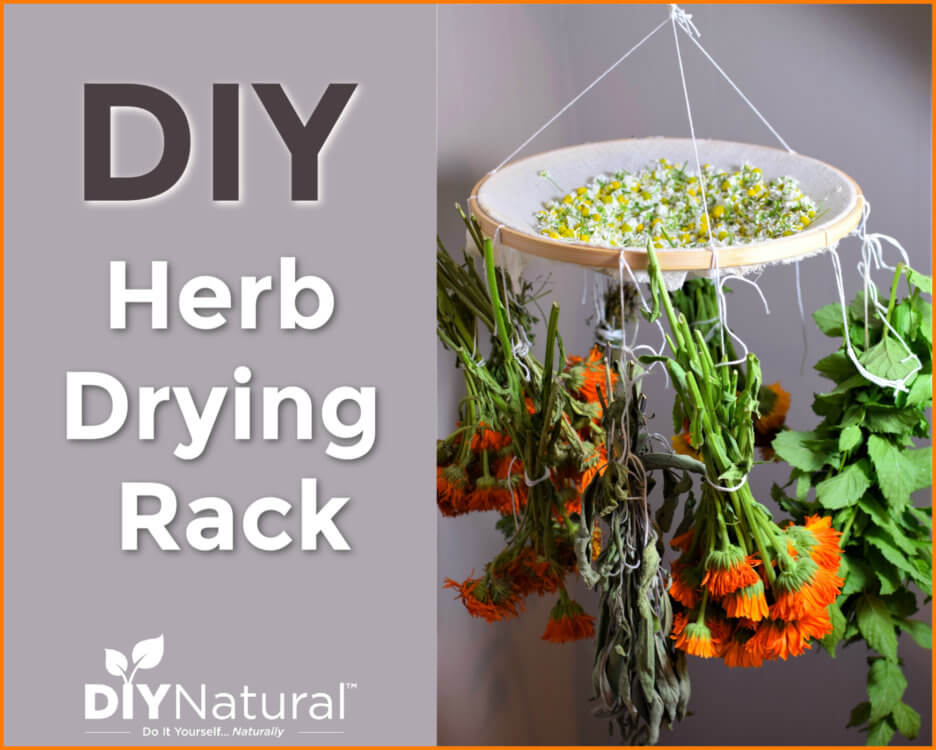
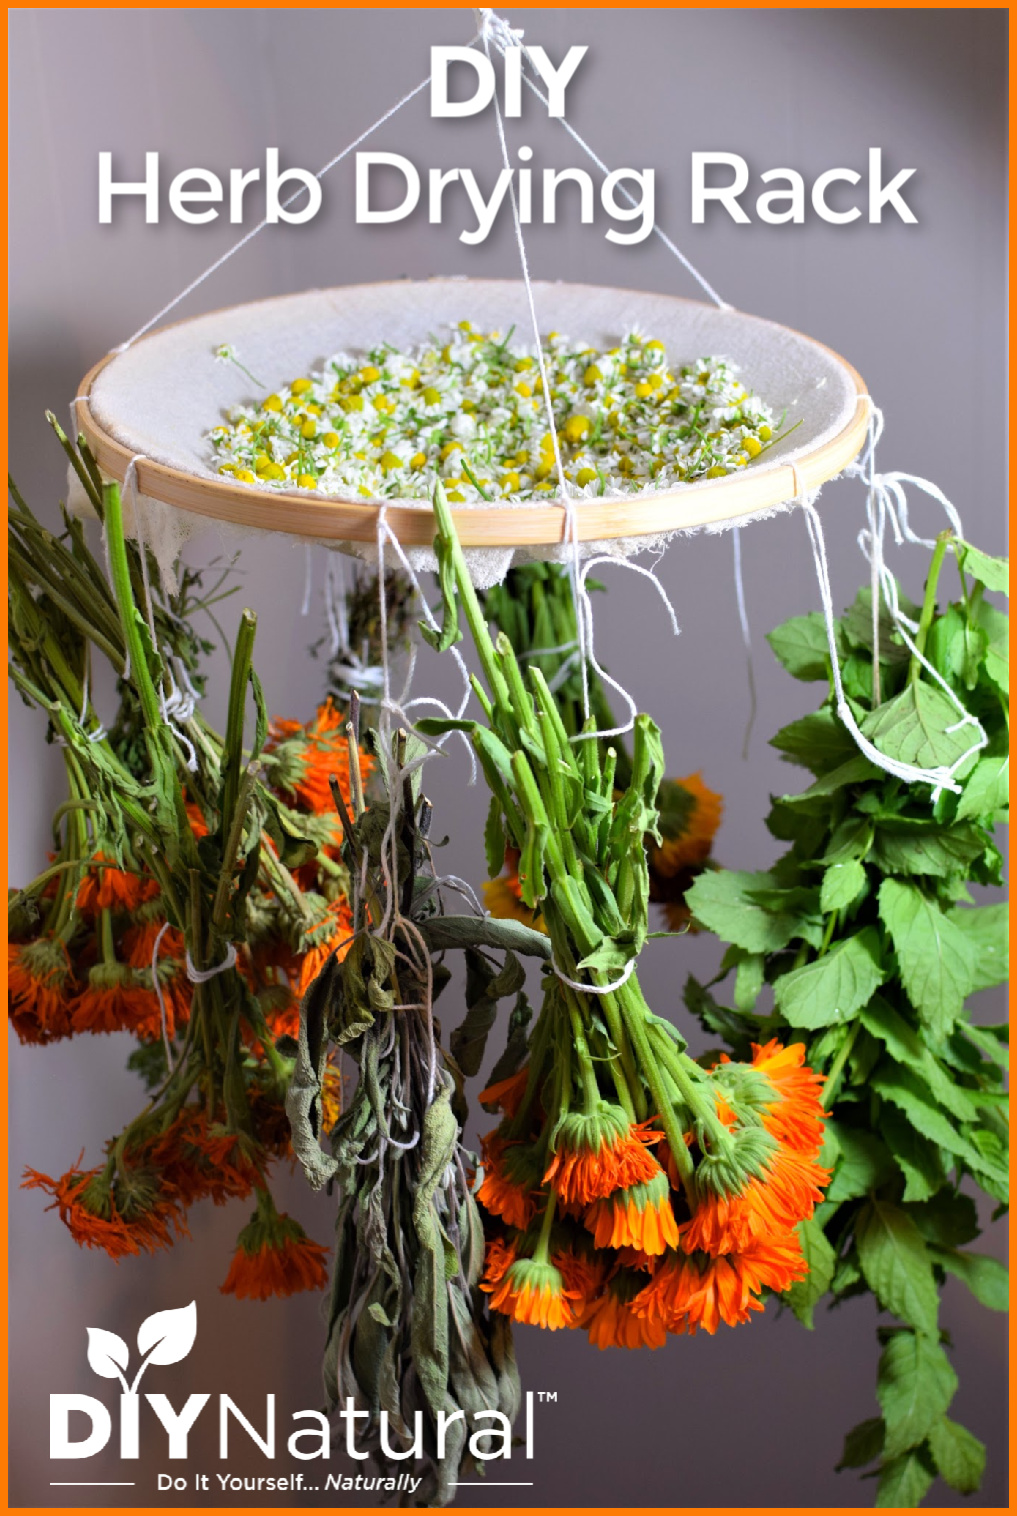
At one time, I thought I would take up embroidery. Apparently, sewing is not my thing, but growing plants definitely is. I had five different embroidery hoops of various sizes laying around. They are round and sturdy, the perfect vertical herb drying vessel.
Because I wanted to maximize the drying space, I decided to place some cheesecloth in the embroidery hoop for extra horizontal drying space. It works well for flowering tops like chamomile.
This herb drying rack did take me a few attempts to get right, but it was so worth the extra effort. It might not be the most gorgeous thing I have ever made, but it sure is one of the most useful! I have actually made four more of these herb drying racks because I have so many herbs on the way.
Herb Drying Rack
Equipment
- 12″ Embroidery hoop (any size will do, but the larger the better!)
- String (I used cotton macrame string)
- cheesecloth or muslin
- herbs to dry
- Wire for hanging (optional)
Instructions
- Gather the things needed for this herb drying rack.
- Remove the outer hoop from the inner hoop, set the inner hoop aside for now.
- Cut three equal strings, about 12-18 inches long (longer or shorter depending on the size of your hoop). The important thing is that they are all equal in length.
- Tie the strings to the outer hoop, spacing them evenly around.
- Bring the tops of the strings together and tie them to a piece of wire made into a loop (you can also just tie the strings together in a loop if you do not have wire). This will be how the hoop is held up. (Don’t worry if your hoop is a little lopsided, you can even out the weight as you add herbs to the rack)
- Next, attach several strings around the embroidery hoop and let the ends hang loosely down. These strings will be how you tie the herbs onto your herb drying rack. I used 9 total.
- Secure the drying rack to an overhead hook in a cool, dry, space away from direct sunlight. I hang mine from the beams in my basement and in an open closet that I use for herb drying.
- Next, place the cheesecloth or muslin on top of the inner embroidery hook. I used a little glue around the hoop to help hold it in place.
- Gently insert the inner hoop to the outer hoop from the bottom, keeping the fabric secure. Pull any strings down that may have been pushed up in the process so that all 9 herb strings are dangling down.
- Tighten the loop fastener until secure
- Tie bundles of herbs to the string and cut down when dry leaving a bit of string behind for the next bundle.
Storing Your Herb Drying Rack
The best part about this herb drying rack is that it can be easily stored after drying season is over, or it can be re-purposed back into something else! You could try your hand at this lovely Aromatic Lavender Wreath made from dried lavender and an embroidery hoop.
Don’t know what to grow? Here is a list of high antioxidant herbs and spices to grow.
Have you ever made an herb drying rack? Please share with us. I would love to hear in the comments!
*******


I have two sets of clotheslines – indoor and outdoor. Most of the year I use the outdoor ones, leaving the indoor lines available for drying herbs. I pin large leafy things directly to the lines, just like laundry, and smaller things are put on several metal window screens I keep for that purpose. I fill the screens, then lay them across the clotheslines. I can dry immense quantities of leaves and flowers on the screens with minimal effort and little or no turning of the material for even drying. If the weather turns damp, I turn on a pedestal fan in the drying room to circulate the air. Since the clotheslines are near the ceiling, the air is usually warmer there, anyway, making a wonderful dehydrator for my herbs. When I’m done drying herbs, the screens get stacked out of the way.