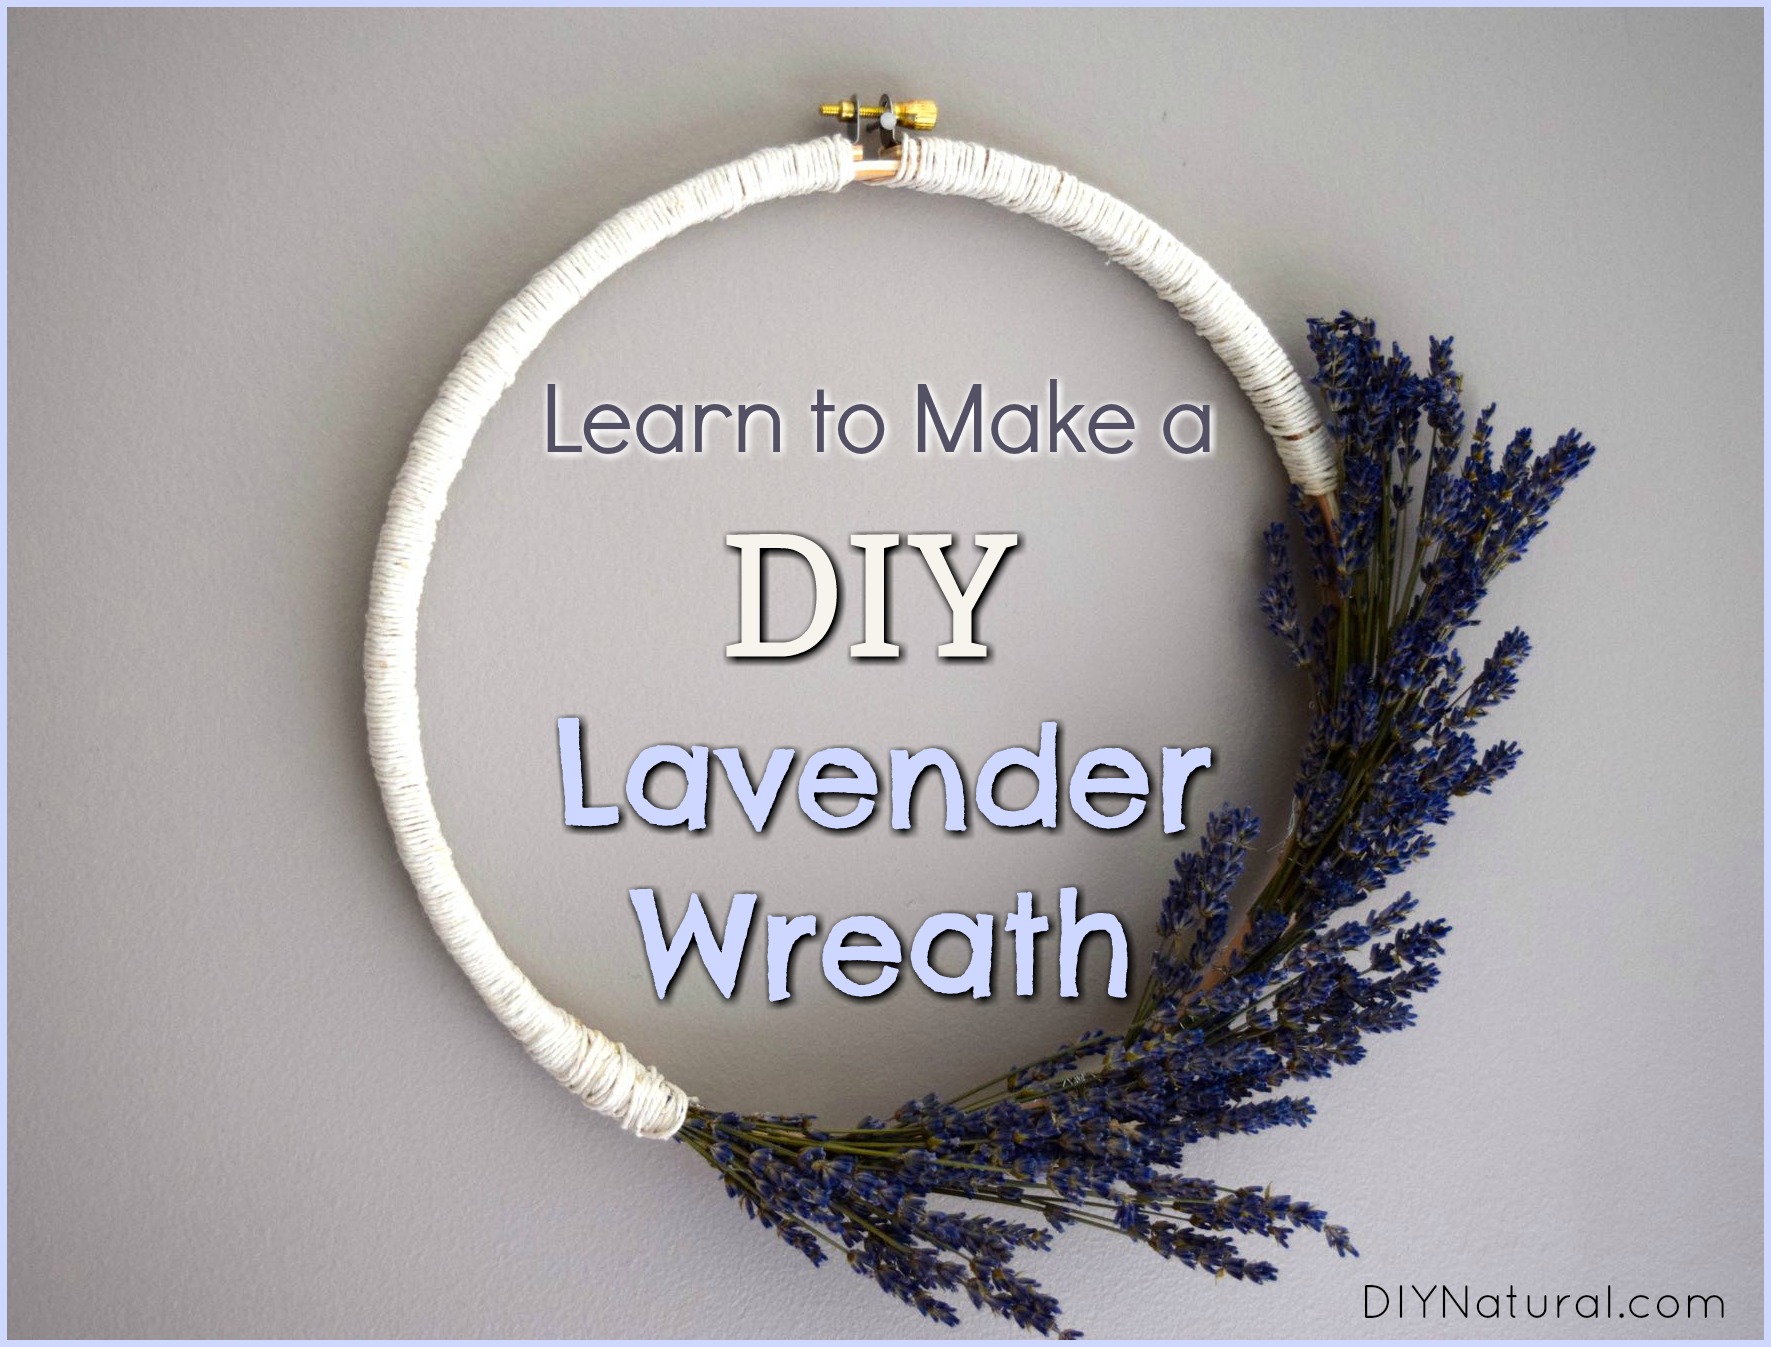
This DIY embroidery hoop is an aromatic lavender wreath that looks beautiful, smells lovely and is an all-around beautiful piece of decor to be proud of.
As the summer winds to a close, I’m back to cutting my lavender plants.
It’s amazing how many dried bundles of lavender four little plants can produce! Lavender is such an easy plant to grow and produces a nice yield even in small spaces. (Read more about growing lavender here.)
This year I’ve already infused my first round of lavender buds into oil for my favorite DIY beauty care products, so I needed to find another way to use up my bumper crop of dried lavender. Instead of just letting it sit and wait, I decided I would re-purpose it into an aromatic wreath.
How to Make an Aromatic Wreath
I’ll start by saying, I’m not a wreath-maker by any means. I’m an amateur at best. However, that has never stopped me from trying my hand at a DIY project before! It just took a little extra time and patience on my end. Especially when figuring out how to secure my lavender.
Gathering Supplies
Since I always seem to have extra craft supplies, I went into my craft closet instead of going to the store. I knew I had some floral wire, but I did not have any wreath bases. I did, however, have a large, 9″ embroidery hoop. That would work just fine!
Securing Your Aromatic Herb
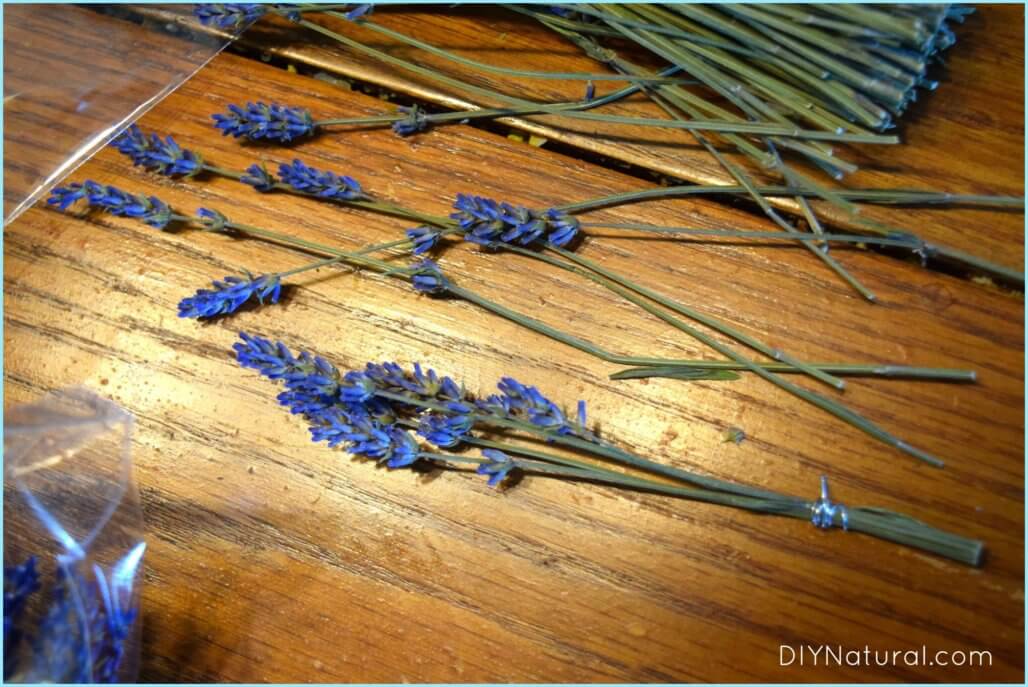
I grabbed the hoop and my lavender and got to work. First I bundled about 7-10 stalks of lavender together and secured them with a small amount of floral wire. Green floral wire is the ideal choice, but I only had silver, so I made sure to cover it well. I made about 20 bundles of 7-10 stalks of lavender each, then I set to work on the frame.
I knew I would never have enough lavender to make a full wreath (you’d likely need about 500+ stalks for that!). So I set my design at a half wreath and decided to cover the rest with cotton string for decor.
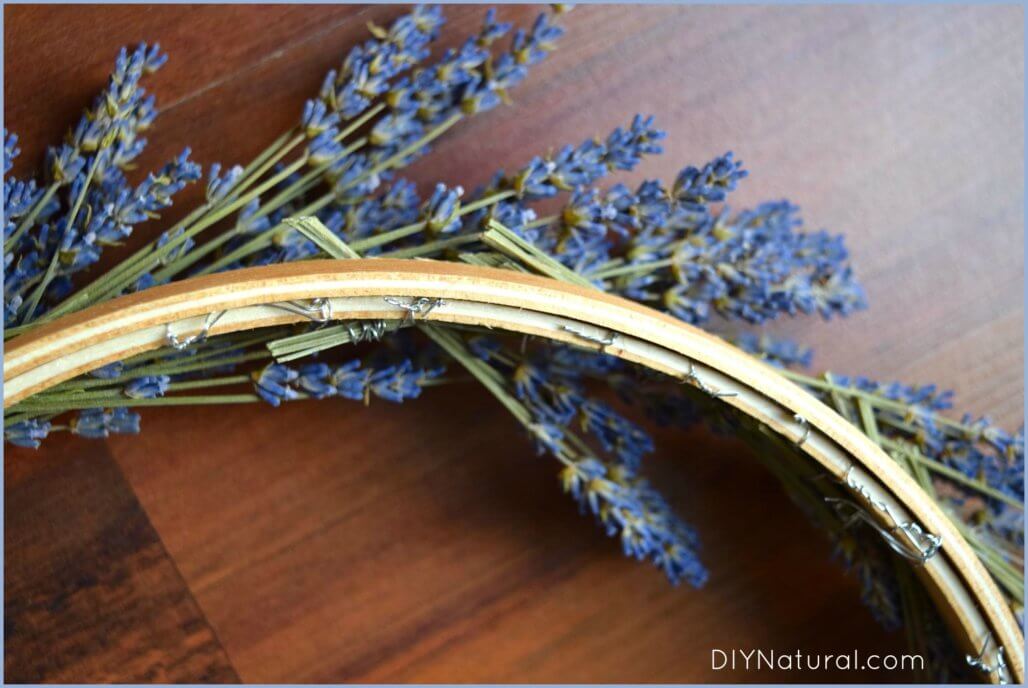
I unhooked the embroidery hoop and used the inside hoop to secure my lavender so that the wire could be hidden by the outer hoop. All of the wires were secured in the rear of the hoop so they would not obstruct the outer hoop when attached.
I slowly began adding the lavender, alternating directions of the bundles left and right. Occasionally I’d add in an extra bundle to make the lavender wreath look more full. I secured the last bundle halfway around the hoop and then moved on to the cotton string.
Finishing Touches
The lavender bundles looked wonderful on my wreath, but the plain embroidery hoop needed some extra oomph. By adding the cotton string, my DIY aromatic lavender wreath had a softer, more put together feel. Adding the string was probably the most tedious part of this DIY, so if you feel your wreath looks fine without the string and you want to stop there, go for it!
If you do want to add the string, you simply wrap the cotton string around your lavender wreath until you reach the other side. I continued the same strand of string behind the embroidery hook and even down past the first bundle of lavender to give it a more “complete” look. I secured the ends of the string with some wood glue so that I did not need to knot the string.
This DIY embroidery hoop aromatic lavender wreath is such a wonderful addition to my bedroom! It smells lovely, looks lovely and is an all-around beautiful piece of decor that you can be proud of. Plus, since I made it with craft supplies that I already had, it cost me nothing to make! Even if you buy the floral wire and embroidery hoops, I doubt this whole project will cost you more than $10 to make.
DIY Aromatic Lavender Wreath
Supplies
- floral wire (like this)
- 9″ embroidery hoop (find them here)
- 150-200 dried lavender stalks (Grosso lavender and Hidcote English lavender are good choices for wreath making as they hold their buds well!)
- scissors
- cotton string (like this)
- wood glue, optional
Instructions
1. Begin by bundling individual lavender stalks together in bundles of 7-10.
2. Secure with floral wire and cut stems so they are even.
3. After you have made 20-25 bundles, begin to secure the individual bundles onto the interior embroidery hoop with wire (after taking off the outer hoop). Alternate the direction of the bundles, left and right.
4. Once you have reached the desired amount of lavender bundles and you are halfway around the outer circle, fill in any empty spaces.
5. Secure the inner hoop to the outer hoop and tighten the embroidery hoop closure.
6. Starting nearest to the last secured lavender bundle, begin to wrap the cotton string around the bundle, taking care to cover the floral wire.
7. Continue wrapping the cotton string around the entire wreath until you reach the first lavender bundle.
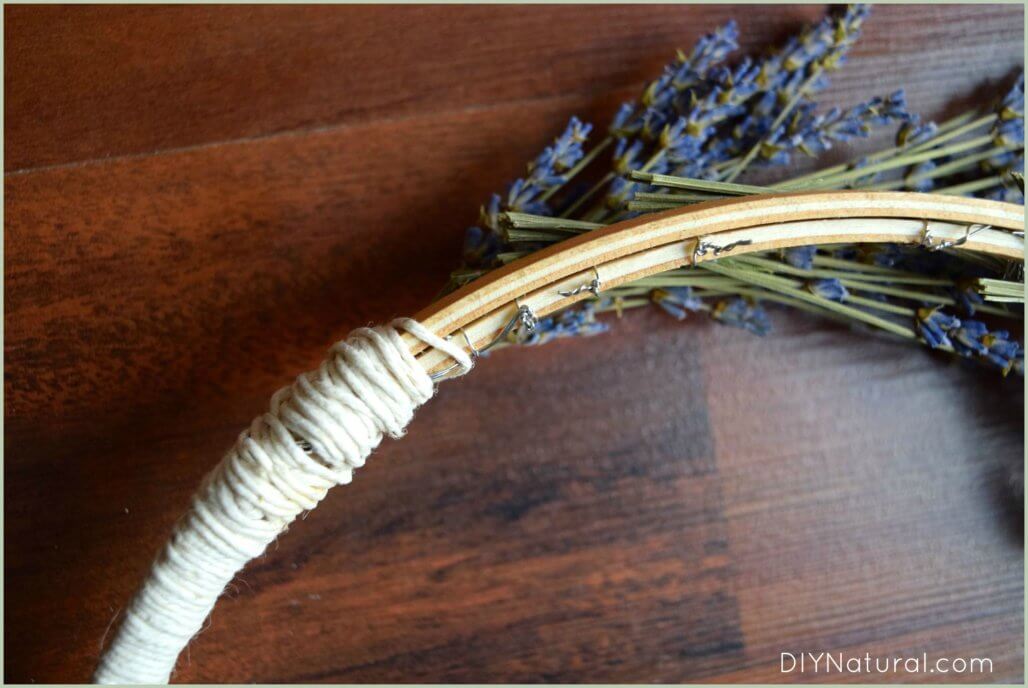
8. Carefully wrap and tuck the cotton string under the first bundle of lavender and secure the end with a small amount of wood glue (or other clear-drying glue).
9. Mount your wreath and enjoy!
Note: Like any wreath with dried botanicals, this DIY lavender wreath will last longer when kept in a dry location out of direct sunlight. I chose my bedroom because this wreath has such a soft feel and is easily kept out of the sun.
Have you ever made your own aromatic wreath? If so, share any tips with the community!
*******