I’ve had a lot of success making creams and just recently mastered lotion making! My favorite so far is this simple goat milk lotion recipe.
Why a Goat Milk Lotion Recipe?
If you’ve ever used a goat milk soap, you know how rich and creamy the lather is. It leaves your skin soft and well moisturized. Imagine that feeling infused into a lotion that you can use on your hands, feet and even your face. With this recipe, you can make your own! Goat milk has vitamins and fatty acids that can help your skin to keep it’s youthful appearance and can help to improve skin texture.
Goat Milk Lotion Recipe
- Prep Time
- 20 minutes
- Active Time
- 20 minutes
- Resting Time
- 12 hours
- Total Time
- 12 hours 40 minutes
- Servings
- 40 ounces
- Estimated Cost
- $10
Equipment
- 2 stainless steel pots (one large enough to hold all the ingredients and a smaller one to heat the milk)
Ingredients
- 1.5 ounces grapeseed oil
- 5 ounces coconut oil
- 7 ounces avocado oil
- 2.5 ounces shea butter
- 2.5 ounces emulsifying wax (see below)
- 21 ounces goat milk
- 10 drops essential oil of your choice
- .5 ounce preservative (see below: rosemary antioxidant extract and/or Linatural.)
Instructions
-
To begin making this goat milk lotion recipe, place all the oils, butter and wax in the larger stainless steel pot and heat until melted. Keep warm while you heat the milk.
-
In the smaller stainless steel pot, heat the milk. Heat slowly, as the milk can scorch easily. You’ll just need it warm, but not boiling.
-
When both liquids are warm, carefully pour the milk into the oils. It should turn white to creamy in color. Stir a bit, then blend with the stick blender. Don’t be surprised if the liquid stays liquid for a while and doesn’t thicken. This is normal when it’s warm. As it cools, it can start to develop thicker areas on the sides and bottom. It can also get lumpy. Don’t worry about this either, it will all come together later.
-
Once it cools a bit and starts to form thicker spots, you can add the preservative to the goat milk lotion recipe. (Doing so at higher temperatures may render it ineffective.) Be sure to blend this in well.
-
As it cools, stick blend a few times. You’ll soon start to notice it getting thicker, more like lotion. If you’re pouring it into pump bottles, now is the time. You’ll want it warm enough to still be pourable. Use a funnel and ladle or if it’s thick enough, a pastry bag will work well. I make enough lotion that I purchased a stainless steel funnel with a trigger that I can proportion out amounts. It works very well when the mix is warm. When it’s cool, it still works, but it takes more time. These methods will also work if you are putting it into jars, but you can wait until it’s cooler and use a spatula or spoon to get it into the jars.
-
Rather than a lid, cover the lotion containers with a sheet of wax paper and leave overnight. The reason for this is to allow the lotion to completely cool off. If there is any warmth left at all, this could cause condensation which could lead to mold or mildew.
-
When the lotion is completely cool, place the pump top in your bottle (or top on the jar) and seal well. If the top is loose, this could also invite bacteria. Store in a cool, dry place that is out of the sunlight.
Notes
All the ingredients in this goat milk lotion recipe are weighed, not measured by volume.
Made this recipe?
Mention @diynatural or tag it #diynatural!
Adding Essential Oils to This Goat Milk Lotion Recipe
You can add essential oils to your lotion if you wish. I like the natural smell, but I also love frankincense. It’s a great essential oil to aid your skin in healing itself. For this size batch, a few drops of any essential oil is all you need.
Cleanliness is Key
As with any homemade body care products, make sure your area is clean before making this goat milk lotion recipe. For lotion, so much more! I spray rubbing alcohol on everything just to be sure that nothing is there. The preservative will help, but it can only do so much. Give it a boost by keeping everything clean. Wear gloves when preparing the lotion and tie your hair back. An apron is always a good idea too.
Waxes and Preservatives
I use this natural emulsifying wax. You can also use sunflower wax. Beeswax makes the lotion too thick so I use these lighter waxes. As with any wax, consistency may vary, so you may need to adjust the recipe a bit to get the texture that you want.
As a preservative for this goat milk lotion recipe, I use rosemary antioxidant extract and Linatural. The ROE can help retard rancidity, slowing it down to near nothing. Linatural is a natural broad-spectrum preservative that can help protect against yeast, mold and bacterial growth. Some essential oils, such as oregano, thyme, cinnamon, and peppermint can also help to keep bacteria at bay.
Do You Need a Preservative?
It depends. If you’ll be using the lotion within a week or so, you’ll be ok. But if you make larger batches or plan to store it for a while, you’ll need to either store it in the refrigerator or use a preservative. A pump bottle is best to help keep it fresh. If you do keep it in a jar, use a clean dipstick or wand to get the product out, not your fingers. Using your fingers can help to spread bacteria.
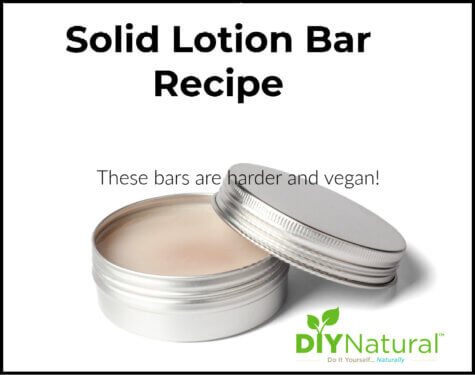
Tip: try our other homemade lotion recipe too!
This goat milk lotion recipe isn’t hard to make. Do your skin a favor and try some today!
*******


Love the recipe but will go bad in 4 days. I made it again and stored it in the fridge this time!
Probably won’t see an answer, but: where do you get the stainless steel funnel with a trigger?
I bought a coffee funnel which is stainless steel. Hope this helps.
Wondering what kind of goat milk raw, powdered or canned?