These DIY, vanilla and spruce scented, decorative soaps are beautiful and functional. Use them at home to impress your guests this holiday season!
Making Decorative Soaps
I love making decorative soaps! From these Easter Egg Soaps to these Herbal Mint Soaps, I love to feature these treasures in my bathroom.
This fall, I’ve been thinking about what to make for the holidays. I wanted a cute design that could transition from fall to winter with an equally lovely aroma. The hardest part was finding a style that was neutral enough, but still decorative.
Soaps for Fall and Winter
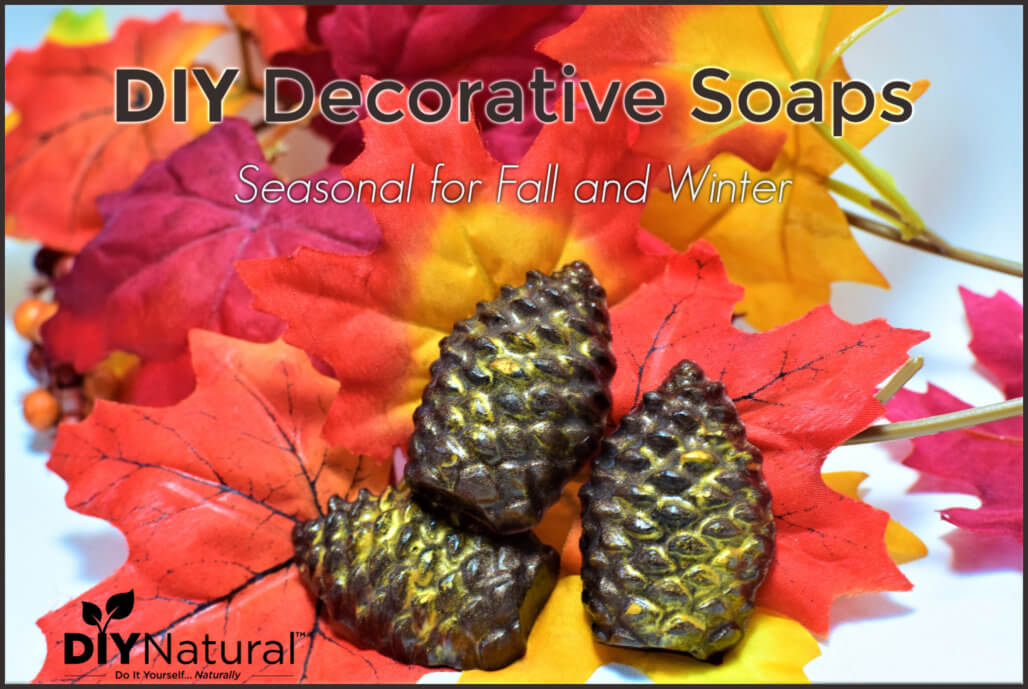
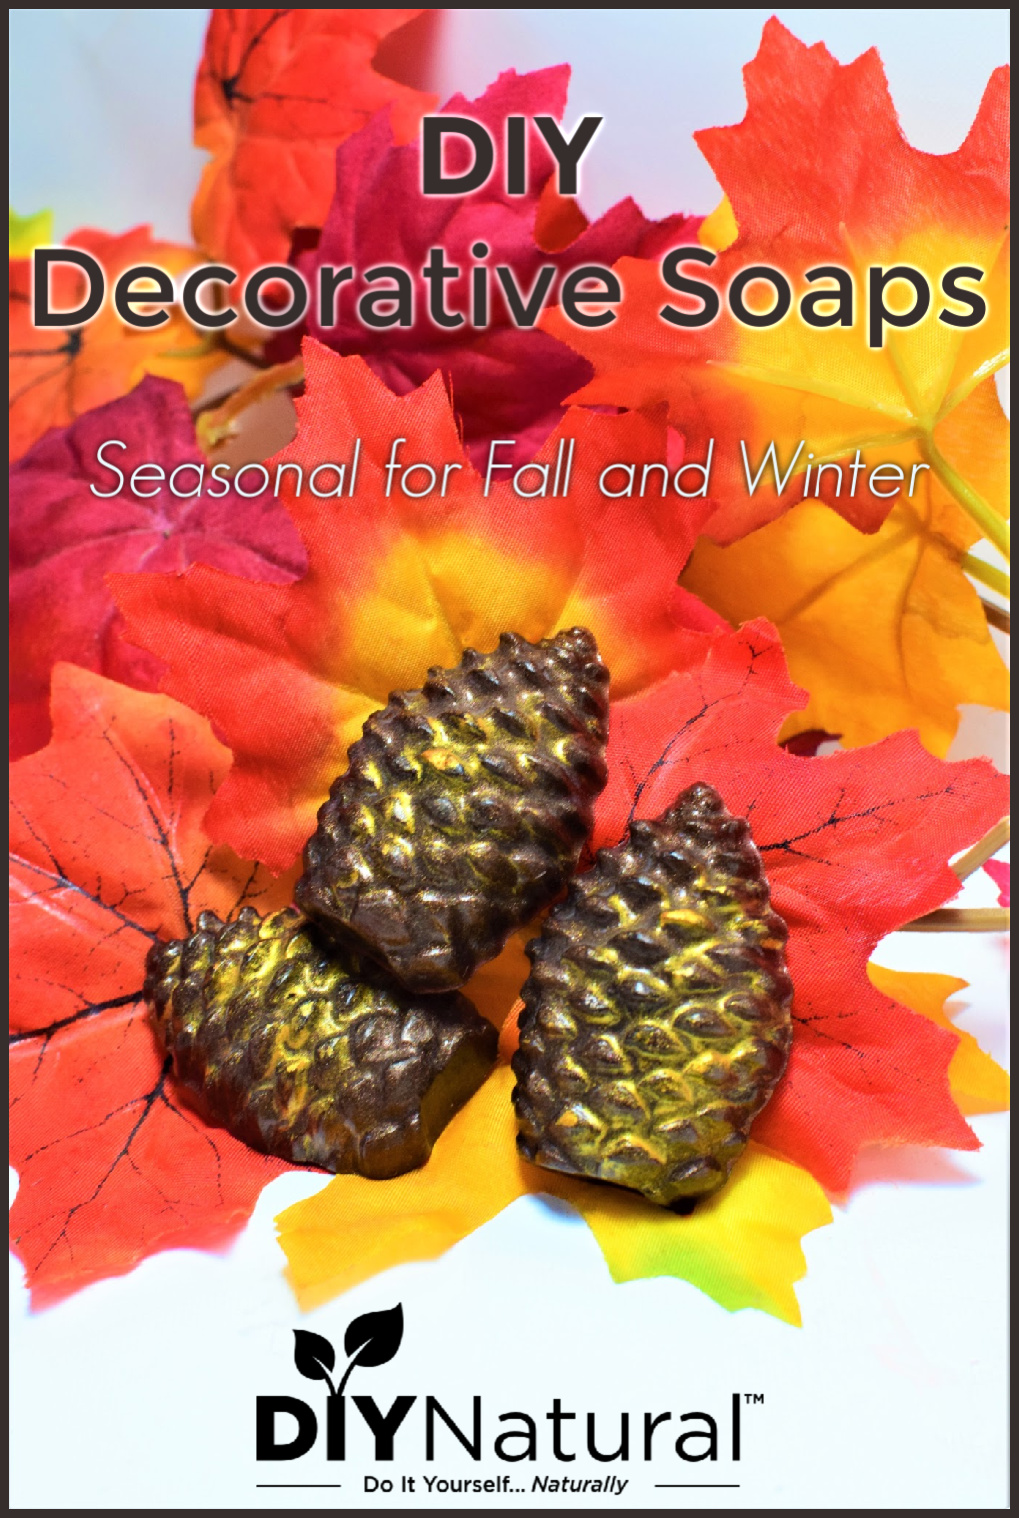
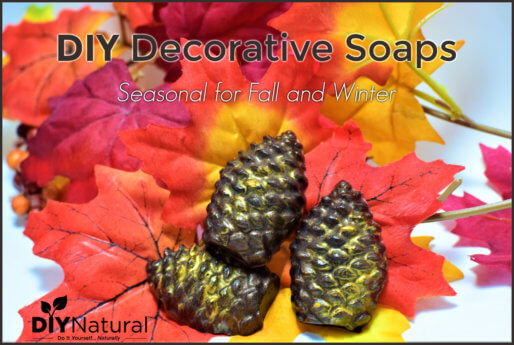
I decided to go with a pine cone shape because they look cute with both fall and winter decor. Plus, it is always easy to think of scents to go with them: something coniferous!
Essential Oils
One of my favorite essential oils to use in decorative soaps is black spruce (Picea mariana). It is deep and woodsy, with that quintessential pine-like aroma. It also has some sweeter notes, which make it the perfect evergreen oil to pair with Vanilla oleoresin (Vanilla planifolia). Vanilla oleoresin is a great fixative for lighter scents and helps deepen the aroma of these pine cone soaps.
These two oils combine to make a crisp, yet sweet pine cone soap that is perfect for the holidays! From Thanksgiving to Christmas and even into the New Year, the aroma is just right.
Melt and Pour Base
Even when making decorative melt and pour soaps, I like to use a nourishing base. My favorite is this clear glycerin, organic oil base from Our Earth’s Secrets. It melts very well and accepts mica easily. Plus it dries nicely and is very gentle on my hands.
Colorants
To achieve the rich, brown color of these decorative soaps I used this chocolate mica. To add a little color, I dusted my soap molds with some gold mica powder before adding the soap. This gave the final pine cone soaps a little iridescent shimmer that is just gorgeous!
Decorative Soaps for Fall and Winter
- Prep Time
- 5 minutes
- Active Time
- 1 hour 30 minutes
- Curing Time
- 1 day
- Total Time
- 1 day 1 hour 35 minutes
- Servings
- 8 soaps
- Estimated Cost
- $3
Ingredients
- 4 ounces melt and pour soap
- 35 drops black spruce essential oil (Picea mariana)
- 5 drops vanilla oleoresin (Vanilla planifolia)
- 1/2 teaspoon "chocolate kiss" mica
- 1 pinch gold mica (optional)
Instructions
-
Begin making your decorative soaps by placing a glass pyrex measuring cup in a small saucepan of water on low heat.
-
Cut the melt and pour soap base into small pieces.
-
Allow it to melt, stirring very gently, occasionally. Try not to stir very much as too much stirring can create bubbles in the soap.
-
Once the soap is completely melted, remove the pyrex measuring cup from heat using a potholder.
-
Measure in mica and stir well.
-
Add in essential oils and stir well again.
-
Pour into soap molds. This recipe made me eight (0.5 ounce) pine cone soaps.
-
Allow soap to cool gently, about 1 hour. Place in the freezer to help soap cool faster and for easier unmolding.
-
Unmold soap and allow to dry fully (about 24 hours).
-
Store your decorative soaps in a cool, dry place until you are ready to use it.
Notes
I prefer my vanilla spruce soaps to be more on the "spruce" smelling side, but if you would rather have a sweeter smelling soap, you can always add 10 drops of vanilla oleoresin and 25 drops of black spruce essential oil. That will shift the balance to be sweeter and less coniferous.
Made this recipe?
Mention @diynatural or tag it #diynatural!
These little vanilla spruce pine cone soaps dry well and are a beautiful addition to bathroom decor. I have mine in a little bowl on my bathroom countertop. My guests often tell me that they are “too beautiful” to use, so I have to put a little note that says “use me!” when I have them on display. This usually does the trick.
Have you ever made decorative soaps for different seasons? It’s fun, you should try it.
*******