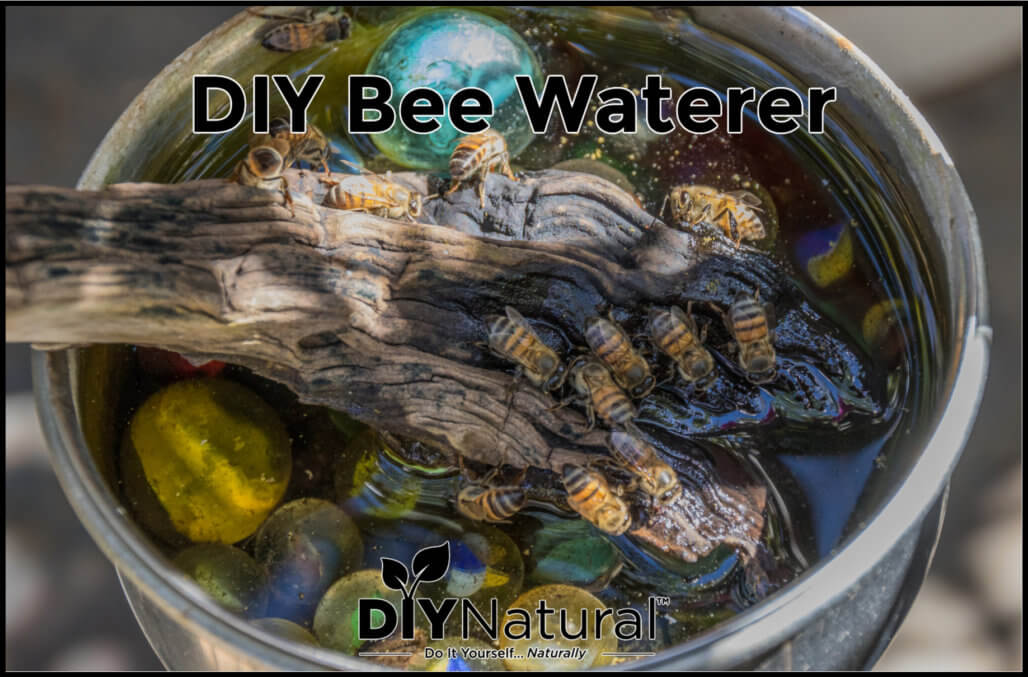
You’ve heard of birdbaths but nobody ever thinks about a bee waterer for honeybees! Here is a simple way to make a DIY bee watering station.
It’s been very dry in my part of the country lately. We’ve had fire and wind warnings out for a few days. While I can make sure that my plants and animals get enough water, I don’t really think about the little creatures. What about the bees?
Save the Honeybees!
We’ve written articles about attracting pollinators, but never about their water. If it’s too dry, bees tend to stay close to the hive. That means reduced pollination for some plants. And it could mean that the bees have to travel miles just to find water. So creating a bee waterer is one more way we can help them.
Bee Waterer Materials
Pan
First, you’ll need a pan of some sort. A steel pie pan will work great. I tend to stay away from plastic and aluminum because we don’t know what it may do to the bee’s tiny bodies. Glass will work great too, but you run the risk of breakage, so be cautious about where you place it.
Stones
Next, you’ll need some sort of weight at the bottom. Line the bottom of the pan with small stones like granite or basalt. Don’t use stones with lime in them because the minerals could leach into the water and make it too alkaline for the bees. I’ll give a tip on how to tell if your stones are inert in just a bit.
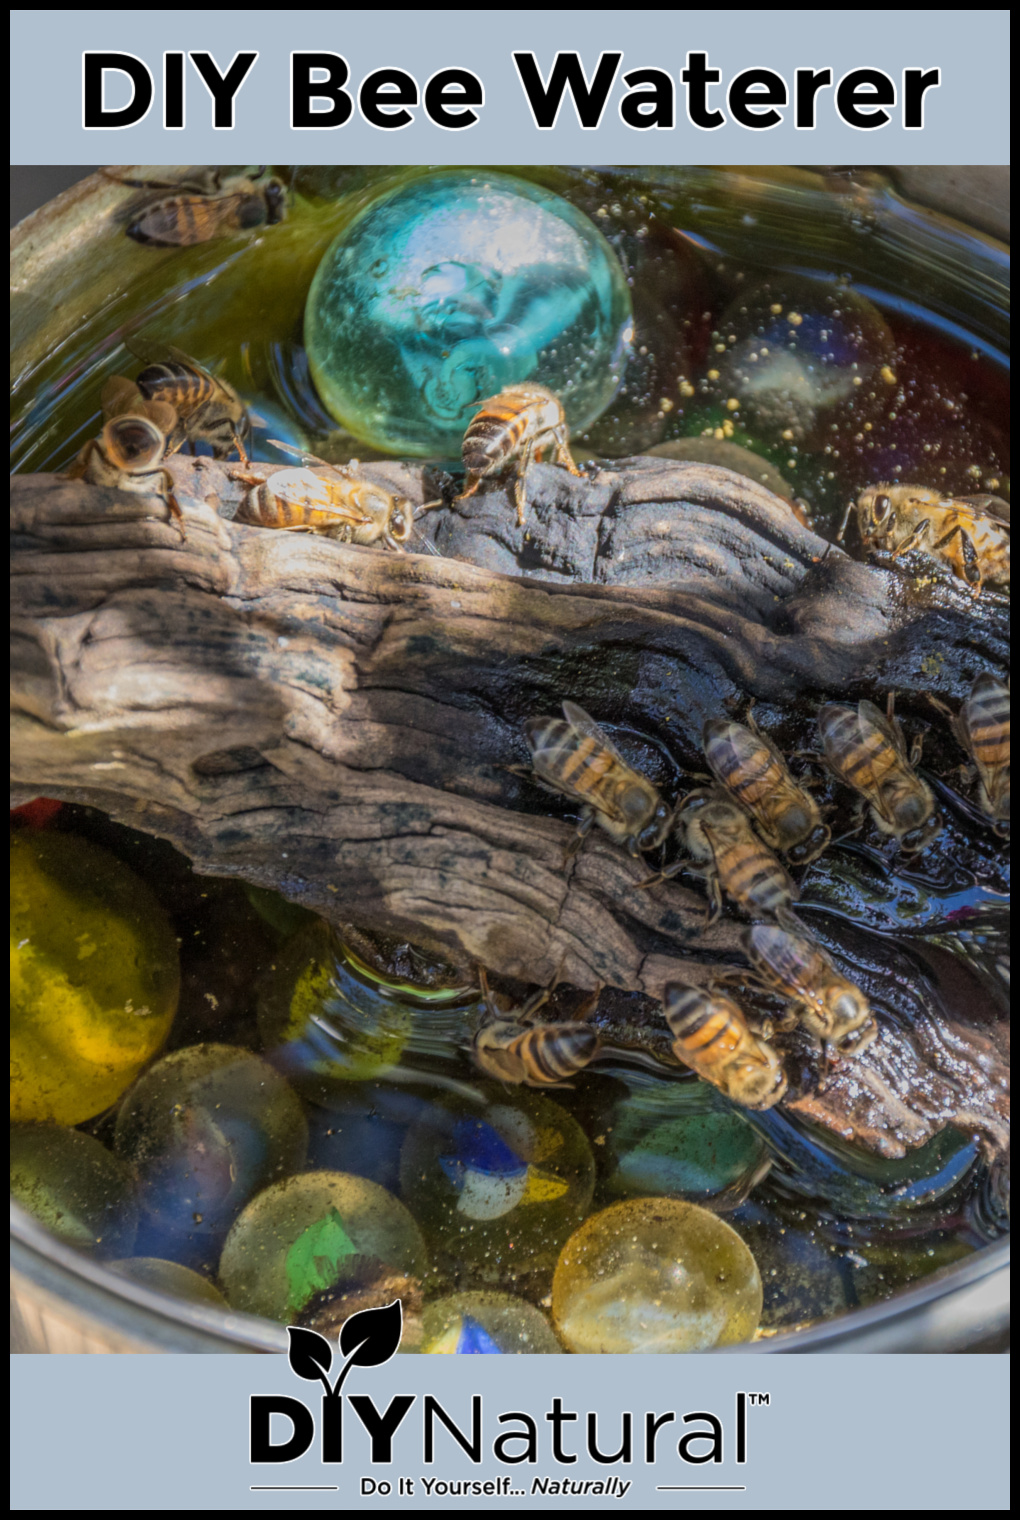
Marbles
You could also use marbles; they give a nice visual effect. Again, be sure the wind won’t tip your waterer over. You could also use a natural sponge or luffa cut into pieces. These will need to be watched because they can cause algae growth.
The Water in The Bee Waterer
Make sure your water is filtered if it contains chlorine and/or fluoride. Large amounts can be toxic to the bees. I have well water and also collect rainwater. Don’t use water that has sat around for too long as it could contain harmful bacteria. For this reason, you’ll also want to drain and clean your watering station pretty often, especially when it’s warm.
Fill the water in the pan to just below the surface of the stones. The bees can then sit on the stones and drink what they need. On hot days, you may need to refill it often. If it storms, keep an eye on it as well. I once found some of my rocks a good 50 feet away because it rained so hard! You could also place one large rock in the bottom to weigh it down.
Inert Stones
One way to learn about your rocks is by taking a look around the neighboring topography. If you have limestone soil, you’ll have limestone rocks in the area. A good example of this is the caves of Kentucky. Here in western North Carolina, we have no such caves, so it’s a safe bet that we have no limestone rocks. But people have stones brought in from all over, so it’s good to check.
So, how do you know if your bee waterer stones are inert? One way is to check for denseness. Limestone is often crumbly or sandy in texture. This isn’t always the case, so the next test will tell you for sure.
First, be sure your stones are clean. You don’t want to mistake the reaction for organic matter on the rock. Then, pour a small amount of vinegar onto the rock. If it is alkaline, it will foam and fizz. Some rocks react more than others, so you may need to use a different side of the rock. If you get no reaction, then it’s most likely safe to use in your bee watering station!
Have you made a bee waterer yet? Let’s get going!
*******


I do use a large shallow glass salad type bowl for my little bees. I placed the glass pebbles that are to be used in flower vases in the bottom and added small pieces of driftwood for them to rest on while drinking . It stands in its’ own stand about 12 inches above the ground, and is nestled in between driftwood and low blooming flowers. The bees love it — they leave my bird baths and pooches watering dishes alone. Prior realizing that the bees were looking for a drink they would swarm around the other water dishes, Now everyone is happy! It is rather neat to sit out and watch them do their thing!!!!!
OOPS! I misread the title! Just finished a blog post about HUMMINGBIRDS! The above comment was for Hummingbirds, not bees!
I have also heard that moving water is good for them. That would also solve the bad water issue.
Maybe a small pump to get the water flowing, but make sure the container is large enough to allow free movement for the birds