
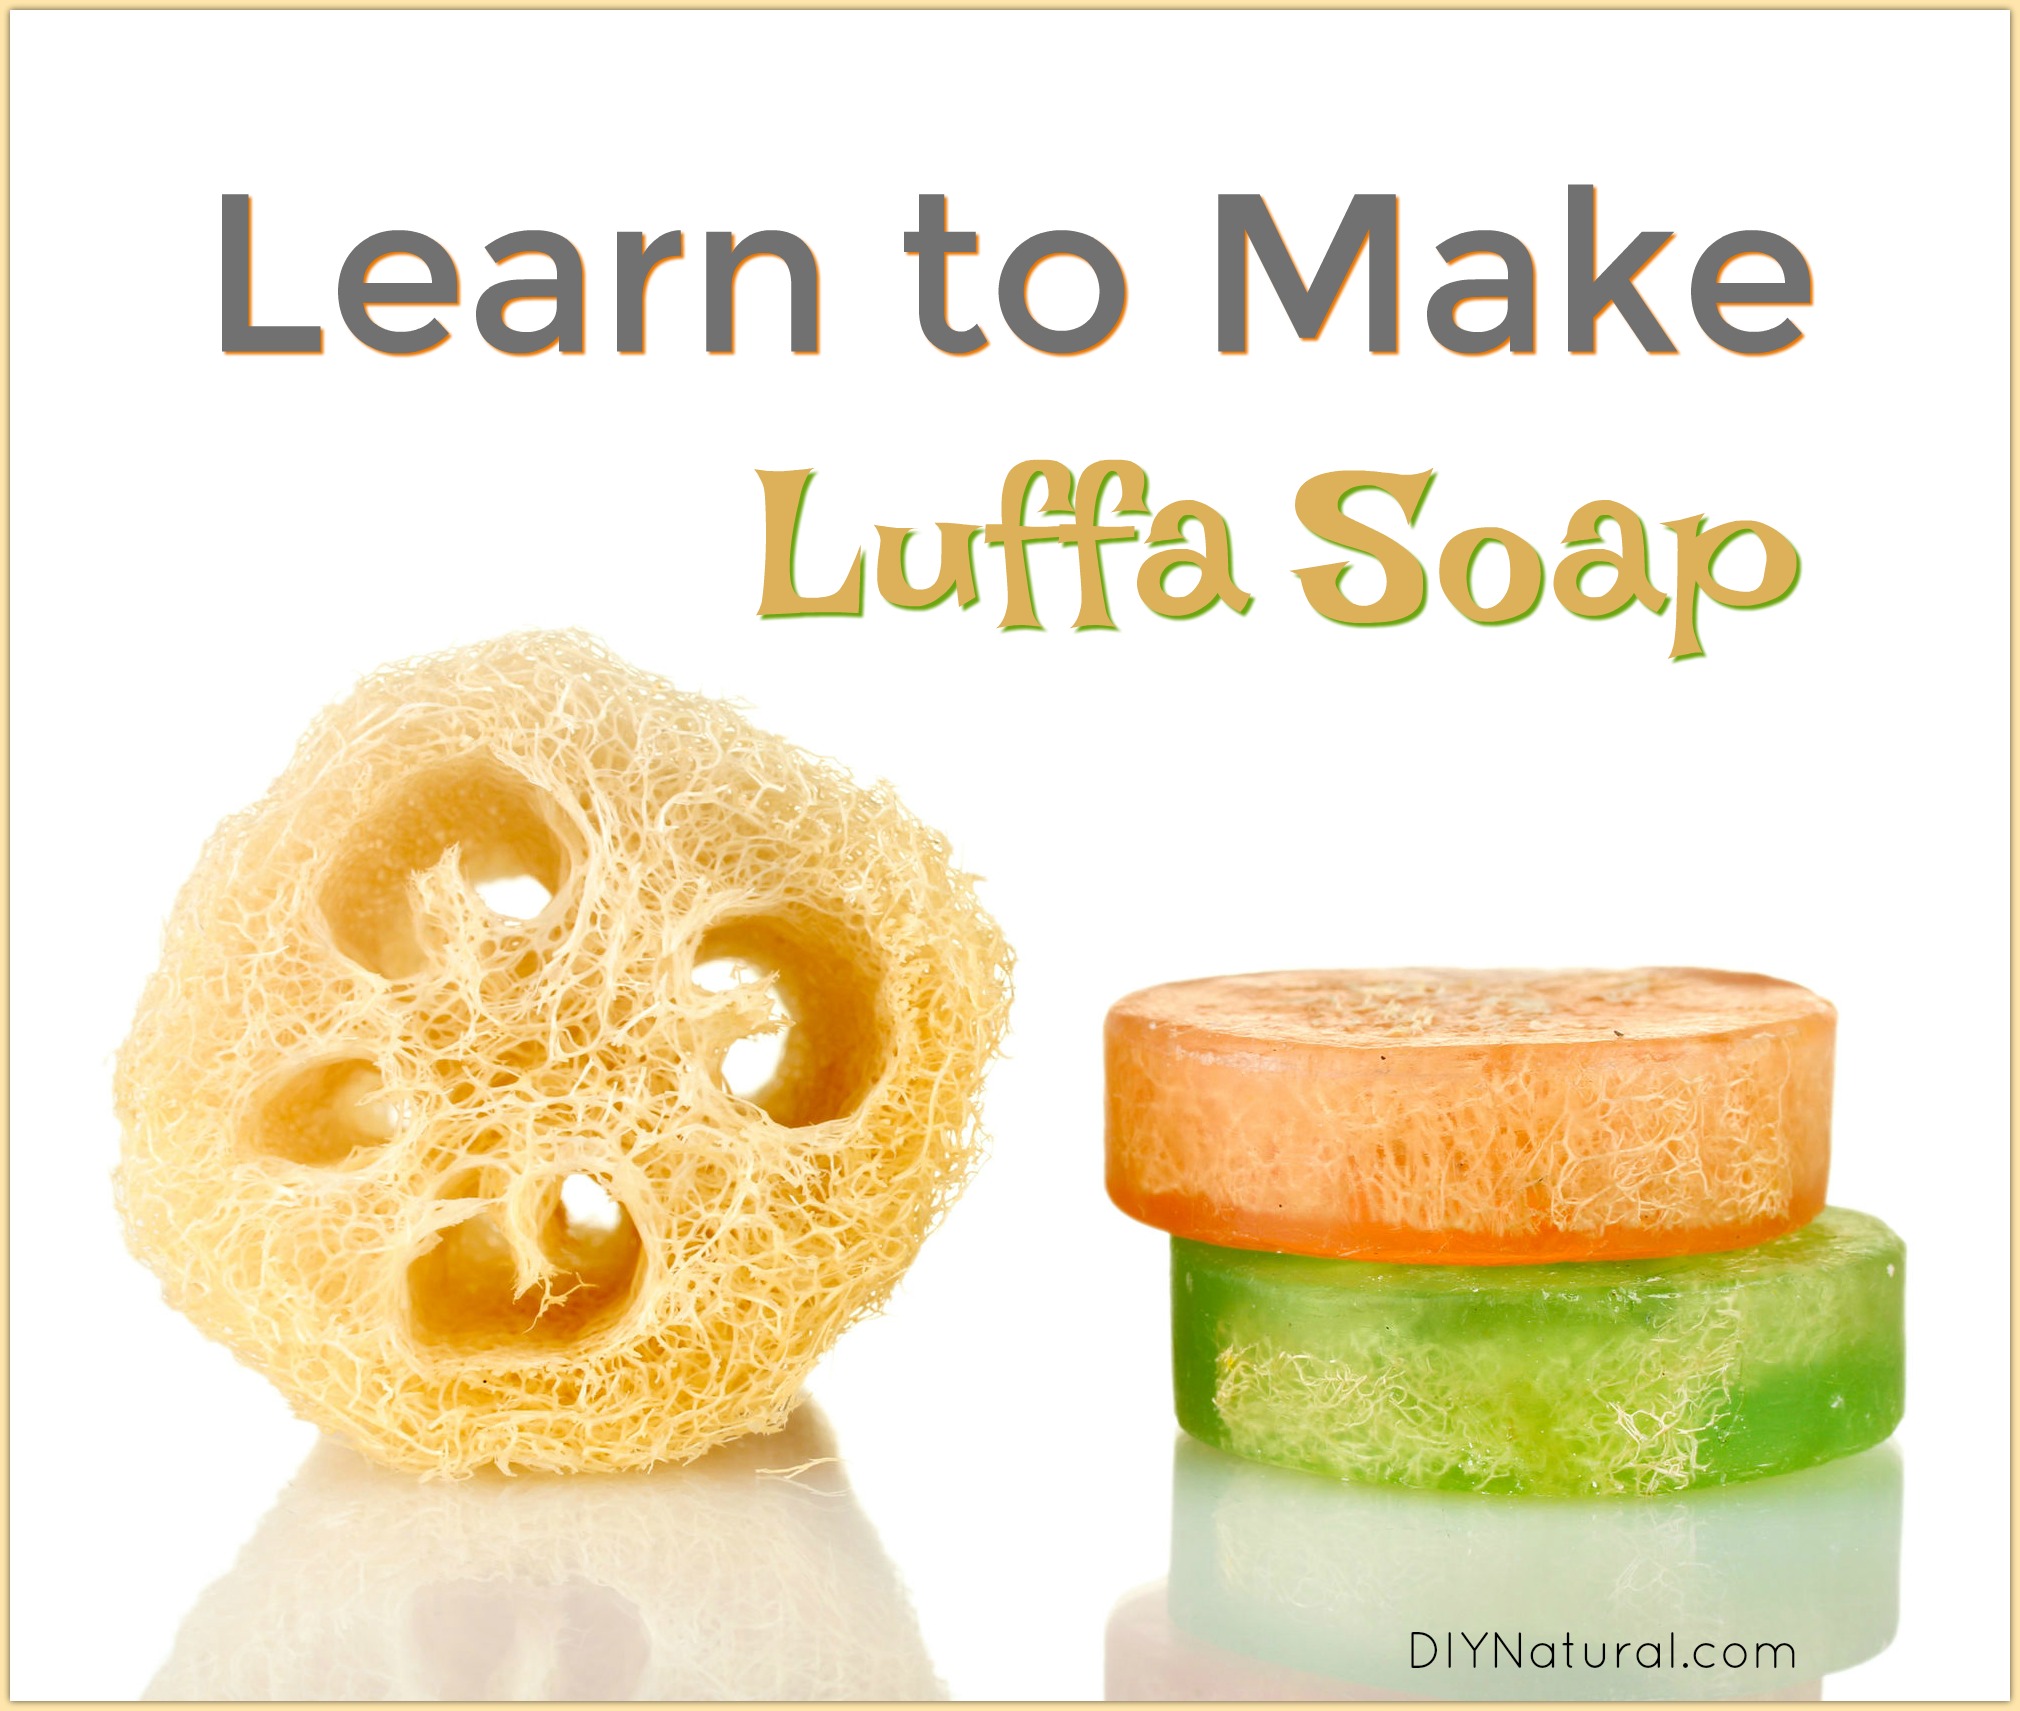
I’ve always loved luffa soap, it cleans without being too abrasive. I’ve found many types so let’s take a look and see how to make our own!
How to Make Luffa Soap
Luffa Slice Soap
This is perhaps the easiest way to make luffa soap. Use as a body or facial soap.
- Place a 1-inch thick slice of luffa in a soap mold. (This silicone mold works perfectly, and makes removing the bars simple.)
- Then melt enough melt-and-pour soap base to fill the mold. (Find organic melt-and-pour soap base here.) Optional: You can color or add essential oils to the soap base at this point.
- Spritz the luffa with alcohol to be sure the soap adheres to the luffa. Pour the liquid soap over the luffa, filling the cavity. Tap to dislodge any air bubbles and allow it to cool.
- When completely cool, remove from mold and wrap the soap immediately so it doesn’t collect moisture from the air.
Luffa Column Mold
This method requires a 1-foot section of PVC pipe that is about 3-inches in diameter.
- Cap the end of your pipe (specialty caps are available that fit these perfectly) and stand up with the capped end down.
- Grease the inside of the mold with cooking spray or any type of oil you prefer. Place a section of luffa inside that will fit the length of the tube.
- Slowly pour any cold process soap base into the mold. Fill almost to the top. Tap the sides as you go to remove air bubbles. Allow it to set up overnight or longer.
- When hardened, remove from the mold. I uncap the end and push from the top side. If it doesn’t come out easily, you can freeze it for about 30 minutes. This will allow the soap to cool and contract just enough to remove it.
- Once the soap column is removed, use a sharp knife to slice the soap into 1-inch thick slices. Cure and wrap as you normally would for cold process soap.
Ground Luffa
Another way to make luffa soap is to mix ground luffa fibers into your soap.
- Purchase ground luffa powder, or you can grind your own in a spice or coffee grinder.
- Combine ground luffa with either cold process or melt-and-pour soap base. Mix in about 1 tablespoon of ground luffa for each 4-ounce bar of soap. (It seems to cook down too much in hot process soap unless you catch it at the right time.)
- You can also add a layer of luffa powder to freshly cut soap. Just press it into the soft edge and allow to dry or cure, depending on which kind of soap you made.
Use a Substitute for Sensitive Skin
Luffa can be harsh to people with sensitive skin. For a softer alternative, try oakmoss. When it gets wet, it softens up more than luffa. It has a nice woodsy/musky scent that I associate with the forest.
Oakmoss can be found in many parts of the country or you can get it online. I shred mine so that it better incorporates into the soap. Oakmoss will disperse well in cold process soap, but in melt and pour soap, it will float to the top. I use this to my advantage and use one side of the soap for gently exfoliating and the other side for everything else.
Grow Your Own Luffa
You can actually grow your own luffa! As long as your area has a proper growing season for squash, you can successfully grow luffa. Luffa is actually a squash, and you can eat it as such when it is young. Or use it to make luffa soap.
- Plant the seeds directly in the soil or you can buy starts already sprouted. It needs a good amount of sunlight, at least four hours a day. It is a vine, so it needs a trellis or fence. As the vines begin to form, nudge it along so that it follows the support.
- It will have several big yellow flowers that may not do anything at first. Most squashes have male flowers first that do not produce fruit, so these may wither and die. Don’t panic, the female flowers will follow soon – these will be the fruiting ones.
- Allow the fruit to form fully and start to turn a bit yellow before picking. I usually just leave mine on the vine. They will start to dry out and may even mold a bit (which is normal).
- When they are fully dry, you can shake them and hear the seeds rattle around on the inside. Cut the ends off and remove the seeds. Dry for next year if you wish. Soak the luffa in warm water to remove the husk. Allow to dry and use as you would any luffa.
NOTE: The sponge will likely look moldy after removing the husk. This is also normal. Most luffas that you buy have been bleached for aesthetic purposes. You can do this yourself by using a 10:1 solution of water and bleach, but it’s unnecessary.
Have you ever made luffa soap or grown luffa? Tell us about it!
*******
Hi! I planted some loofa seeds for the first time this spring. They are growing everywhere and a few yellow flowers have appeared. Its now August I’m really hoping something else starts to happen soon! Thanks for your info!
Wow I really like this, it sounds so cool! I’m gonna have to try this as soon as I find out where to purchase it. I love the idea of growing my own.
Thank you
Cindy
Hi Debra, thank you for sharing this hack with us. I especially like the idea of growing my on in my backyard. However, I wouldn’t know if it will grow well in my area though… I share this with my Google+ and Twitter accounts.
Thanks
Chalara
Thank you, Chalara! It really depends on what part of the country you’re in, but I grew it in Minnesota (zone 4) and here in Western North Carolina (6B/7A). We have very poor soil here, so mot all of my plants are in raised beds. A really easy way to grow it no matter where you live would be to get a large round pot and fill it with good soil. Then take a tomato cage and turn it over. Tie the top together and place a brightly colored string or piece of fabric on the top. I can’t tell you how many times I nearly poked out my eye because I forgot how pointy those things are! Bury the cage partway into the ground, but leave a good amount above for a trellis. plant two or three luffa plants in the pot and let ’em go!