DIY seed tape makes it easy to start plants in rows. And learning how to make seed tape allows you to pick which seeds and fertilizer to use.
I’ve just spent the entire day planting seeds in flats for the coming season.
I mix my own blend of soil (I’ll share the recipe below!), set up the flats, put the soil in the flats, mark off the rows, and then plant the seeds. No matter how careful I am, I always end up getting the seeds in the wrong place or all bunched up together. For larger seeds like beets, it’s easy to move them, but for tiny seeds, like basil, they get to stay in a clump. Switching to using seed tape would prevent these issues from happening.
What is Seed Tape?
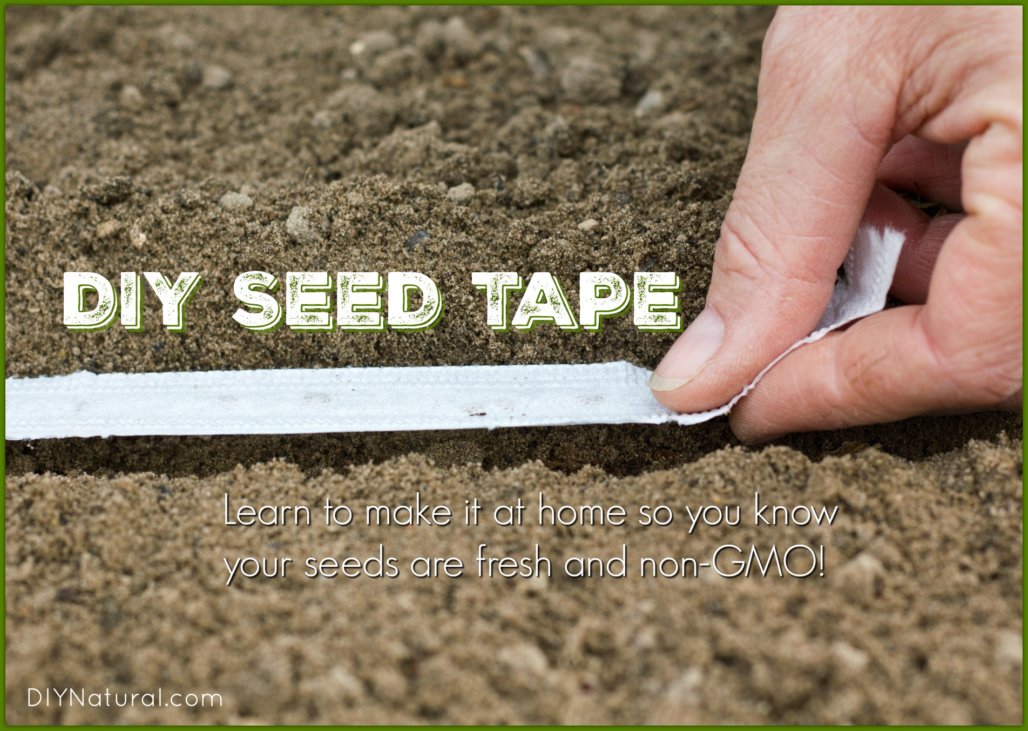
Seed tape is a runner of biodegradable material that has seeds stuck inside of it. You can plan your garden bed, roll out the tapes, cover them with soil, and water. Nice neat rows are achieved.
Why Use Seed Tape?
Seed tape makes it easy for you to start your plants in rows without the hassle of seeds going where you don’t want them, or having to move them once they are already in the soil. The tapes are a thin paper-type product that can be cut or torn to make them fit exactly where you want. Additionally, the seeds are set exactly the distance from each other that is required for best growth.
Why Make Your Own?
There are several reasons why making your own DIY seed tape makes more sense than just buying them:
You’re in Control
You know how old the seeds are when you make your own seed tapes. Commercial tape may have seeds that are several seasons old.
You can control whether or not the seeds are GMO, hybrid, or heirloom. You use what you want for seeds, not just what you can source from a company.
Commercial seed tapes have very little variety. You get Sparkler Radish, Danvers Half Long Carrots, and so on because they are the most popular. But what if you want purple carrots? Or something really unusual like Orach or Mangels? When you make your own seed tape, you can use whatever seeds you like.
You don’t know what the medium is when you buy seed tapes. What kind of paper and what chemicals did they use to make them? You can control that too when you make your own.
Scarified or Stratified
Seed tapes don’t come scarified or stratified.
Some seeds, like moonflowers, need scarification to open and start sprouting. Scarification is nicking the side of the seed to allow the germinating plant to get out. Want to make scarification easy? Just rub the seed with sandpaper a few times.
And some seeds need stratification to germinate. Stratification is the alternating of heat and cold, much like what happens in nature. Ginseng needs stratification in order to germinate, but many times seeds are kept inside, so they don’t go through that process. You can simulate this by placing the seeds in a refrigerator for a few weeks, then taking them out for a few weeks. Do this three or four times over the winter for better results.
Fertilizer
Seed tape doesn’t come with fertilizer. This is simple to fix. When you make your own DIY seed tape, use a water-soluble fertilizer instead of water when making them. I use a high phosphorus fertilizer, such as 15-30-15 to help get the roots going. Strong roots equal strong plants.
Germination
You can pre-germinate seeds when you make your own seed tape. Beans and peas get a head start if you soak them in water for a few days to get the germination process started. Use these sprouts to make your tapes.
Save Seeds and Grow What YOU Want
You can use seeds that you saved from the previous year. No company can do that for you.
Want flowers? This works with flower seeds too.
How about ground covers, trees, or shrubs? Anything you start from seed can be started this way.
Making Your Own Seed Tape
- First, determine which seeds you’ll use. Count out the amount you need for the space you’ll be sowing.
- Take a piece of all-natural, biodegradable napkin and cut 2 strips about ½-inch wide. You’ll probably need more but start with this one. Place the strip on top of a piece of wax paper.
- Place some of the water-soluble fertilizer in a shot glass. With an eyedropper, wet one piece of the strip just until damp. Place the seeds on the strip at the interval suggested for that type of seed.
- Cover with the second seed tape strip. Drop a few more drops of the fertilizer on the strips of napkin until damp all over.
- Cover with a second piece of wax paper and place a small brick on top of that. Leave overnight.
- The next day, remove the wax paper from the top and let dry out. Once dry, you can use them right away or store them in a jar until you are ready to use them. (I place a bunch of strips in a quart jar and then label the top so I remember what they are. Don’t forget the date, and any details you might need to know later.)
How To Use the Strips
You’ll want to prepare a garden bed or a flat like I did today. Here’s my “secret” mix of soil for just about any kind of plant. Use equal parts of the 3 ingredients below:
- existing soil or garden or potting soil
- aged manure, compost, or mushroom compost
- fine aged pine bark mulch
The existing soil will give your plants a taste of what’s to come, just not all at once. Or you can use another type of soil. The manure or compost adds beneficial microbes and nutrients your seed tape plants can’t get from fertilizer alone. And the pine bark mulch keeps the soil moist without it getting stagnant, keeps the soil aerated, and keeps the soil at the proper acidity for most plants. If you are planting something like blueberries that need a much lower pH than most other plants, you can adjust the pH with lime or sulfur. Otherwise, leave it alone. It’s an old wive’s tale that you need to lime your garden every year. Your plants will be happier if you don’t.
And by parts, I mean equal parts. If you use a 2 cubic foot bag of one, use the same for the others. Just keep the amounts equal.
Once you get your bed or flats set, lightly mark where you want your seeds and lay the strip down. Cover lightly with soil and water. That’s it. Water them often at first then as they get larger water whatever the plants need.
Tip: Don’t want to use seed tape? Learn how to start seeds indoors the traditional way.
Have you ever used seed tape or made DIY seed tape? Share your seed tape experience with us.
*******


