Have you ever made something and didn’t even know why you were making it? That describes my relationship with kefir back in 2006.
Matt brought home some mushy little tapioca-looking things in a jar he had procured from someone at work. He said we would use it to make a yogurt-like drink by letting a jar of milk sit out at room temp with these “grains,” as he called them. “Disgusting,” I thought. But I was a newlywed, so I went with it – and I’m glad I did!
What is Kefir?
We’ve learned so much about kefir (pronounced keh-FEAR) in the past eight years, and want to share a bit of it with you. We’ll keep it basic though, so it doesn’t overwhelm beginners and doesn’t bore all you kefir masters.
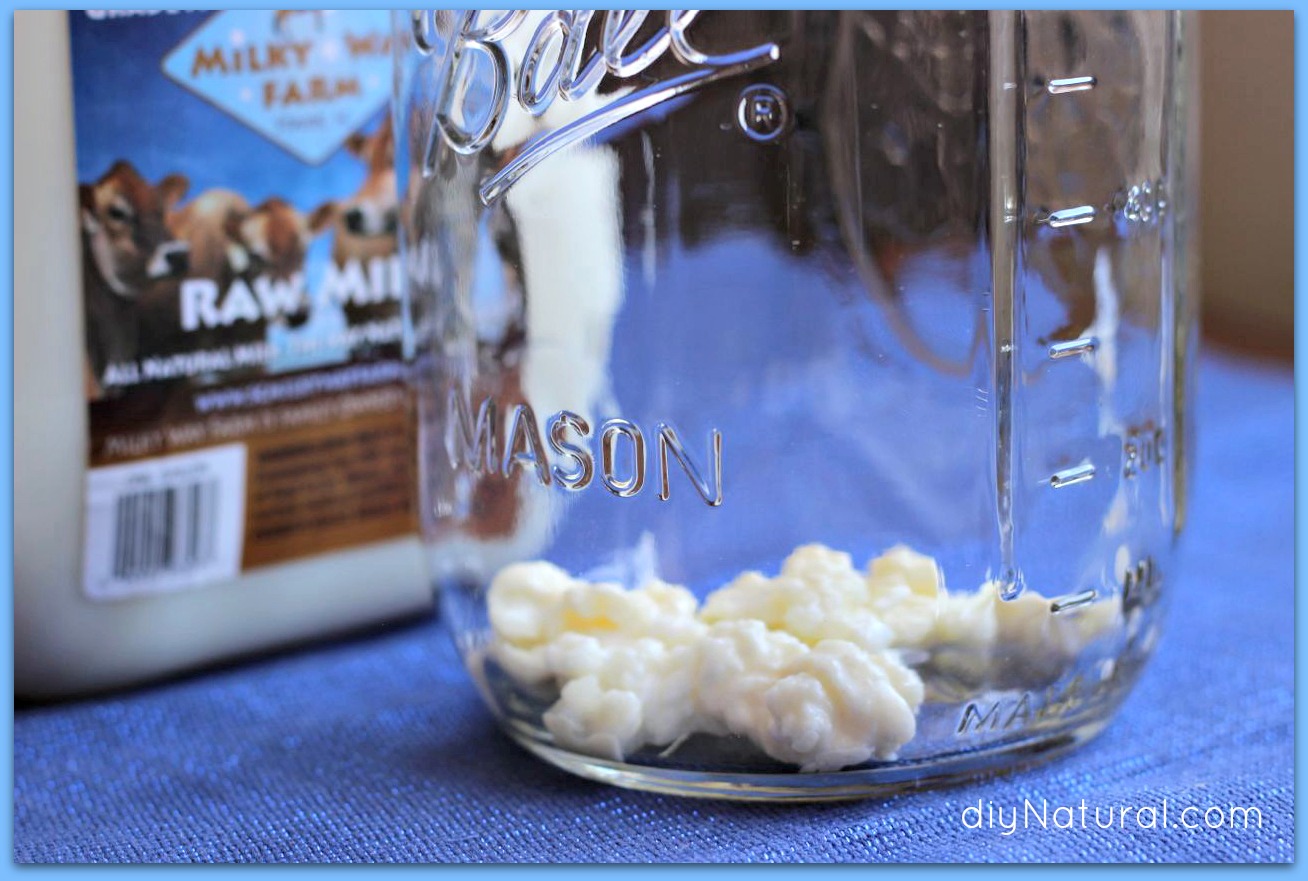
Kefir is a probiotic-rich drink, much like yogurt, but thinner in consistency. It is produced when you combine milk with kefir grains and let them ferment. The term grain can be a bit confusing though, since kefir grains are really little lumps of proteins, fats, and polysaccharides – no relation to the grain family at all. I would describe them as looking similar to miniature translucent cauliflower florets.
Fermentation of kefir will occur when your mixture of milk and kefir grains are left at room temperature for about 12-48 hours. The more grains you have, the more quickly it will ferment.
Temperature and the amount of time it is left to culture will affect not only the taste, but also the thickness. It will ferment slowly in cooler temperatures, and more quickly if your home is warmer. A thicker kefir is achieved by allowing your mixture to culture for longer periods of time. You can also add a bit of cream to yield a thicker product. However, the kefir grains need to feed on the milk sugars, so you can not make kefir with cream alone.
A finished kefir will taste a bit tart and tangy. Some may describe it as sour, but it should not taste like spoiled milk. Again, the tartness depends on how long it’s allowed to ferment. Your kefir might even be bubbly or effervescent.
Benefits of Kefir
Kefir is full of healthy bacterias and yeasts that offer crazy good probiotic power. The particular combination of bacteria in kefir is thought to be more powerful than those found in yogurt. Homemade kefir made with milk kefir grains usually contains around 50 strains of live bacteria and yeast. Compare that with regular store-bought yogurt which usually contains only about 2 major strains.
That’s a huge difference.
Some of kefir’s health benefits include the following:
- improving digestive health
- increasing population of desirable bacteria in the gut and eliminating some of the harmful bacteria
- helping with gastrointestinal problems like constipation, diarrhea, and bloating
- has been used in the treatment of Candidiasis, allergies, metabolic disorders, and many more conditions
- contains important minerals (calcium and magnesium) for a healthy nervous system
- contains the essential amino acid tryptophan, which has a relaxing effect on the nervous system, and can be beneficial for people with sleep disorders, ADHD, or even depression.
In addition to all these possible benefits, many individuals who are lactose intolerant can handle kefir because the bacteria pre-digests the lactose in the milk.
Sound good? Great. Now let’s talk about making your own kefir. It’s simple and doesn’t require a lot of hands-on time, but there are a few things you should know before jumping into this project.
Before You Start
Before making kefir at home you will need to obtain milk kefir grains. You can purchase them here or get them from a friend, neighbor, or co-worker who makes kefir. Kefir grains multiply over time, so there are always kefir-drinkers out there looking to get rid of grains.
Kefir will work its magic in any type of milk, but we recommend raw milk or at least an organic non-homogenized milk, preferably from pastured (grass-fed) cows.
Keep in mind if using any metal utensils, they should always be a nonreactive metal such as stainless steel. If a reactive metal is introduced to your kefir grains, their delicate balance can be altered. If you want to stay away from metal altogether when making kefir, choose wooden, plastic, or silicone utensils.
How to Make It
You will need:
- 2 tablespoons kefir grains (purchase starter grains here)
- 2 cups milk, preferably raw milk from pasture raised cows (find raw milk here)
- 2 clean glass mason jars (purchase mason jars here)
- lid or cloth for your jar
- spoon or spatula (like this)
- small mesh strainer (like this)
Directions:
1. Add about 2 Tbsp kefir grains to a clean glass jar.
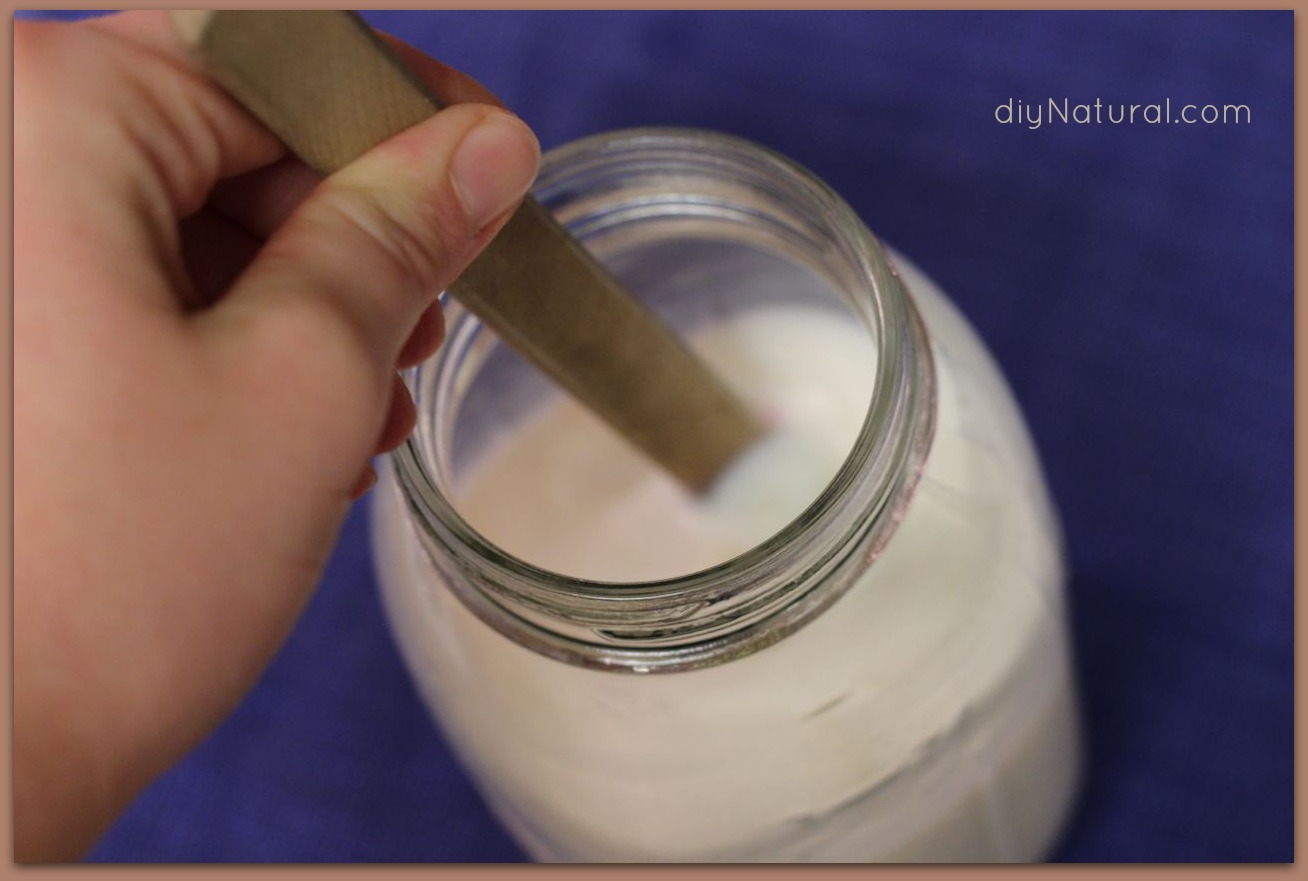
2. Add about 2 cups of milk to the jar. Stir grains gently using a wooden spoon or spatula.
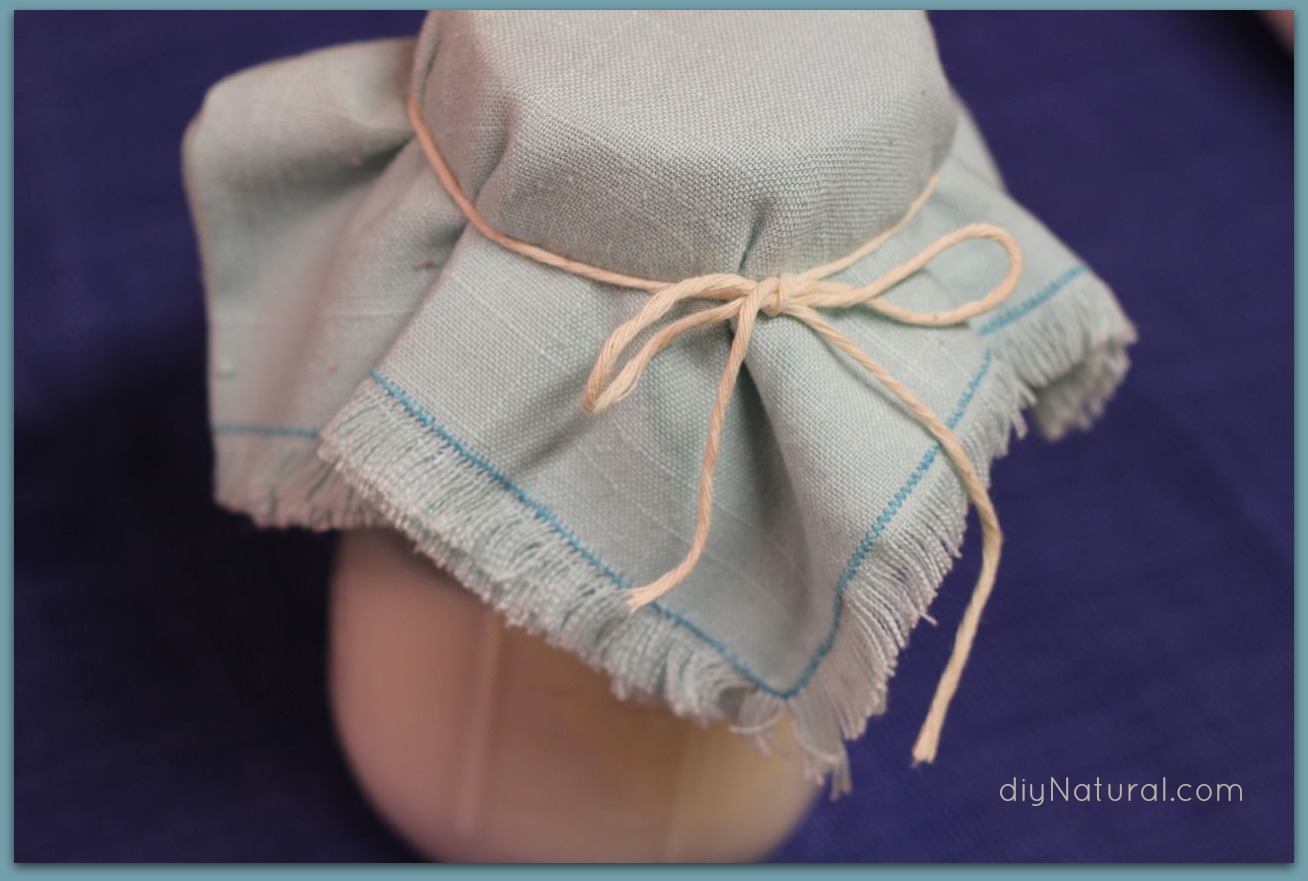
3. Cover jar with a cloth or lid, and allow to ferment in a warm spot in your kitchen (but out of direct sunlight) for 12-48 hours. You can taste the kefir to see if it has properly fermented, or watch for the whey (a clear yellowish liquid) to separate at the bottom of your jar. You may have small pockets of whey throughout your kefir.
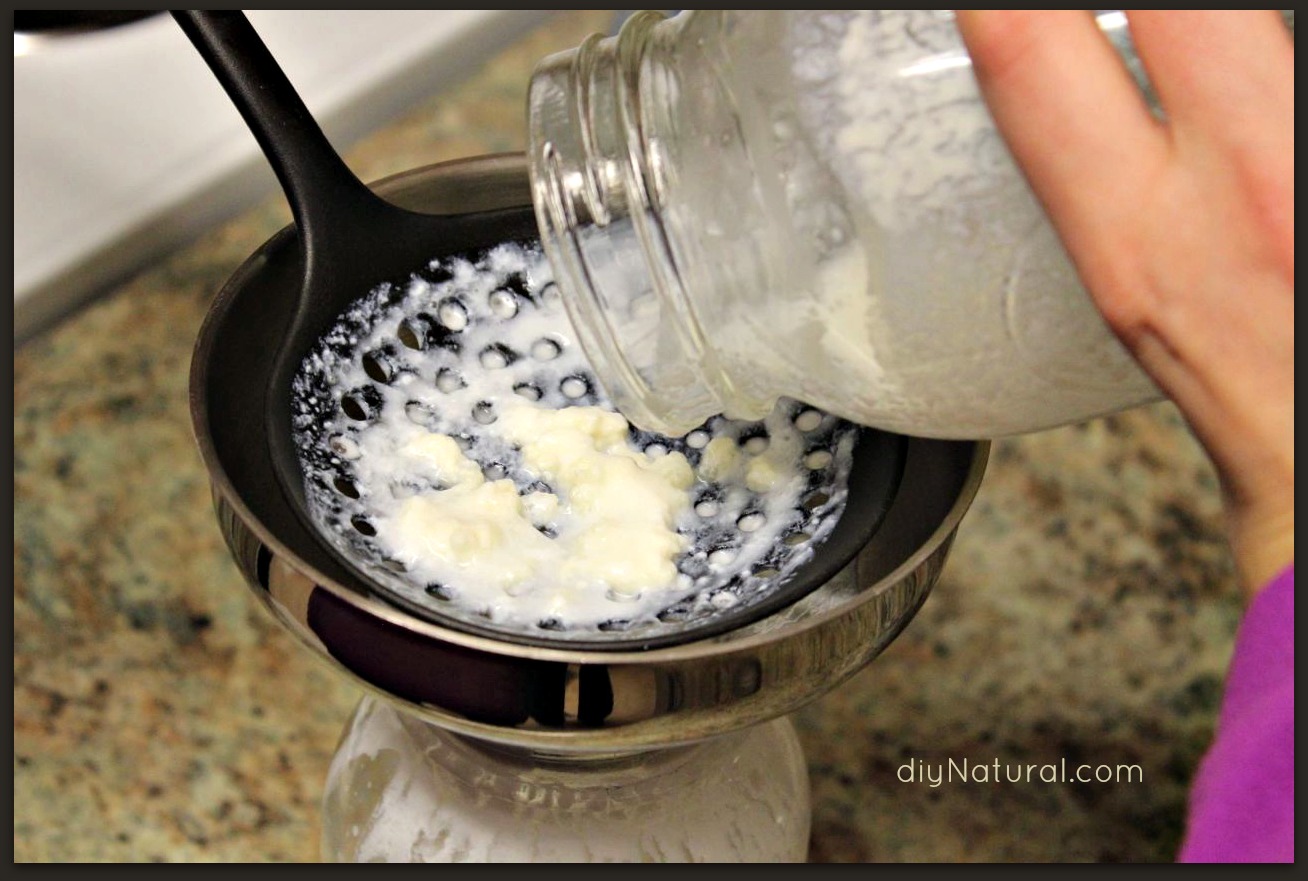
4. Pour kefir through a small strainer into another clean jar, collecting kefir grains in the strainer.
5. You now have fresh kefir that you can use right away or chill in the refrigerator, and your kefir grains are ready to be used again.
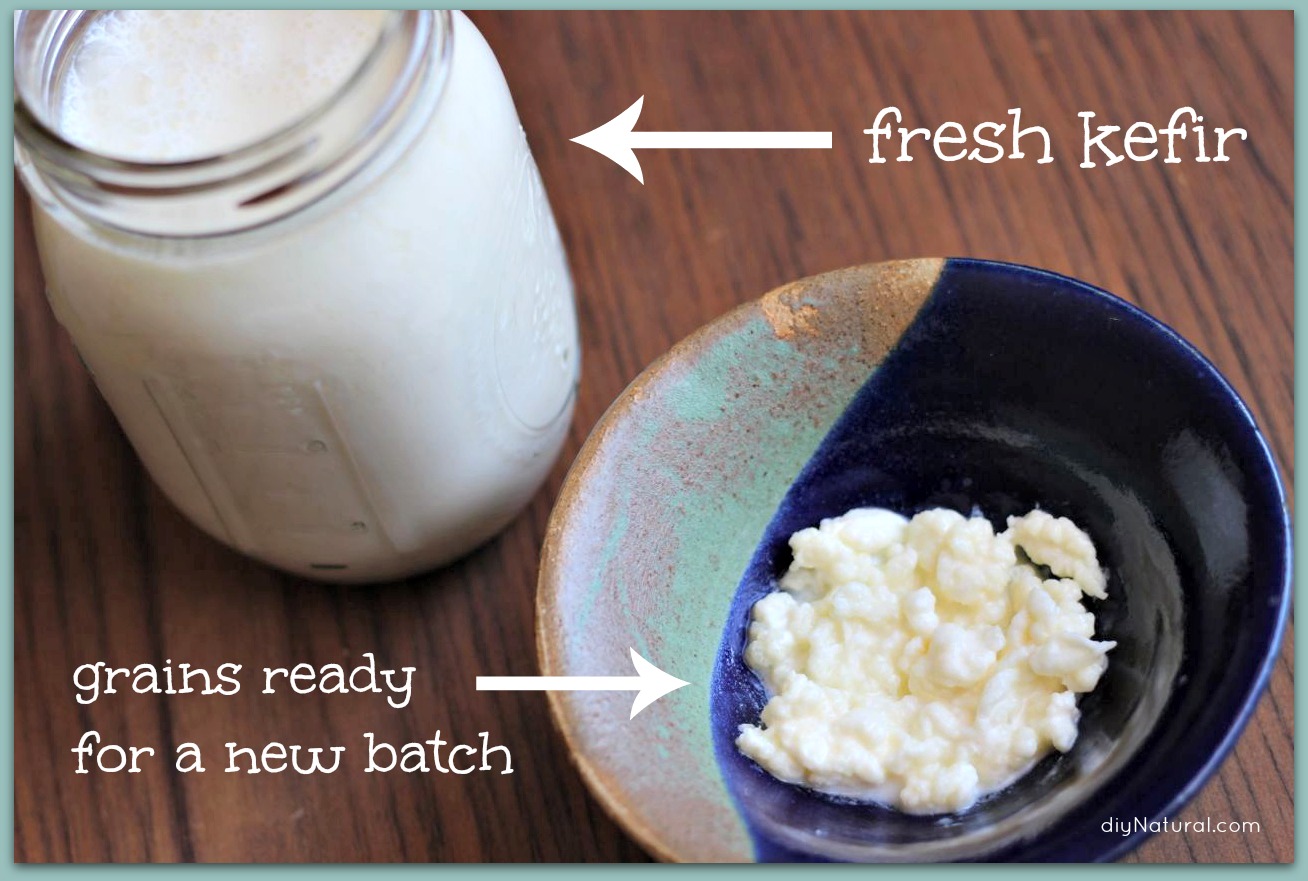
Combine your kefir grains with fresh milk for a new batch, or store in the refrigerator covered with a little milk if you’re not ready to make another batch. Refrigerated grains will become semi-dormant, so this is a good option if you’re going away or don’t want to make kefir for a few days. (Keep in mind it will take cold grains longer to ferment, so only refrigerate them if you’re not planning to make a new batch right away.)
When making a new batch of kefir, there is no need to rinse the grains. In fact, when a little bit of the previous kefir is allowed to remain with the grains, it keeps them stronger. Rinsing grains is only necessary if grains have been dropped or contaminated. In this case, use only fresh distilled or spring water, never water from the tap (as it can contain fluoride, chlorine, or other contaminants).
We like to make our kefir continuously, making only what we can drink in a day or two. This usually eliminates the need for storing the grains in the fridge. It really only takes a few minutes each day or two (depending on how fast your kefir is fermenting) to strain and make a fresh batch.
Using your Kefir
Chill your kefir for best taste results. You can drink your kefir plain, although it’s usually too sour for our tastes. We like to add frozen berries to ours and blend in the Vitamix for a delicious smoothie drink. You can sweeten with a bit of maple syrup or honey if it’s still too tart for you.
For several years we made our kefir thick so we could eat it with a spoon for breakfast, with homemade granola and berries on top. Here are 10 more healthy breakfast ideas.
I often sneak a little kefir into recipes calling for milk or buttermilk. It gives a fabulous rich flavor to baked goods. Since heating kefir will destroy much of the beneficial bacteria, I only do this when I have an abundant amount on hand.
Have you ever tried making kefir? Have you seen an improvement in your health? What are your favorite ways to eat it?
Share your experience below!
*******
References and Recommended Reading:
- Grow Your Own Probiotics, Part 1: Kefir on NaturalNews.com
- Dom’s Kefir Site
- Why We Need Probiotics and the Benefits of Kefir on NaturalNews.com


I haven’t read all the comments above, so please forgive me if this was already addressed. Do you know if there is a difference in water kefir versus milk kefir? I have trouble with milk products, even yogurt, and I’m afraid milk kefir would not set well with me. However, I’m very excited to try this, for myself and for my family. Any tips/advice would be appreciated!!!
Yes, there’s a big difference. There isn’t any milk in water kefir, so it’s a good choice if you’re nervous about how your body would react. However, many people who are lactose intolerant can actually drink kefir (starting with only a little at first) because the lactase is consumed by the kefir grains during the fermentation process. Also, you can make milk kefir with coconut milk, almond milk, or other types of non-dairy milks. You’ll just need to make a batch with dairy milk every 3 or 4 batches, or your kefir grains will starve if they don’t have lactose to feed on every so often. I have covered a few of these ideas and given some links to other helpful resources in some of the above comments, so give them a glance when you get a chance. 🙂
I make homemade farmer’s cheese with homemade kefir 🙂 It is delisious and healthy.
Farmer’s cheese is expensive almost $5 per 5 oz pack.
Great idea Natalia! Now I want to try this. 🙂
How do I know I successfully made my kefir?
There are a few things you can look for. You’ll know it’s done when you see some separation happening. You will get some pockets of whey forming throughout the kefir–they will look like little clear yellow pockets of liquid. You can also taste it to check –it will taste a bit tart/tangy/sour. It should NOT taste like spoiled milk. You may even have some bubbling. It will be a little thicker when finished, but not thick like yogurt. Hope this helps!
If you go to Doms insite (google it) There are pictures that show “kefir is done when”. I look for both the beginning of separation and the “delta” channels on the side of the jar after shaking it.
Thank you, that all makes sense so I think I did it right!!
Hi, my sister has had amazing results with kefir for treating Irritable Bowel Syndrome 🙂
Your “get them here!” didn’t get me there
Pam- Yes-Please!
I would love to have some-how do we go about this?
Thx! Jennie
Jennie, according to one of Pam’s comments she has run out of grains to give away. Check the above comments for 2 other ideas on where to get some grains. Good luck!
Hi all,
Just wanted to let you know that there is a website where people are sharing their grains for free!! If you get some, pay it forward and list your name on the site to share once you grow your own.
http://www.torontoadvisors.com/suppliers?keywords=united+states&page=53
Thanks for sharing Nicole! I know many will be happy to see this!
I love learning new ways to incorporate more fermented foods into our diet. I just wish I wasn’t allergic to milk. Perhaps I will make a batch for my husband. It’s so amazing the things we can make for ourselves in a sustainable manner. Thanks for posting!
Hi Sharon,
You can still get kefir in your diet if you’re allergic to milk. Many people make “water kefir,” and drink it as a soda replacement. It doesn’t have as many live bacteria strains as milk kefir, but it still has more than yogurt! Check out this tutorial: http://ournourishingroots.com/real-food-101-how-to-make-water-kefir/
Hi Betsy. Does turning milk into kefir get rid of the casein? We are allergic (mildly) to the milk protein casein.
That’s a good question Ava. I know kefiring the milk gets rid of the lactose, but I don’t think it gets rid of the casein. Check out this article for some more ideas on using coconut milk, or making a truly dairy-free kefir: http://www.culturesforhealth.com/coconut-milk-kefir-recipe
If you still have too many kefir grains and would like to get rid of more of them I am very interested in obtaining some. I have not used them before and have read such good things about the drink. I have several issues that seem to be helped by the kefir and I would like to feel so much better. Thank you so much for the offer. I have many friends and family that I will share my increase with. I thank you and they thank you!
I love making kefir!! I need to get back into it. I am working on procuring a continuoeus kombucha system. Soon, I hope!
Please check out the blog post I posted today: http://yourhealthmattersfw.blogspot.com/2013/02/the-wonders-of-vinegar.html
Thanks and keep the great stuff coming!
I really hope to try this! After you make it, how long does it last in the fridge? Thanks!
In the fridge it will keep for about a month – but usually doesn’t last that long!
Thanks!
The link to “purchase starter grains here” did not work.
Hi Ruthann, sorry about that! Use the link Matt left for another reader in one of the previous comments. It should work for you.
THANK YOU SO MUCH for this article!!!!! Best I’ve seen put together in a LONG time! 🙂 I started making kefir like this in 2007, back when I was single & lived in a place where I could get raw milk MUCH easier (I used goats milk!!). I was teased about my “kefir farm”…cuz the grains just kept multiplying like CRAZY!!! But it gave me more ENERGY, helped with brain fog & with constipation!!! Didn’t help much with candida I don’t think…but then again I was drinking so much of it (like a quart/day!), it was probably too much for the candida?
Then in 2011, had left them with a “babysitter” since I was going to be out of town for an extended period of time. The grains were never the same after that, and eventually died. 🙁 After I was done mourning for them (lol…just kidding!), I got busy with life and never replaced them. THANK YOU for the motivating article to start my “farm” up again (Pam, I may be emailing you!) 😉
Many blessings to you! 🙂
Thanks for your kind words Bree! You should definitely get back into it. Since I have learned that grains can actually be frozen (in a little bit of water) for a few weeks or months, I’m not so scared to go away and leave my grains anymore. 🙂
Great tutorial and info. I have been making milk kefir for several months and love it! I actually enjoy it plain. I used to make yogurt but kefir is so much easier and as you said it has tons more probiotic strains!
Thanks Marie! I agree kefir is easier and has more benefits for the body. Thanks for stopping by!
You suggest using raw milk to make the kefir, but I’ve never tried raw milk for fear of the different bacterial illness that are associated with it. Does the fermenting process “take care” of this issue?
I don’t think so Ashley. The answer is to get raw milk from healthy, grass-fed cows that are being raised properly to avoid these risks. Bacterial illnesses have been associated with raw milk from unhealthy cows raised in less than optimal conditions. It’s important to know your farmer, ask questions, and check out their facilities. You can make kefir with any kind of milk, but if you’re on the fence about raw milk, I would encourage you to read this great article:
http://mylifeinapyramid.com/2012/03/my-raw-milk-conversion-why-how-i-decided-to-embrace-fresh-local-milk/
I just pluck my “grain” out of the finished batch, with a plastic fork, and plop it into the new jar of milk. Presto changeo! No need to strain. Makes my life just that much easier. I have been drinking it for years, and am NEVER sick. Thanks for all the great info
Thanks for the great testimonial Lydia! And I like the sounds of your method! Do you have a huge grain that is almost like a sheet? That would be much easier to fish out of a jar than all the little ones I have. 🙂
I am probably “loosing” some of the smaller loose grains. (sometimes I get one in my mouth when I am drinking it. YUCK) But , yes, my one “blob” just gets bigger, and when it gets too big, I cut it in half (plastic fork)
and feed half to my chickens. They love that.
It’s REALLY good for you to eat them, so you’re getting more out of your kefir this way! Funny that your chickens see kefir grains as a treat. 🙂
It probably isn’t as strange as you might think that the chickens like the kefir. My mother tells about feeding ‘clabbered milk’ to the baby chicks to help them grow. So they must have a taste for sour milk. Kefir should just be better for them.
Wow, your kefir grains look much “chunkier” than mine. Mine are from Cultures for Health, and I’ve been using them for about a month now. Personally I can’t drink it straight, although my husband does.
Favorite usage so far is blue cheese dressing: crumble up some blue cheese, pepper and paprika and add kefir till it’s the right consistency for you. Delicious!
I do drink water kefir though, and love making it with coconut water and chia seeds. Mmm! (Not as much probiotic goodness per cup, but much easier to drink)
I would love to know how you make water kefir, I can’t have dairy.
Heather, check out this article on how to make water kefir:
http://ournourishingroots.com/real-food-101-how-to-make-water-kefir/
Yes, these current grains are from a friend, and they’re chunkier than others we have used in the past.
LOVE your blue cheese dressing tip! We’ll have to try this sometime!
To Pam, I saw your post with an email to reach you. I just sent you an email.
I started buying kefir for my husband’s IBS. The process to making it seems so simple that I am willing to try making this for him. Thanks!
Our pleasure Julia. In fact, when we began making it years ago it was mainly for treating my IBS. As I recall, it did seem to help. I no longer have IBS symptoms, but I think that’s mostly related to less stress in my life. 🙂 Making your own kefir will be better for your husband, because store-bought kefir has SIGNIFICANTLY FEWER strains of live bacteria compared to homemade. I would definitely recommend it over store-bought!
Betsy Jabs: Thank you for that insight! Question: Would coconut milk work with the grains or should I stick to dairy milk? I know you mention raw milk is preferred but just wondering about non-dairy milk like coconut or almond?
Great question Julia. You can make kefir with coconut milk (or any non-dairy milk, for that matter), but the grains won’t grow, and after a period of time they will actually begin to die. This means they won’t ferment your milk anymore. I have read you can rejuvenate the grains by using real milk every few batches, then they won’t completely die if you want to make kefir with a non-dairy milk. Hope that helps!
You are awesome! I am grateful for your quick response. Most definitely will make a note of this. Now I can’t wait to get the grains to start!
Thanks again.
Thank you for this article Betsy Jabs!!! I would also love to thank Pam for sending me the kefir grains. I made my first batch and it was as easy as you described it in your article. On the road to recovery for my husband with a better quality kefir and better gut health to me! Yeah!!!
Thank you for this. An aquaintance turned me on to kefir for PMS symptoms. Thinking it she meant it would help with physical aches, it actually helped with ever changing moods, which I wasn’t expecting! It really is like a natural antidepressant! I think I’m going to try making my own.
Wow, that’s really cool it gave you some surprising results! You should give it a shot…it’s difficult to mess up. 🙂
I couldn’t find any resources on the link page you provided to purchase kefir starters.
I started making/drinking dairy and water kefir about 3 weeks ago. I have Celiac disease, and after a year being gluten free, my gossamer guts are still needing some TLC. While I don’t feel wildly fantastic when I drink kefir, I definitely feel worse when I don’t! I’m hoping over time I’ll see a dramatic improvement.
Constance, I got my starter grains on ETSY. There were lots to choose from.
Hi Constance, you can get them from here. Blessings!
Pam, I would LOVE some milk kefir grains! How do I get your info and provide my address privately?
Betsy, how did you make thick kefir? Sounds like a lot less fuss than yogurt! I have been making kefir water for a year or so and it has allowed me to quit purchasing expensive probiotic capsules, but am thinking it might be good to use both kinds to get more variety in my body. I also have been mis-pronouncing the word forever! ; ) Thanks for the info!
[email protected] Please capitalize KEFIR GRAINS in the subject line so I know to check it. It’s much easier to make than yogurt. Whole milk makes thicker kefir than 1%. Raw milk better than store bought but I use store bought just fine.
Hi Dori,
As Pam mentioned, using whole milk (we use whole raw) makes a difference. You can add a few tablespoons of cream to help it thicken, and allowing the kefir to ferment a little longer yields a thicker product. I have also heard of people adding a bit of unflavored gelatin to thicken their milk kefir. Making kefir is DEFINITELY no-fuss! You just combine the milk, grains, and optional cream, and let it sit on the counter for a day or two…that’s really all there is to it. 🙂
I have many, many, kefir grains in cold storage that I will GIVE to anyone that wants them. I only ask that the recipient cover the postage if I have to mail them.
You’re awesome Pam! Thanks for putting this offer out to the community!
Your welcome. As you know they grow, and grow so I have plenty. To all who have PM’d me I have responded and will get the grains in the mail this week.
Pam, I’d like some as well. Email me the details please. [email protected]
I’d like some also. Please e-mail me details.
Pam, I would love to start trying this. Do you still have some to give away? My email is [email protected] I can paypal you postage costs 🙂 Thanks so much!
I am still getting to all the requests (as of Feb. 5 10:45). I am including my paypal ID in the package but will add it it here as well for others. [email protected]
I will post when I run out of grains to share. These two links are for a guy in Australia that has done extensive testing and experimentation with Kefir. Everything you ever wanted to know about Kefir.
http://users.sa.chariot.net.au/~dna/kefirpage.html
http://users.chariot.net.au/~dna/Makekefir.html
Great stuff Pam. I love it when the community binds together and helps each other!
10 pm MST Feb. 5, 2013. Everyone who has emailed me up to this point will get grains. I need to stop at this point so I don’t completely run out. Good luck everyone.