
You know fall is here when you start to see caramel apples in the stores. There’s something about that sweet and tart, chewy and crisp combo that people love. Don’t get me wrong, caramel sauce is great year-round: on ice cream in the summer, on bread pudding or stirred into hot coffee in the winter. But, it’s in the fall that I start to crave those deep, caramelized flavors. And I want them with apples.
Caramel apples are a fun treat for the kids, and can be found at a lot of fall festivals and Halloween parties. But, store bought caramels and caramel sauce are typically full of corn syrup, preservatives, and stabilizers.
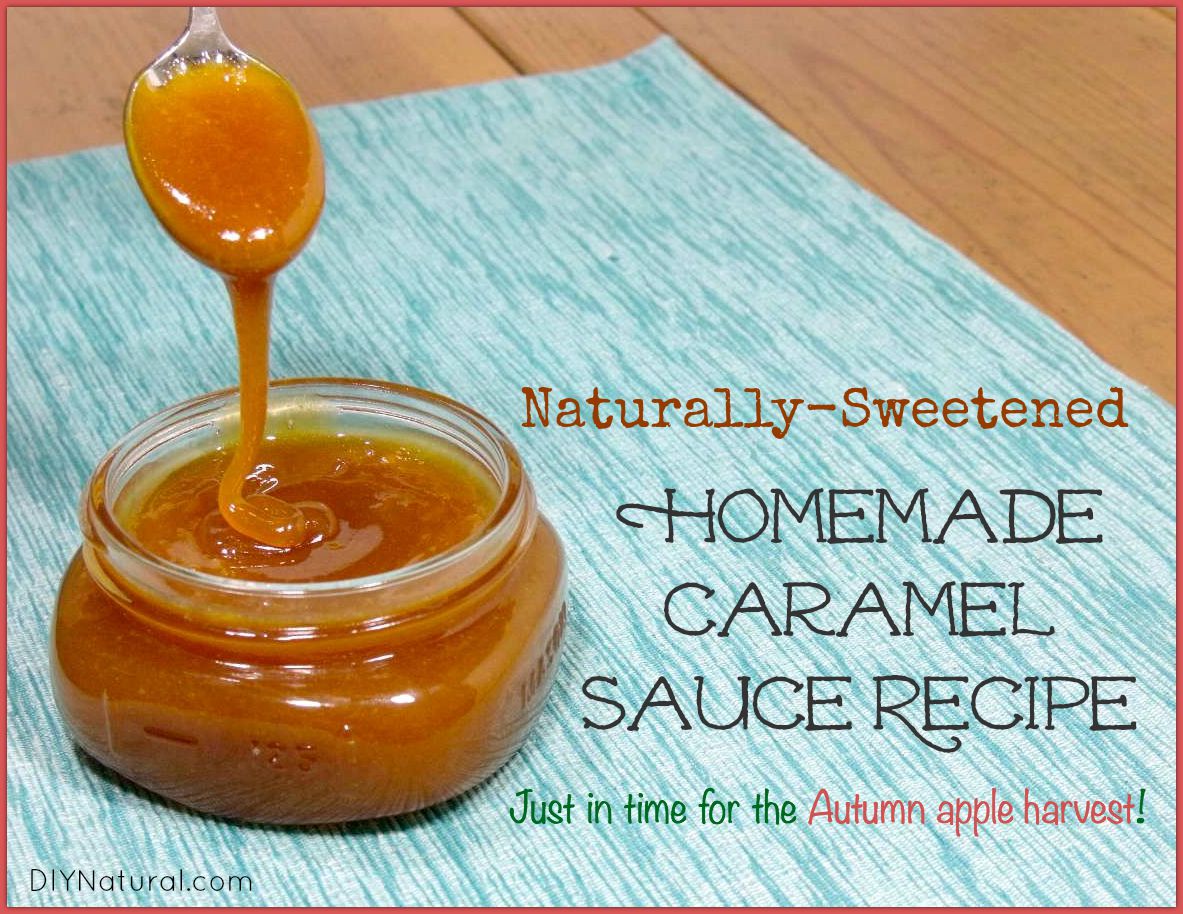
They’re really not worth buying, especially when you realize how easy this homemade caramel recipe is.
Natural Caramel 3 Ways!
Today we’re sharing a recipe for a simple caramel sweetened with honey. And, there’s something magical about this recipe. This same recipe can be used to make three delicious caramel treats – a pour-able caramel sauce for ice cream or other sweet treats, a thicker caramel sauce perfect for caramel apples, and firm and chewy caramel candies! Three treats all with the bright sweetness of honey, and without all the drawbacks of sugar or other processed sweeteners.
Honey caramel is slightly different in flavor than your traditional sugar caramel. It doesn’t have quite the deep, dark caramelized flavor, but it has so much more. Honey caramel is smooth and mellow with a wonderful, bright sweetness and a deep, dark honey flavor.
Since the flavor of honey will vary by region and flower, every honey caramel will be different. But, that’s all a part of the fun!
Homemade Caramel Recipe: Honey-Sweetened
(Makes about 1 ⅓ cups of caramel)
Equipment
- 4-quart soup pot – This pot will seem to be MUCH bigger than you need, but trust me. The sugar will bubble and foam as it caramelizes, growing 4-6 times its initial volume. The last thing you want is a caramel foam boil-over. In addition, using a pot with a wider bottom gives the caramel more surface area from which the water can evaporate, making the whole process a little quicker.
- candy thermometer – This is essential. You’ll know that you have a candy thermometer if it goes up to at least 310ºF.
- (if making candies) dish lined with buttered parchment paper – This will become your candy mold if making the caramel candies.
Ingredients
- 1 ½ cups raw, local honey (find raw honey here if not available locally)
- ½ cup organic heavy cream
- 1 Tbsp butter, preferably from grass-fed cows
- ¼ tsp salt (find unrefined sea salt here)
- 1 tsp pure vanilla extract (find organic vanilla extract here or learn to make your own)
To make caramel sauce and candies
- Heat the honey and cream together in a 4-quart soup pot. Bring the mixture to a simmer over medium high heat, stirring often until it reaches your desired sugar stage. (240°F will make a pour-able caramel sauce. 245°F will make a thicker caramel sauce. 250°F will give you caramel candies.)
- Once the sugar mixture reaches the desired temperature, remove it from the heat and whisk in the butter, salt, and vanilla.
- If making a caramel sauce, let it cool slightly before using.
- If making caramel candies, immediately pour the caramel into a baking dish that has been lined with buttered parchment paper. Cool the caramel brick in the refrigerator until firm. Then, turn the brick out of the pan, remove the parchment paper and cut the caramel into your desired bite-size pieces.
- Store caramel sauce or caramels in the refrigerator for up to 1 month.
To make caramel apples
- Double the above recipe.
- Once the caramel has been made, skewer the apples with a wooden candy stick and dip them into the slightly cooled caramel. Place the apples on a sheet of buttered parchment paper and refrigerate for 1 hour.
- Once the caramel is mostly firm, you can gently press any caramel that has puddled back around the apple. Roll your caramel apples in nuts, chocolate, etc, as desired.
- Store them in the refrigerator until you are ready to serve them.
Once you realize the endless possibilities of this caramel, why would you go back to store bought? You’re welcome, and we’re sorry. Because, we just might have started a caramel addiction.
*******


I am dairy intolerant, can I use coconut creme and will it turn out the same? How long can I keep it and must it be in the fridge after use?
Hi Olinda! That is a great question! I have never personally tried using coconut creme instead of the cream when making caramel, and my hunch is that, due to the difference in fat levels, it might not work the same way.
That being said, there’s no harm in giving it a try! I would love to hear how it turns out for you!
The caramel should be stored in the refrigerator. It will stay good in the refrigerator for a month or more.