
Note from Matt & Betsy: Please join us in welcoming one of our newest contributors, Sarah Ozimek! She writes over at Curious Cuisiniere, and has come on board to share her awesome food knowledge with the DIY Natural community. Enjoy her timely article about dyeing your own Easter eggs naturally!
It doesn’t matter how old I am, I’m pretty sure I will always want to dye eggs come Easter. The bright colors. The smell of vinegar. The hard boiled egg sandwiches with little bits of dyed white from the cracks that formed when I get a little too excited dropping the eggs into the dye. It’s just one of those things that signifies the season.
Eggs have long been a symbol of spring and new birth, for pretty obvious reasons. There are many versions of where the tradition of dying Easter eggs originated, but, no matter the origin, the tradition can be traced all the way back to early Christians in Mesopotamia.
That’s way before they had synthetic food coloring!
So, what did Christians (and others) do to dye their eggs before the invention of synthetic dyes? They used natural dyes, of course!
Nature has given us a beautiful pallet of colors just waiting to be experimented with as dyes. And, there are bound to be quite a few great options for natural dyes in your kitchen right now. You’ve probably experienced the potent dyeing power of beets or turmeric. But, some dyeing ingredients are surprising. Red cabbage, for example, gives a beautiful range of blue and teal hues. And, dried onion skins create quite a bit of depth in the red/orange family.
Dying Easter Eggs Naturally
Once you’ve decided on the colors you want (found below), follow this process for each one:
- Simmer roughly 2 cups of dye ingredients with 2 cups of water in a small, covered saucepan for 15-20 minutes. Remove the dye from the heat and let it cool slightly.
- Once the mixture has cooled to room temperature, strain out the vegetable bits. Add 2 Tbsp of vinegar to your liquid and pour the dye over hard boiled eggs that have been placed in a bowl, glass, or jar. (We used pint canning jars which hold 2 eggs each.)
- Refrigerate the eggs in the dye solution overnight.
- After 24 hours, remove the eggs from the dye mixture and place them on a wire rack to dry. (Place a paper towel on a plate under the rack to save your countertops from any dye that might drip from the eggs while drying.)
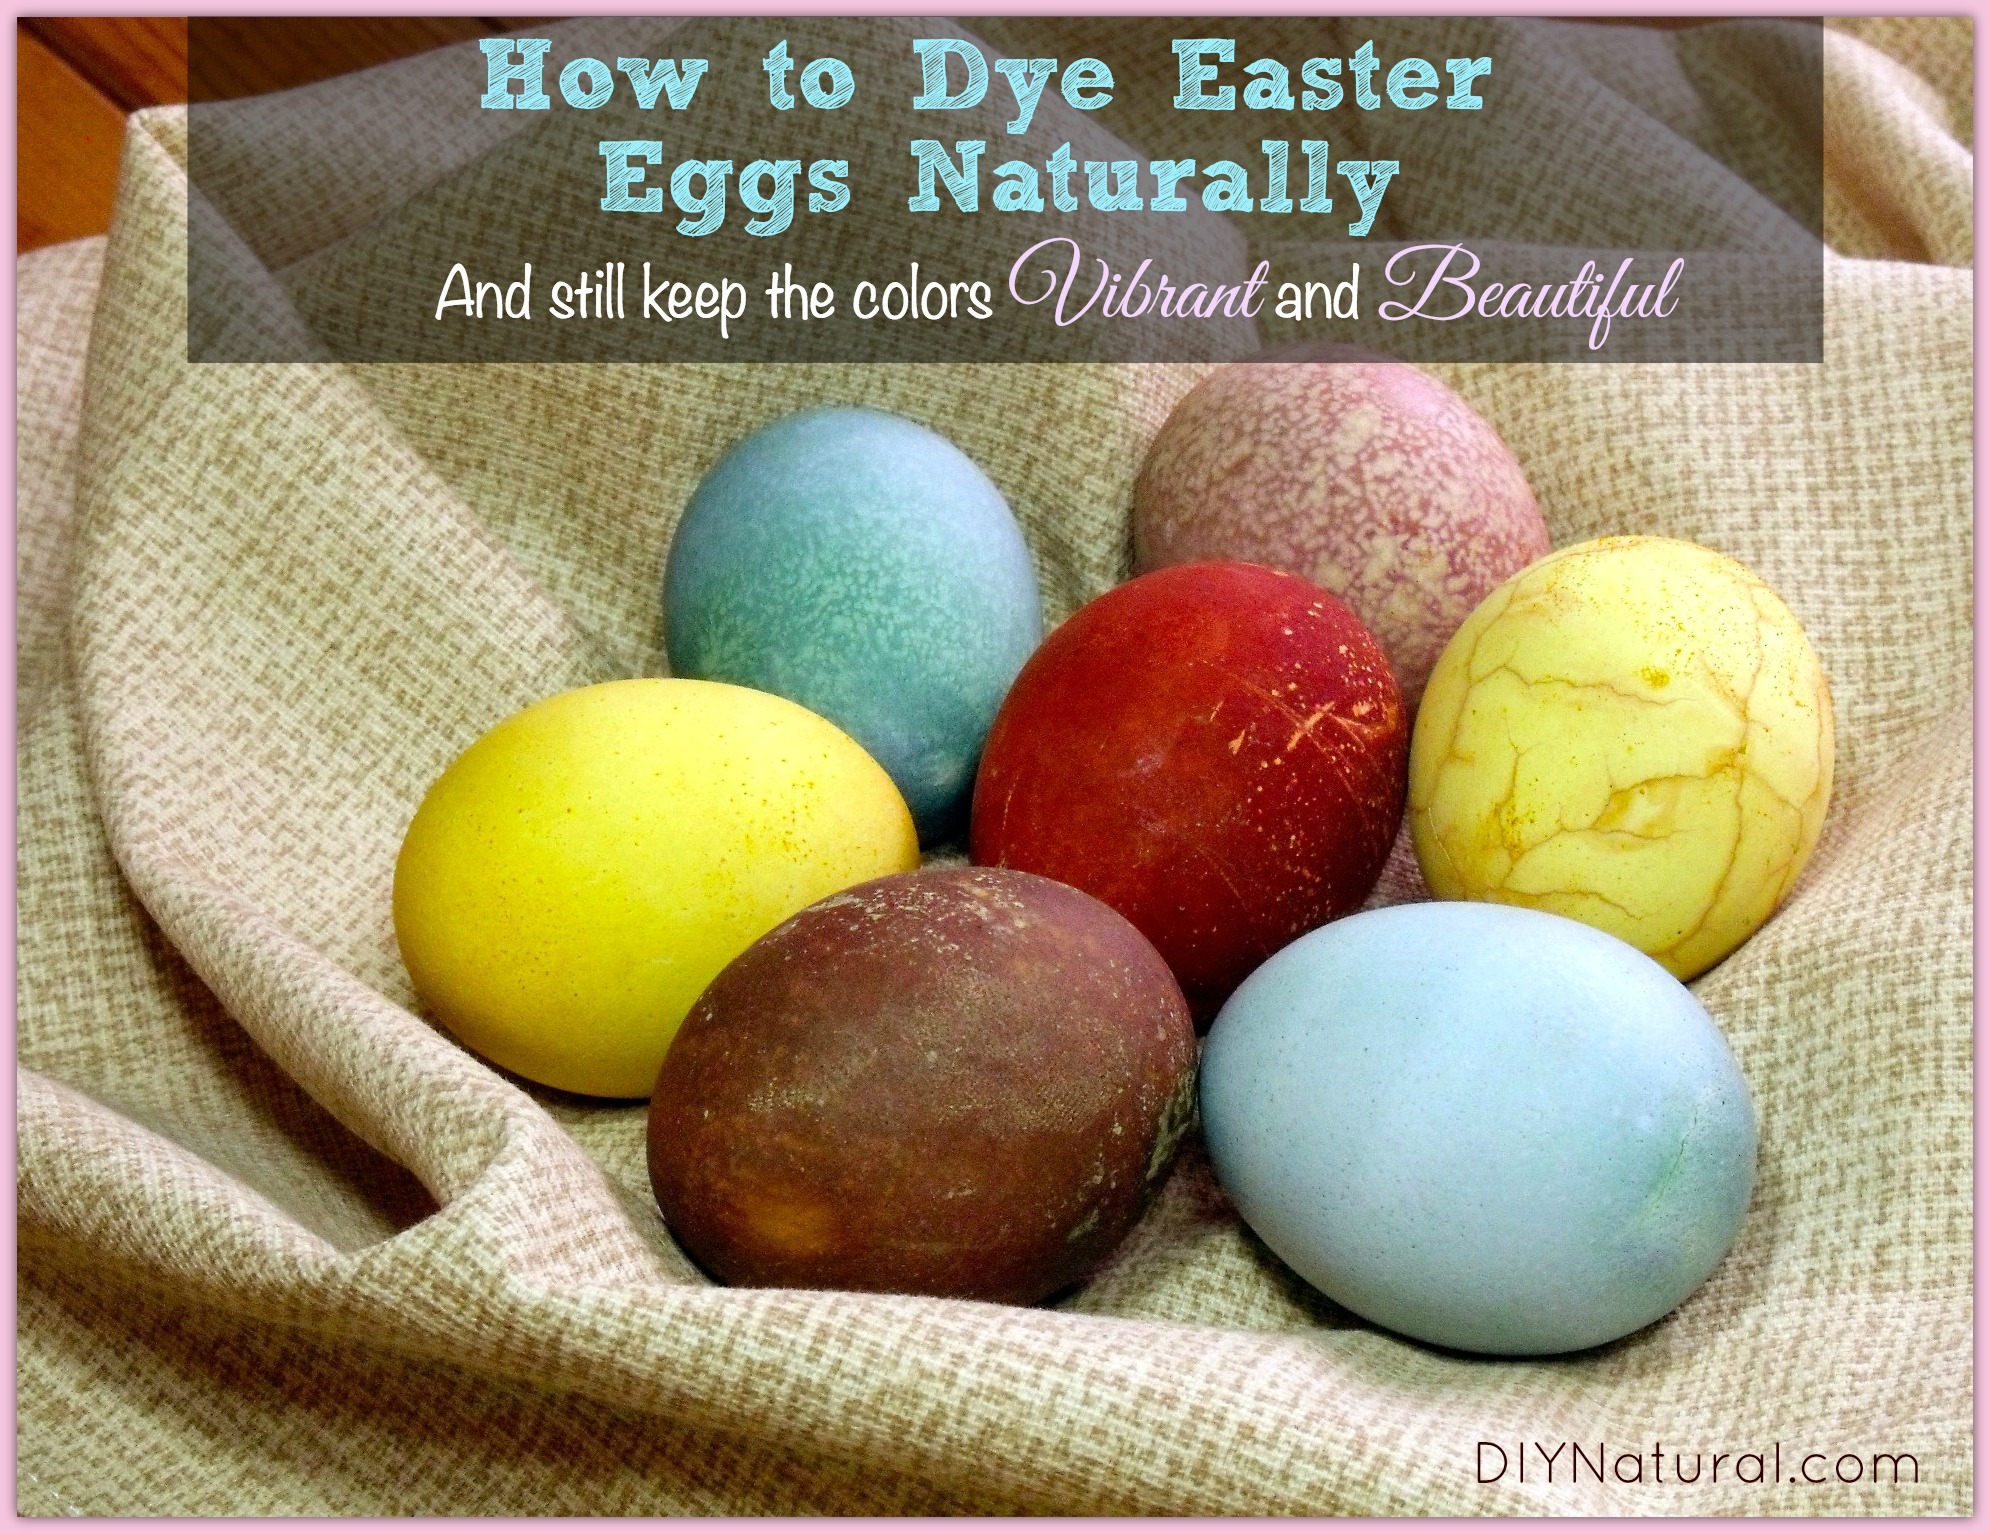
Don’t be surprised if the egg shells change color or texture as they dry. Let nature do its work – the end result is worth it. (All of the color patterns on the eggs pictured above developed as the eggs dried. With the exception of the cracking. That came from overzealous dropping of the egg into the jar.)
Ingredients and Colors
Red Cabbage ⇒ Blue/Teal
Chop the cabbage leaves coarsely before simmering. When you add the vinegar to your dye solution, you will notice the color of the liquid change from blue to pink. Don’t be alarmed. After a nice soak, the eggs still come out blue.
Red Onion Skins ⇒ Deep Brick Red
Simmer the outer layers from the red onion. The dry layers work just as well as the outermost fresh layers.
Yellow Onion Skins ⇒ Red-Orange
Keep those dry outer layers from your yellow onions! Once simmered, they play fun tricks in the red-orange and brown family.
Beets ⇒ Pink/Maroon
Peel and chop the beets before simmering.
Turmeric ⇒ Yellow/Gold
If you have ever worked with turmeric, you know what a potent dye it can be. Keep this one away from your clothes and clean up spills immediately. Mix 1 Tbsp turmeric powder with 2 cups of boiling water and 2 Tbsp vinegar.
Keep in mind that the effect of the dye will vary depending upon how concentrated the dye is, what color your eggs are, and how long the eggs are in the dye.
Alternate Method
You can also dye your eggs by simmering the raw eggs with the dye ingredients, water, and vinegar. Use the same ratios of ingredients to water and vinegar as you would for the overnight method above. This method is a quick way to batch color eggs, and is particularly helpful if you don’t have the fridge space for a number of jars.
Looking for fun ways to use your dyed eggs? How about using them in a Polish Easter Soup or braiding them into an Italian Easter Bread?
Have you tried dying Easter eggs naturally? What are your favorite dye ingredients?
*******


Great suggestions! I’m so excited to try these. I was also thinking of trying chlorophyll drops for green eggs and substituting beet root powder (which I use for natural color in my lip balms) for messy fresh beets. I’d prefer to eat those 😉
Thanks Jessica! I’d love to hear how the chlorophyll drops turn out for you! We haven’t worked much with beet root powder, but I don’t see why it wouldn’t do the same job as boiled beets. Enjoy!
I only wish you had a way for me to print this out with just the dying information! Like a recipe.
Thanks for the wonderful info. I’m going to have to cut and paste it into something I can print out and save.
Hi Sandi. At the very bottom of the article you’ll see a print button; you can use that to print the article and even cut out sections you don’t want to include in your print. Blessings.