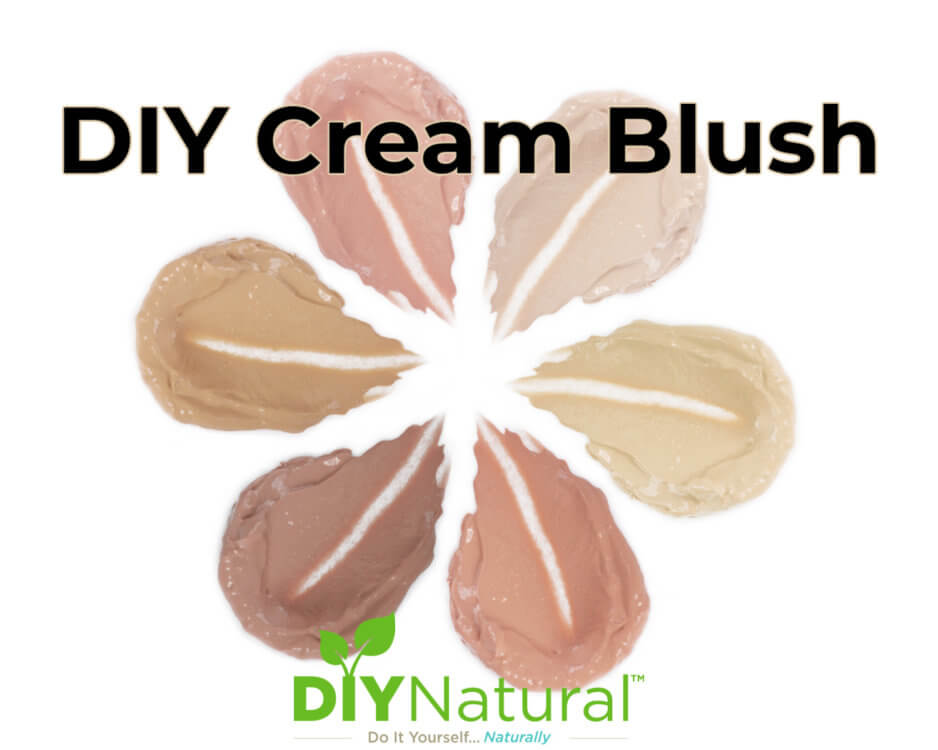
Cream blush has always felt heavy and unnatural to me so I came up with this natural DIY cream blush recipe that feels and looks great!
I may be past the optimum age for wearing make-up, but I still do on occasion. When I do, I like natural versions best, and when I can make my own, that’s even better. I’ve shown you how to make blush powder before, but creams have always felt heavy and unnatural. Then I came up with this recipe.
DIY Cream Blush: A Natural Recipe
This recipe is light and spreadable but is also nourishing and moisturizing to the skin. And the recipe allows for adjustments should you want it heavier, darker, more sparkle, more peachy, or whatever! You can decide just how it will look on you.
Ingredients
- 1 teaspoon shea butter
- 1/2 teaspoon emulsifying wax
- 1 teaspoon aloe gel
- 1/2 teaspoon cocoa powder
- 1/2 teaspoon crimson red mica powder
- 1/4 teaspoon peachy pink mica powder
Instructions
- To make this DIY cream blush, grab a double boiler and melt the emulsifying wax and shea butter together. When they are fully melted, remove them from the heat.
- Whisk in the aloe gel until smooth. Let cool a bit, but not completely.
- Start adding the mica powders and cocoa powder. It may take a bit to get the colors exactly right. You can also try activated charcoal powder instead of cocoa powder. But use very little until you see how dark it will get! Start slow, adding just a bit of color at a time. You can always add more, but once the color is in there, you can’t take it out. And thinning it down doesn’t work very well.
- Mix well and test with each addition. I prefer a rosy color, so I use the crimson powder with the peachy pink and it works very well. If you want more of a golden tone, you can use a gold mica, or add a bit of brown, like gingerbread. With the large variety of mica out there, the choice is up to you!
Notes
I prefer a more sheer color for my DIY cream blush, so I don’t use quite as much mica. If you prefer more coverage, you can add more mica for more color. Again, the choice is yours!
When you get your blush to where you want it, pour or scoop into a wide flat container. There are tins available just for this. Or a canning jar that is wide and flat will work too. Allow to cool completely and cover.
Using Your DIY Cream Blush
With this recipe, I like to use my fingertips or a blending sponge. Apply a bit to your fingertips and then apply to the cheekbones. Start at the middle under the cheekbone and sweep your fingers upwards. Blend out from there. The same applies if you use a blending sponge instead. I’ve tried a brush, like short bristle kabuki, but they seem to pick up too much product and leave the look more streaky. Blending with your fingers or a sponge seems to work much better.
And there you have it! Now you can make your own DIY cream blush in colors you actually want and with products that are good for your skin.
Other Cosmetics Recipes
I’m going to go make some DIY cream blush right now! How about you?
*******


You didn’t use any preservative here. Aloe gel has water about 99.5% water.
You always have great DIY/natural remedies and other things to look at. Do not sell yourself short in saying you are past the age for makeup! Whatever makes you feel good at any age…..