
When my husband and I bought the house that we live in now, we were completely overwhelmed by the amount of wallpaper covering our kitchen and bathrooms. It wasn’t hip, fun, colorful wallpaper, either – the kitchen walls were covered with ivy and we had one floral and one seaside-themed bathroom. It wasn’t necessarily bad, but it didn’t fit our style, either.
We knew we had to remove the wallpaper, and we knew we had our work cut out for us.
First, we removed the wallpaper from the kitchen. I am not exaggerating when I tell you that it took us days. Next, we did the small seashell bathroom, which also took a significant amount of time. By the time we were finished with those two rooms, we simply didn’t have it in us to remove the wallpaper from another bathroom. We decided to live with the floral wallpaper in our own bathroom, and we would worry about it later.
Two weeks after we moved in, our oldest daughter ripped a large sheet of it off the wall while I was in the shower. She’d seen what we did with wallpaper, and she thought she’d help us out. While it was (in spirit) a thoughtful gesture, what it means for us is that we have lived with a raggedy, partially-papered bathroom for two years now.
Enough is enough. We decided this week that we have to get that wallpaper off once and for all.
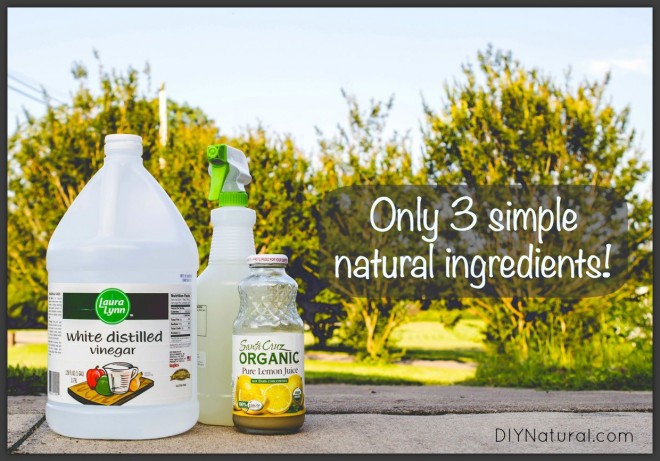
There are commercially available wallpaper strippers available, but they’re expensive and full of chemicals. Two years ago when we moved in, we used a solution of water and fabric softener that we purchased just for the occasion (I never use it for laundry). It worked pretty well, but this time I wanted to find an all-natural wallpaper remover. I made my own and I’m pleased to say that it is very effective.
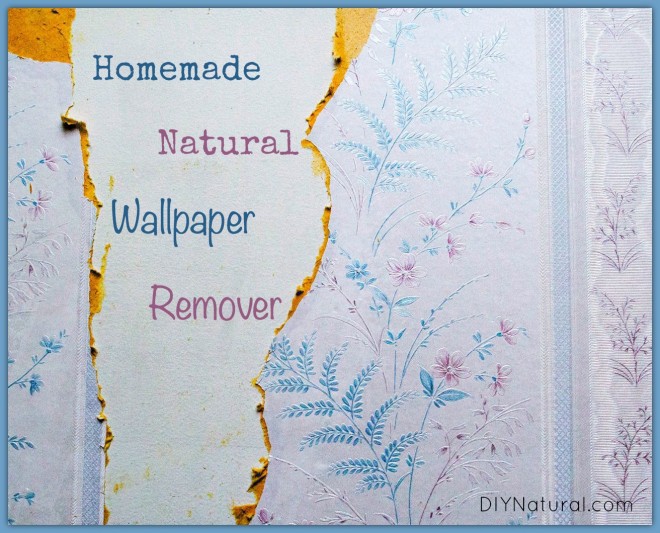
Chemical-Free Homemade Wallpaper Remover
Ingredients
- ⅓ cup of lemon juice
- 2 cups white vinegar
- 2 cups water
Supplies
- Spray bottle (find them here)
- Scraper – many options for this:
- special wallpaper scraper tool (like this)
- putty knife (find them here)
- old debit card
- plastic tent stake (I’m not recommending this so much as admitting that it’s what I’ve been using.)
The Process
Before you begin anything, make sure your room is ready for its facelift. Remove all the furniture that you can, and either cover the flooring and furnishings that remain or be prepared for an extra step in your clean-up process.
There are different methods of wallpaper removal, but what has worked best for us is to remove the top layer of paper first – it is thicker and comes off easily. What’s left is a thin, papery residue that is quite stuck to the walls, especially in the areas where glue was applied. It can be picked off by itself, but it takes ages.
When you are down to a thin, brown layer, spray a section with your solution. Start with a small patch or a partial wall to see how quickly you will be able to get the paper off. Let the wallpaper removal solution sit for 3-5 minutes. This is just enough time to let the solution penetrate the paper and begin to dissolve the glue, but not enough time for it to dry.
When your wallpaper is wet and kind of slimy, go ahead and begin peeling it off. Fingernails are perfect for starting it out, but I wouldn’t depend on your hands too much. This solution is acidic, so too much exposure will leave you feeling raw. It’s best to use a scraper for the majority of the work.
NOTE: If your wallpaper is only coming off in tiny pieces after allowing the solution to soak, experiment with peeling the wallpaper right after spraying the solution. Results depend on your particular wallpaper, and this method may yield better results for some.
Cleanup
The fantastic thing about this vinegar and lemon juice solution is that it’s easy to clean up. Aside from the cost and the chemicals in the fabric softener, the cleanup was my biggest complaint with that method. Vinegar and lemon juice actually help you clean! If you wipe the excess off before it’s dry, you won’t have anything to do at all. If, like me, you are too focused on removing your wallpaper to clean at the same time, you will have to eventually gather up all of the paper scraps and then clean the surface beneath them. A quick spray with your favorite all-purpose cleaner and a wipe-down should do the trick!
Have you ever had to remove pesky wallpaper?
Share your tips for easy, natural removal below!
*******


First, please — anyone who is even THINKING of wallpapering their walls — JUST STOP. DON’T DO IT. Do a nice, easy, small border or just suck it up and paint the wall. Please don’t. Someday you (or your home-buyers) will thank me. Honest.
However, if you DO decide to ignore my advice and paper and then realizing several years later you want to change that wall … this is by far the BEST non-toxic, non-chemical wallpaper remover EVER. No smell. No gloves. No gagging. Very LITTLE expense.
The chemical one at the store was about $17 … I spent about $5 for the vinegar and lemon juice.
Things to remember: 1) try to pull off the first layer (the wallpaper part) before you spray; at least as much as you can. This makes this job even easier. 2) you don’t want to let the solution dry; the vinegar tends to dry very quickly (mine did anyway). Spray, let sit for no more than maybe 2 minutes and then scrape off. 3) invest in one of those paper scrapers. It worked BEAUTIFULLY.
Thank you so much for this recipe. It does work and work without harming my nose (or my cats who wanted to see what I was doing).
I just finished the task and decided with all I read about the many uses of white vinegar, I’d give it a try. I mixed half and half water and vinegar and added a few drops of blue Dawn dish washing soap. Worked like a charm!!
My family home is 108 years old. I have been removing wallpaper in every room for a few years now, sometimes 4 layers thick, ugh. The best and easy way that I have found is, just plain water and pieces of a light flannel fabric. I use scraps of inter lining drapery fabric. The texture hold water better.
I soak the fabric and place the scraps on the wall, I let it set for 10 min. or more. I use a flexible putty knife and for the most it comes off. Sometimes I have to replace the fabric but to me, it has been the easiest way. Hope it helps someone
Many years ago when I was first married we moved into a house with old wallpaper. We had no trouble getting it off. We just put hot water in a paint roller pan and used a roller to put it on the wall. Wait a few minutes for it to soak in and then scrape it off with a putty knife. We did several rooms. We had to clean off the gluey stuff occasionally (more hot water and mild dish detergent). It was very simple, even fun. We painted the walls afterward and had no problems with it.
Ok, I have used similar… Just vinegar & water, or lemon sudsy ammonia and water to remove wallpaper. . . .
But my question here is— What about a recipe for wallpaper Paste?
— I know about flour & water..(cooked version). . . but what would you add to keep it from spoiling?
About how old was the wallpaper you removed? When my husband and I moved into our house, which was built in 1971, we had to remove a hideous wallpaper from our downstairs bathroom. I wanted to just paint over it — it was just pink with tiny dots, almost like a dotted-swiss fabric — but well-meaning “experts” advised us to remove it using the special tool and spraying it with fabric softener. Not only did we end up with an epic-level mess, some of the drywall came off with the paper! We ended up effectively having to make new walls. The whole process took a few months, whereas if I’d gone ahead with my original plan, it would have been finished in less than a week.
Our house was built in the mid-90s, so that wasn’t an issue for us. I’m sorry that happened to you!
Don’t forget to wear protective masks, underneath that wallpaper is paint–and if your home was painted before 1970, and who of us moving into a home that is older knows when it was painted–the paint probably contains lead. In scraping the wallpaper, you are also scraping the paint. We renovated a turn-of-the-century home for 17 years–every room was wallpapered in mousy brown–the upstairs was mousy brown lilacs and the downstairs was mousy brown pebbles. We also stripped all of the woodwork. Somewhere I picked up lead poisoning. We don’t know for sure that it was the paint in that home–but I did most of the wall paper removal. In the home we live in, the kitchen was totally wallpapered–even the ceiling. Now scraping wallpaper off a ceiling is way tedious. And it was so soiled and stuck on very tightly. So think long and hard about what kind of wallpaper you ever put up unless you are going to live there for a long, long time. Resale value can go way down if you choose something obnoxious. I’m sure the former owners of our home must have thought they were going to live there forever when they wallpapered the dining room in African animals and the only bathroom in lighthouses!
That’s great advice about the lead paint, thanks! I can’t imagine a wallpapered ceiling. Sounds like my worst nightmare!
Hi! Thanks for the post. Here’s a simular idea.
My husband and father-in-law were wallpaper hangers back in the day wallpaper was popular. Here’s the way they removed wallpaper:
In a spray bottle mix water(warm if possible) and a squirt of dishsoap. Slight score the old wall paper with a razor making sure you don’t get into the sheetrock. Spray the soapy mixture and scrape.
I have used straight vinegar in the past and it has worked great. Next time I need to remove wallpaper– I will try your concoction.
Thanks for your timely post! I have a border that had a few lifted edges that my children decided to peel off. I have been dreading finishing the job and look forward to trying your solution.
Great post! I have been living with ugly wallpaper for four years because I haven’t wanted to deal with what I knew would be a gargantuan task. Will try this!
Hi ,
your recipe for the wallpaper stripper – do you add any more water to your ingredients ? I’m only asking because I’m wondering how far it will go – as it’s just a few cupfulls , or is it enough due to it’s strength ?
I don’t add more water, but I do have to make a new batch every now and then. That probably wouldn’t do a whole room.