
These chocolate lotion bars are great for beginners! They’re simple, quick to make, hydrate the skin, and are a creative project for kids.
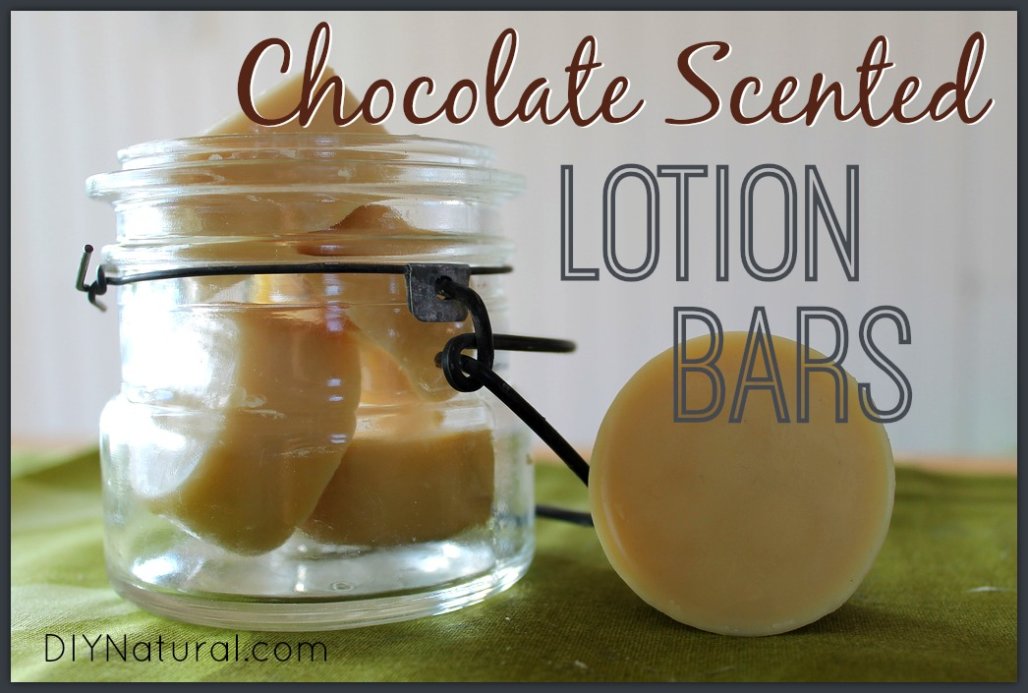
Chocolate-Scented Lotion Bars
While I think most natural DIY projects can be done by anybody, even if you’ve never made anything yourself, some projects are especially great for beginners. Like these DIY chocolate lotion bars. They’re easy and fast, and allow room for creativity.
These lotion bars are great for hydrating dry skin and I love them because my kids can’t “accidentally” pump lotion all over the floor. Not that they would ever do such a thing …
Plus, they smell like chocolate, thanks to the cocoa butter.
When my oldest daughter smelled them, she said they smelled just like dark chocolate and then proceeded to tell a joke she made up herself: “If someone evil had chocolate, it would be dark chocolate!” Get it?
Just one of the many benefits of letting kids help you with your DIY projects. (By the way, these chocolate lotion bars are a great project to do with kids.)

DIY Chocolate Lotion Bars
In addition to the following ingredients, I recommend grabbing a double boiler, spatula, and a mold of some kind to pour the melted ingredients into. (See my tips at the end for mold suggestions.)
Ingredients
- ¾ cup coconut oil (find unrefined coconut oil here)
- ¾ cup grated beeswax or beeswax pastilles (find it here)
- ½ cup cocoa butter (find organic cocoa butter here)
- ¼ cup shea butter – or an extra ¼ cup of cocoa butter can be substituted if you’re allergic to shea (find organic shea butter here)
- 20 drops essential oils – see tips below for suggestions (find 100% pure essential oils here)
- 3 teaspoons Vitamin E oil (find it here)
Method
To begin making these chocolate lotion bars, measure out all of your ingredients. Put the coconut oil, beeswax, cocoa butter, and shea butter in a double boiler on medium heat until everything melts. Remove from heat.

Allow to cool for a few minutes and stir in essential oils and Vitamin E oil. Pour into silicone molds while it’s still liquid. Do it quickly, as it can harden pretty fast!
Use the spatula to scrape as much out of your pan as possible. It makes for a much easier cleanup. Allow lotion bars to cool completely, then pop out of molds. Store in a jar, a small tin, or in a small dish on your dresser or countertop.
To Use
These bars will melt a bit when they come into contact with body heat. To apply, you can rub them directly on the skin. You can also warm them by rubbing them between your hands, then rub the lotion on your hands over parts of your body to moisturize.
Recipe Tips
Tip 1
Remember to use all of the ingredients for these chocolate lotion bars.
If, say, you pour everything into your mold and after it’s hardened, take out a lotion bar to test it and wonder why it’s just not spreading properly, it’s probably because you’ve forgotten the coconut oil.
Not that I did that or anything.
Ok, maybe I did. Go ahead and heat it all up again (plus the forgotten ingredient) just until it melts and re-pour it into your mold.

Tip 2
Make the chocolate lotion bars extra special with essential oils.
While you can omit the essential oils and still end up with a yummy-smelling product, I highly recommend using essential oils. If you don’t know which scents to use, here are some suggestions (I just thought of flavors that would be great mixed with chocolate):
- Peppermint essential oil
- Lemon essential oil
- Lavender essential oil
- Orange essential oil (this is what I used and it smells like those chocolate oranges they sell at Christmas time)
- Cinnamon essential oil
If you’re feeling extra adventurous, you can try combinations of the above essential oils. I’m partial to the lavender peppermint blends myself.
* If you are pregnant, nursing, or will be using the lotion bars with babies or young children, please do your research to determine which essential oils are appropriate for use.
Tip 3
Use a silicone mold.
I used a silicone muffin mold for these chocolate lotion bars because that’s what I had around. Use a silicone mold if you can because the bars are very easy to remove and there are lots of fun shape options available. (Find some here, here, and here.)
However, if you don’t have access to one, you could also use metal tins with lids (great for traveling), an 8 oz. wide-mouth canning jar, or even ice cube trays.
Tip 4
Give them away.
These chocolate lotion bars make great gifts and I suggest using single bars for stocking stuffers or giving a larger amount as the main gift. I’d stack three bars in a small clear bag and tie them up with jute twine or put a few in a small, decorative glass jar. I’m making a batch just for Christmas gifts.
I also set one aside for my kids so they can have their own special bar. But I do put it out of reach when they’re done with it. You know, just in case they “accidentally” see if it will spread around the floor.
More Lotion Bar Recipes
- If you like vanilla mint try making our vanilla mint lotion bars.
- Here is a lotion bar recipe that smells like summer.
- In April, try making these fun Easter egg lotion bars.
How did you like these chocolate lotion bars?
*******


I’m not again of the chocolate smell. Could I sub more Shea butter.
Hello! I tried making these last night and this morning when I checked on them they were still super buttery and soft. They didn’t get hard enough to pop out of the molds and are a bit lighter in color then the ones pictured. Any idea what I might have done wrong? Thanks for the help!
I am absolutely going to do some of these. It sounds delectible as well as good for dry skin. This winter I think we will all need some. I like the purity of these recipes.
I have been making soap now, with the soap bases that can be purchased at Hobby Lobby, Michael’s Crafts, etc. My favourite is goat milk base with Moroccan Red Clay (Vitamin Shoppe) and tea tree oil. It is a great facial soap, cleansing but not drying. Probably good for problem skin also. Also clear glycerine base with pink himalayan salt and a bit of lemon essential oil. A good kitchen soap to remove garlic or onion smells from fingers.
I have now actually made an assortment of soaps. Once you understand how to do it, imagination takes off. My neighbor and I got together to make soap, and then she got her grand daughter to make some. They loved it – making it and using it.
I want to make these for a friend that is allergic to nuts(even coconut)..any suggestions?-Raphaela
I guess I got Christmas down with these!!
However, I do have a concern: I have made body balm using beeswax in the past, and I have noticed that the beeswax separates from the other oils and rises to the top of the mixture and solidify. Additionally, once any oils underneath the beeswax are exposed to the air, they will also solidify. Any recommendations to combat this? Thanks for suggestions!!
I made some very similar lotion bars recently. I love that the ingredient list is simple and that these ingredients are so useful and can be used for many other things. I used grapefruit and orange for a citrus smelling bar.
Would wooden soap molds be ok?
For those wondering about coconut oil alternatives, you could use olive oil, almond oil, apricot seed oil, hemp oil… the list goes on. You would likely have to experiment a little with proportions,though. If you use the same amount listed in the recipe, you may have to add a little more beeswax, but that’s easy enough to do if you notice that the bars didn’t set up properly. Just re-melt and add some more wax.
I’m also interested if there is a coconut oil alternative. I’m thinking about making these for gifts and my best friend is allergic to coconut also (and in the interest of trying to “convert” her to the natural side of things I’m looking for all kinds of awesome things to show her how the cool *responsible* people do it).
Cassie,
I use Palm Kernal Oil (PKO) as a substitute for Coconut oil in several of my soaps that I make for people sensitive to coconut oil. Try that. If you need to buy a little to try this lotion bar recipe, contact me thru my website and I can sell you a small amount so you can experiment. That way you won’t end up with a pound or two of it at home that you can’t use if your friend is also sensitive to PKO.
My website is: http://www.sundogsoaps.com
would GSE work if you don’t have Vitamin E?
Hi Matt and Betsy once again you have done it. These lotion bars look fabulous. I am making some for gifts. Thank you so much and also I am about to make the home made soap I need a few more equipment and I am ready to go.you are a blessing to people like me. Thanks.
You can thank our contributor Nina for this great article and recipe! 🙂
Thank you. These look “yummy”. How could I make these without coconut oil – I’m allergic. Also looking for REAL shampoo that has no coconut derivatives in it.
Is the coconut oil you used refined or unrefined? Thanks.
I have never made my own lotion or body butter, but I am loving your site and may just have to try experimenting soon! Quick question though, how long will this lotion stay “good” for? Should it be used up in a certain amount of time?
About how many bars of lotion does this make?
Depends on the size of your molds, for us it made 6.
Does this make 6 of the mini or regular cupcake size?
these sound fantastic and I love that we can mix up the scents (yes, I almost said flavors) and how would I use them? As gifts to myself and others… I was wondering if this could be poured into wee glass jars which would make them easy for people to carry in their daily lives… just a thought