
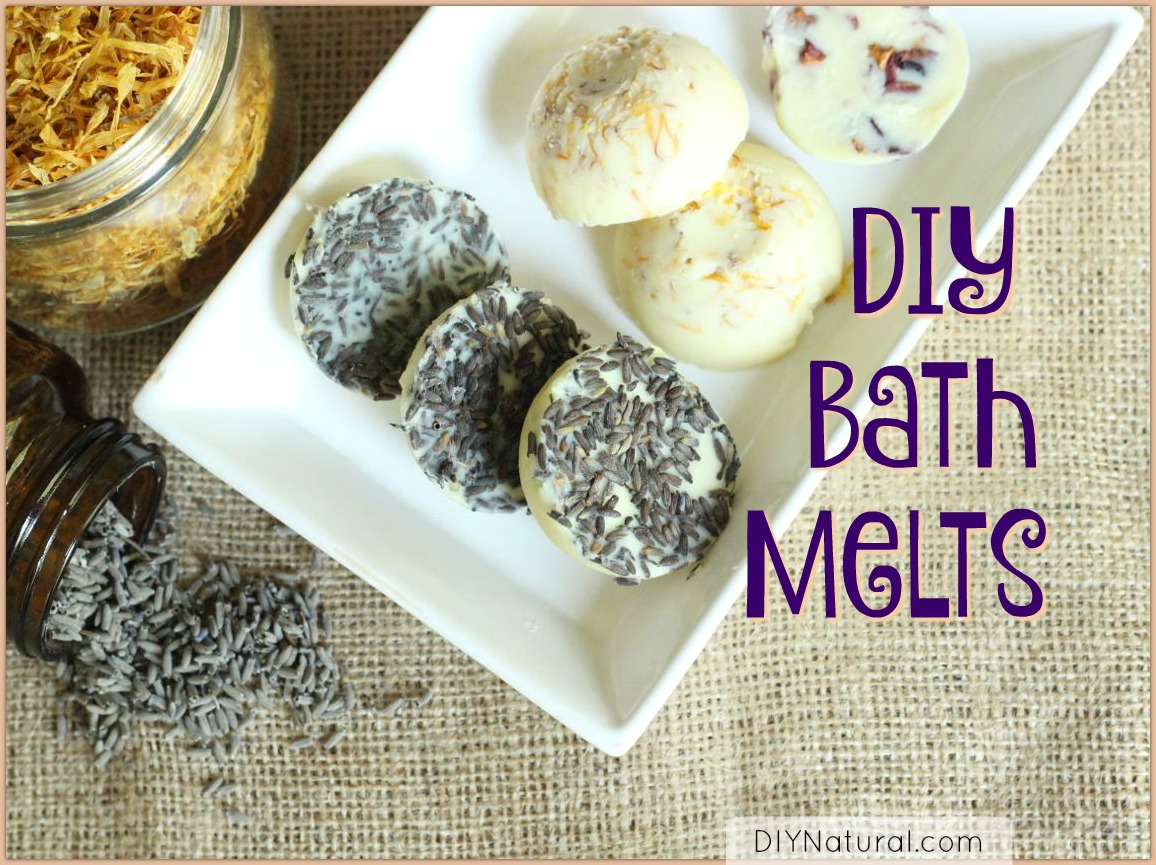
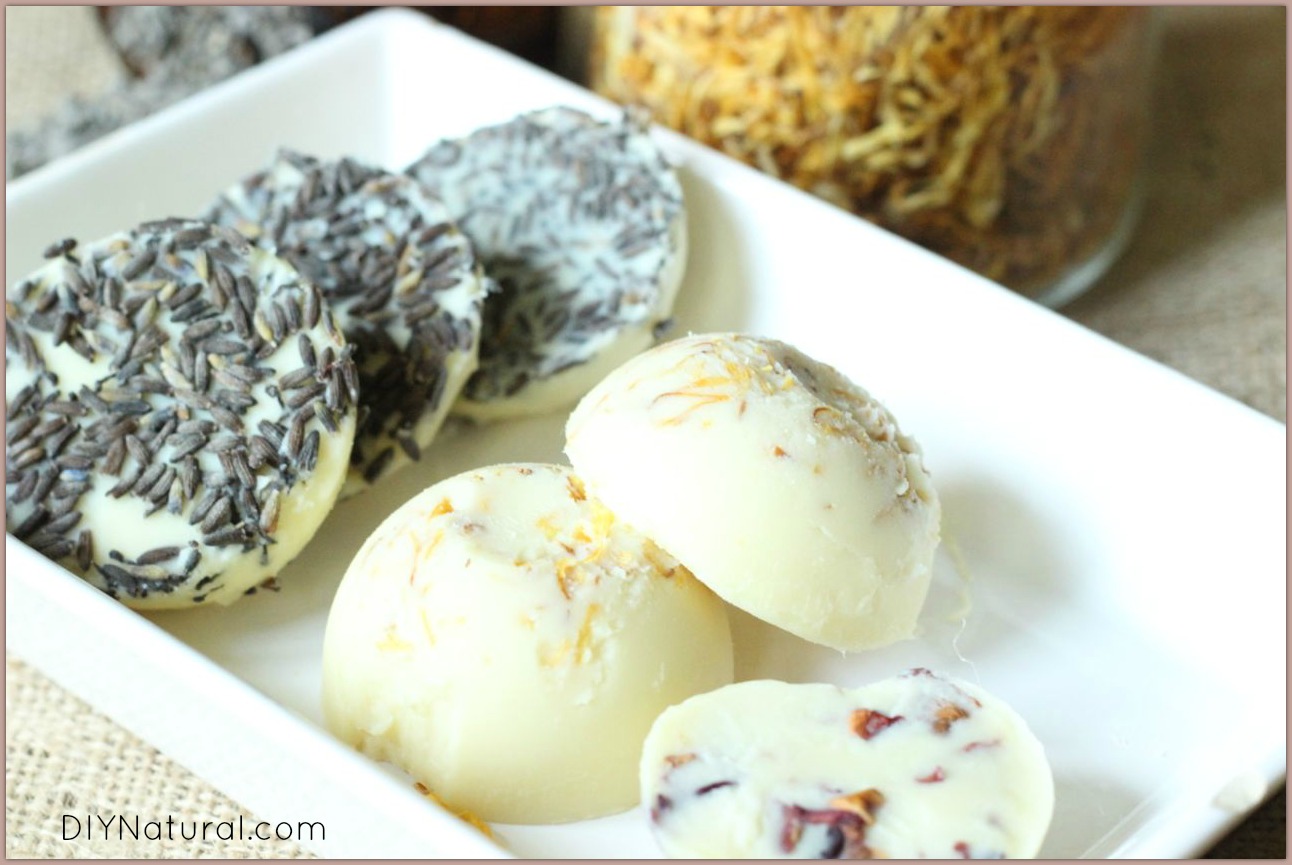
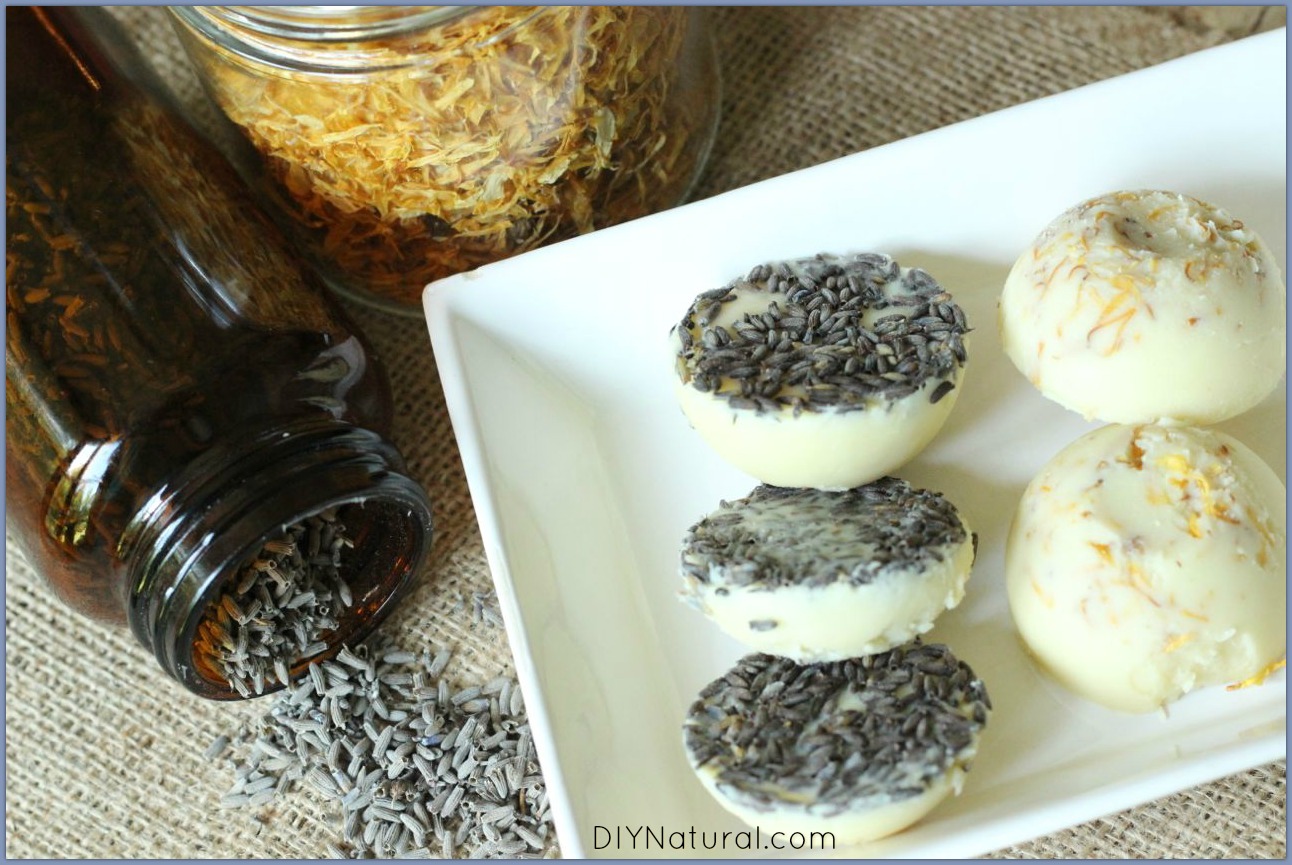
These DIY bath melts are small bars made with moisturizing body butters. Toss them into a hot bath to melt, and enjoy a fragrant and skin-softening bath!
I’m outside in the garden a lot now that summer has set in. And with all the sweat I put into my yard, a little dirt comes with it. I’m tired and sore at the end of the day and a nice warm bath always sounds good.
DIY Bath Melts Add Moisture to Bath Time
Bath melts are small bars made with moisturizing body butters. They are tossed into a hot bath to melt, resulting in a fragrant and skin-softening bath time experience.
Bath melts are made with butters from a vegetable source – cocoa butter, shea butter, and mango butter can all be used. I also recently discovered kokum butter; it’s very hard with almost no scent. The type of butter you use doesn’t matter, but if it’s soft (like shea butter often is) you’ll need to combine it with a harder butter or add a bit of beeswax.
The skin-nourishing fats and oil in these DIY bath melts will partially mix with your bath water but mainly float on top to soften your skin.
To make this even more fun and luxurious, add dried botanicals and/or essential oils.

Moisturizing Homemade DIY Bath Melts
Ingredients
- ¼ cup cocoa butter (find unrefined organic cocoa butter here)
- ¼ cup shea butter (find unrefined organic shea butter here)
- about 1 teaspoon beeswax, grated or pastilles (find beeswax pastilles here)
- 1 teaspoon carrier oil - jojoba, sunflower, safflower, etc. (find high-quality carrier oils here)
- ¼ cup dried herbs - lavender, roses, or other skin-safe herbs (find high quality dried herbs here)
- 15 -20 drops essential oil (find pure essential oils here)
- silicone molds or other small molds (silicone ice cube molds work very well)
Instructions
- Melt the butters and beeswax in a double boiler, stirring occasionally just until wax is completely melted. Remove from heat.
- Add carrier oil and stir to combine. Add essential oil and stir again; you may want more or less depending on your nose and the individual oil used. (See fragrance ideas below.)
- Prepare your mold(s). Place on a cookie sheet or cutting board for stability. Place a little of the dried herbs into each cavity.
- Pour butter/oil mixture over the herbs to the top of the cavity. Allow to cool and harden completely at room temperature. (I don't like putting them in the freezer to cool. It gives a false sense of what they will be like when they are cool. If they are too soft, you can remelt them and add more wax. If they seem too hard, add a bit more oil.)
- Un-mold and store in a glass jar.
To Use
Fill the bathtub with water. Toss one of the DIY bath melts into the tub and allow it to melt. Enjoy your soak!
Notes
These DIY bath melts can cause surfaces to become slippery, so use caution when getting out of the bathtub. You may want to give the tub a quick wipe with a Homemade Tub & Tile Cleaner after using bath melts.
Fragrance Ideas
I like the scent of cocoa butter in my DIY bath melts, but there are many other scents you can achieve using essential oils and/or herbs:
- Cinnamon Orange – Add 5 drops of cinnamon EO and 10 drops of orange EO. You can decorate with dried orange peel or bits of cinnamon bark.
- Lemongrass Mint – Add 7-8 drops each of lemongrass and mint EO. Decorate with snips of dried lemongrass or mint leaves.
- Chocolate Truffle – Add 5-6 drops of vanilla EO and a tablespoon of cocoa powder. Cocoa butter will already smell like chocolate and the vanilla will enhance the chocolate in your DIY bath melts even more.
- Cedarwood Vanilla – This is a personal favorite. Add 10 drops of cedarwood EO and 5 drops of vanilla oil. Then add some black tea that contains beetroot. This will add antioxidants and looks like shaved cedar.
- Lavender Chamomile – Add 6-7 drops each of lavender and chamomile EO. Decorate with lavender buds and chamomile flowers.
- Rose – Add 5 drops of rose essential oil. Decorate with rose petals.
NOTE: Fragrance oils can also be used, but aren’t completely natural. If using fragrance oils, you may need to use more than the amounts suggested above.
Further Tips on Making Bath Melts
There are some precautions to take when working with DIY bath melts:
- The oils and butters can be very hot to work with. Use gloves to protect your hands and clean up any spills quickly.
- Be sure your molds can handle the heat. Silicone is a great choice since it can usually handle up to 500°F.
- Place your mold on a cookie sheet or cutting board to stabilize it. This makes it much easier to move floppy silicone molds if needed.
- Use only dried herbs. It may be tempting to use fresh, but moisture can get trapped in the butter and create a moldy mess.
- Keep the size small. You don’t need more than a ping pong ball size. Most ice cube trays are about the right size.
- Be aware that as you give these as gifts, people will want more. They’re quite addicting!
DIY bath melts are a fun way to unwind at the end of the day. Have you ever tried them?
*******


Hi Debra, these sound amazing and I would love to make some, now that we’re in the middle of winter and my skin gets really dry (I’m in South Africa). Just a question: what about the oils going down the drain after the bath – won’t they clog the drain? Do you just rinse the tub out with very hot water after the bath and will that wash them away sufficiently?
No, I actually don’t usually use bath melts, as my tub is pretty dirty: I have well water, so hardness with scale and mineral deposits are pretty had to get out. I have tried most homemade cleaners, but they aren’t created with well water in mind and don’t usually work very well. I have actually tired them with….well, there is no way around it…: a metal brush attachment to a power drill!!!!! Still doesn’t work well (my tub is old, old, ceramic or porcelain over metal, so it can take the extreme abuse)…also why it is so hard to clean, probably! I have actually tried an entire box of dental cleaner!!! AND, horrors, a bleach soak with almost an entire bottle, but HATED doing that as I have a septic ….yuck, BIG time!
Thank you Safia! I’ll look into reducing crows feet and see what I can come up with.