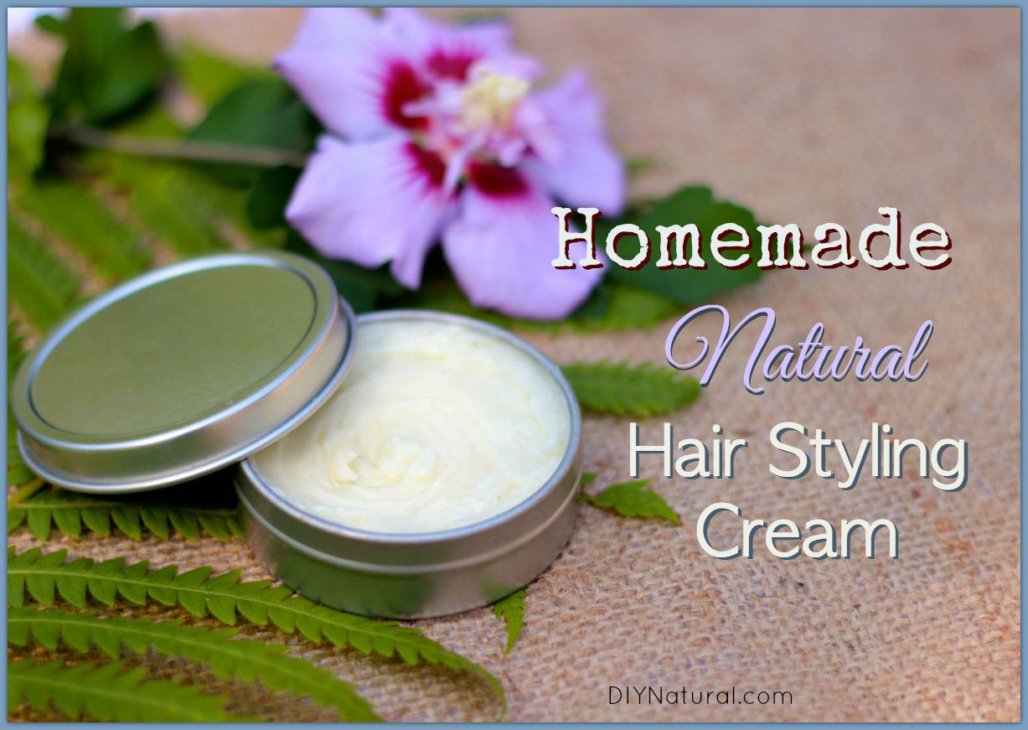

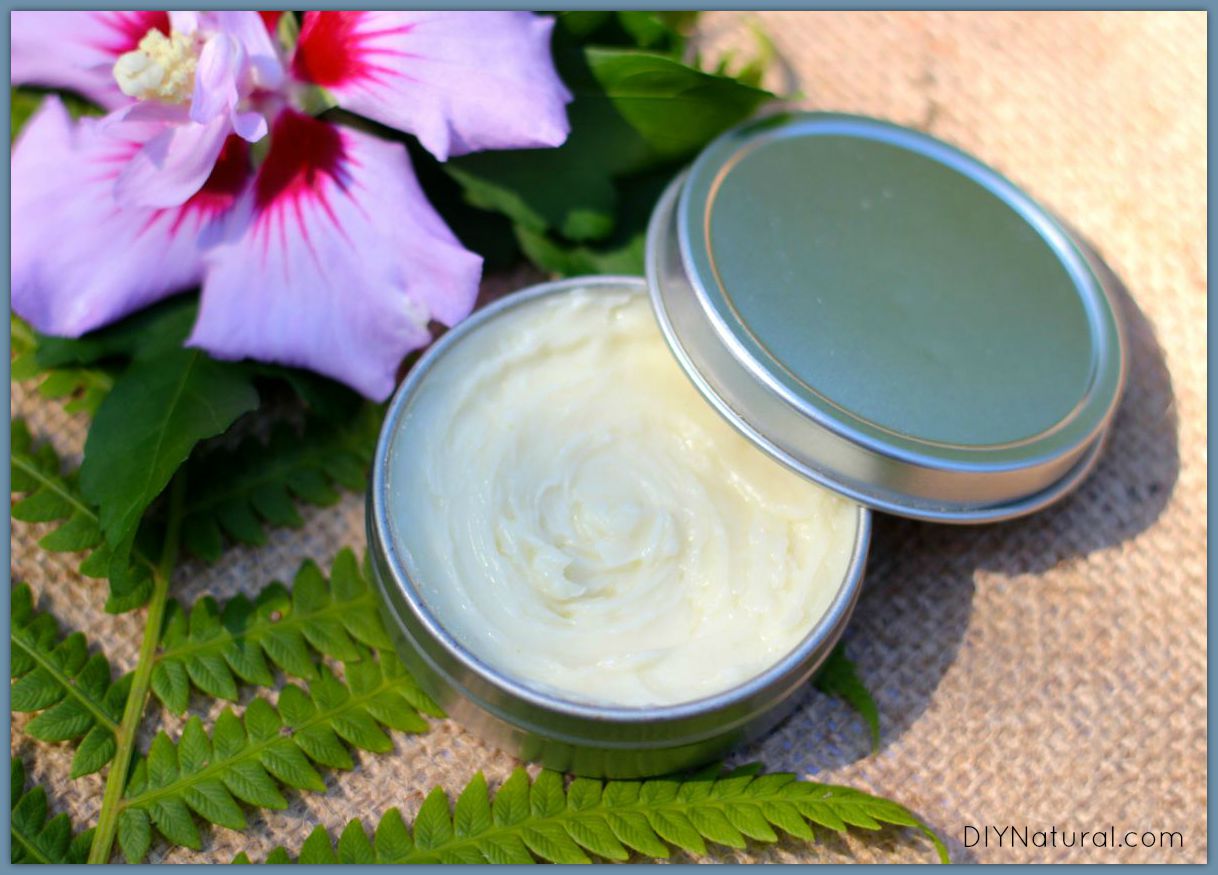
Our homemade hair styling cream is a nourishing and moisturizing hair product that adds shine, smooths curls, and even eliminates frizz!
When summer approached and I realized I had been wearing my hair in a ponytail every day for 10 solid months (since our son was born), I decided it was time for a summer haircut.
I needed a cut that would eliminate the ponytail as a styling option altogether. Because if given the option, I’ll always choose a ponytail… especially when I’m short on sleep.
It may have been the first time I chopped all my hair off and didn’t immediately want to cry when I left the salon. I loved my new short ‘do, and couldn’t wait to get home and see what homemade hair styling products would work best on it.
A Nourishing Hair Styling Cream
I actually revisited an old styling cream recipe I started making a few years ago when my hair was really long. I would use it to smooth my hair and add a little shine when I wanted to straighten it. And now with a short, curled style, it has been perfect for adding moisture after heat styling.
Benefits of This Homemade Styling Cream
I have used my homemade hair styling cream for the following hair issues*:
- to add shine to dull hair
- tame fly-aways, especially in dry winter weather
- smooth out curls, eliminating frizz
- smooth straight styles
- to replace moisture lost from heat styling
The ingredients I chose for this cream are nourishing and/or moisturizing. I selected a few of my favorite essential oils that are good for hair and scalp, but you can choose any you like. (p.s. I love the scent of this hair styling cream so much that I sometimes open the jar for a whiff even when I’m not using it on my hair.)
This hair styling cream is so natural and creamy that I’ve even used it as a hand cream.
*All hair is different, so the results of this hair styling cream may vary for each individual.

Homemade Hair Styling Cream Recipe
Our homemade hair styling cream is a nourishing and moisturizing hair product that adds shine, smooths curls, and even eliminates frizz!
- Prep Time
- 15 minutes
- Active Time
- 15 minutes
- Resting Time
- 1 day
- Total Time
- 1 day 30 minutes
- Servings
- 3 ounces
- Estimated Cost
- $5
Ingredients
- 2 Tablespoons shea butter
- ½ Tablespoon coconut oil
- ½ Tablespoon olive oil
- ¾ teaspoon jojoba oil
- ¾ teaspoon sweet almond oil
- ½ Tablespoon aloe vera gel
- ⅛ teaspoon Vitamin E oil
- 15-20 drops essential oils (I use 6 drops rosemary, 5 drops chamomile, 5 drops of bergamot)
Instructions
-
Begin making your hair styling cream by combining shea butter and coconut oil in a glass measuring cup or half-pint mason jar. Melt in the microwave for a few seconds, or use a double boiler (fill a small saucepan with about 1-2 inches of water and set the glass container inside, heating on low just until melted).
-
Add remaining ingredients and stir well to mix. Transfer to a small, shallow tin with a lid (like this).
-
Refrigerate for several hours or overnight until mixture is cooled and set up. Remove from refrigerator and allow it to come to room temperature before using.
-
Store at room temperature (for a nice, creamy consistency) and use within a month. Refrigerate any amount you can’t use within that time.
Recipe Video
Notes
To Use
A little bit of this DIY hair styling cream goes a long way, so start with a very small amount when first using it. Dip clean fingers into the cream, rub a small amount into your hands, and apply to hair that is only slightly damp or completely dry. (I have not had good results when using it on wet or very damp hair.)
If the cream causes your hair to look greasy, you’re using too much.
Made this recipe?
Mention @diynatural or tag it #diynatural!
Want more DIY hairstyling recipes like this?
Check out our other articles:
- Natural Non-Greasy Hair Pomade and Texturizer
- Homemade Natural Hairspray
- Homemade Natural Hair Gel
- Sea Salt Spray for Beach Hair
*******

I know you put the caveat about all hair being different, but it would be nice if you described YOUR hair, as it will most likely work best on that type of hair…..
For instance, mine is straight, thin and fine. So if your hair is thick and curly, and full, this probably won’t work for my hair…..
I’d rather not use up my supplies on something that isn’t likely to work…
Just a thought for future beauty recipes: describe your type so others know it works for THAT TYPE, and may not for them, BEFORE they use up precious supplies on something that may not work for them, or at least give them the option to try knowing it might not work for them.
I probably will try this anyway, so thank you for the recipe. I’m not being negative or critical, just trying to think ahead!
I, too, like your site very much and have made many recipes posted here. Thank you for all your hard work researching and testing.
If I made a lot of this…how long can I store it in the refrigerator? Is this freezable in case I make a large quantity?
Btw…I LOVE YOUR WEBSITE! It’s my “go to” when I need some good beauty recipes. Keep them coming! Many thanks in advance.
The first time I made this I had lots left over and I stored some in the refrigerator for almost 2 years. When I finally went to use it up it didn’t even have mold on it or a funky odor. While I wouldn’t recommend storing it for *that* long, it will last a while in the fridge. 🙂 I’ve never frozen it, so I don’t know about that. But if all your supplies are very clean and the cream doesn’t get contaminated by dirty hands or anything else, it stores well in the fridge if you make a large quantity.
So glad you find our site helpful! Thanks for letting us know!
very nice
I have everything but the jojoba oil – any possible substitutions?
And by the way, I owe you a long overdue thank you…you have made transitioning to a natural lifestyle not just painless, but fun and exciting! My husband and I are grateful!
You can increase the sweet almond oil if you don’t have jojoba.
We’re so glad we could help in the lifestyle transition! It can sometimes be a long, difficult one, so we’re happy we could add some fun to it. 🙂
Thanks for this recipe Betsy! I was going to try the pomade but I like this one too because of all the essential oils. PS You really look cute in a pony tail! 🙂
The essential oils are definitely what makes this product fun to use. And this styling cream will suit your hairstyle much better than the pomade. 🙂
Hello. Thanks for the recipe. Can I omit or replace with something else the shea butter?
I would recommend replacing the shea butter with mango butter, which has a very similar consistency. You need the butter to get the creaminess, so it’s a pretty important part of the recipe. You can find mango butter on Amazon or through Mountain Rose Herbs. And it’s nice as a moisturizer if you have lots left over after making the hair cream.
Just want to say how much I love your emails. I look forward to trying this, as I’m trying to make our lives as harsh chemical free as possible. Sure wish I had done this years ago!
Thanks for taking the time to let us know how much you like our info! And I agree with you that I wish I had started living a more natural lifestyle sooner. But at least we’re doing it now, right?! 😉 Best of luck going forward with your natural living journey!