As I mentioned a few weeks ago when I wrote about homemade eczema cream, we have recently taken my youngest daughter off dairy products. The improvement we’ve seen in her eczema has made it easier than I ever thought it would be to let go of dairy, but cutting out that whole block of the old-fashioned food pyramid has still been a challenge.
We are big believers in eating a whole foods diet, which means that we drink real milk and we eat real dairy products. I’ve heard many people say they could give up dairy if it weren’t for the cheese, but the challenge for me has been giving up butter. (That might be the South showing itself in me.) I can drink coconut milk and skip the cheese, but if you ask me to do my baking with margarine I get all kinds of anxious. That’s reasonable, of course: margarine is a very unnatural, processed food. I’ve seen butter substitutes that are soy-free and GMO-free, and even a few that were coconut based, but nothing that compares to real butter.
When a friend suggested I learn how to clarify butter, I was intrigued. I hadn’t realized that clarified butter is considered safe for most lactose intolerant individuals. If you aren’t familiar with clarified butter, it is a butter that is cooked until the solids (milk proteins) and liquids are separated. After the butter has become clarified, it becomes free of both lactose and casein. Lactose and casein are the two most aggravating ingredients in dairy products.
I was pleased to find that I could buy this stuff if I wanted (find it here), but that I could also learn how to clarify butter at home. It’s probably not a big surprise that I decided to make it myself.
(A quick note: clarified butter and ghee are two very similar foods, and the words are often used interchangeably. Ghee is different in that it is cooked longer and often has added spices.)
How to Clarify Butter (Make Ghee)
Supplies
- pot for melting butter (find the pot we use and recommend here)
- spoon for skimming butter froth
- jar in which to pour the butter (we recommend simple mason jars like this)
- coffee filter or cheesecloth for straining
- 1 lb of butter (organic or homemade is best, of course!)
Directions
Step 1: Melt your pound of butter in your sauce pan. Don’t turn the heat up too high or you will risk burning your butter. Keep it medium-low to medium.
Step 2: Once your butter has melted, it will begin to simmer. That’s good! Let it simmer for several minutes. Don’t stir, and don’t allow it get above a slow, easy simmer. At this point, you will notice that froth is bubbling to the top. It’ll look a little like cappuccino foam. Skim this foam off as it appears, but don’t toss it out. It’s still usable! It isn’t, however, considered dairy-free… so be careful who you feed it to.
While froth is bubbling to the top, milk solids will be gathering together and sinking to the bottom of the pan. That clear yellow stuff in the middle is the stuff you’re trying to gather.
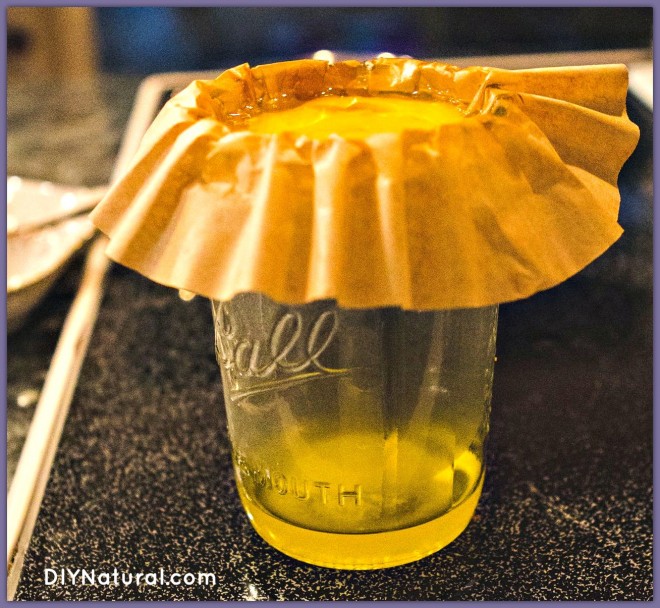
Step 3: Grab your jar and cover it with loose cheesecloth, or, if you’re like me and have forgotten to replenish your cheesecloth stock, go with a coffee filter. It’ll take a while, but it will be well-strained butter that makes it through.
Pour the butter in small batches into the jar, letting it soak through before adding more. If you are using a coffee filter, you might have to replace it a few times. I’ve found that the coffee filters tend to get clogged with the milk-solids after a few rounds of butter-pouring.
Step 4: You’re finished, actually. Now you just have to close your jar, clean up any butter you may or may not have spilled all over the counter (seriously, this was very messy for me, but then again most things are, so it might not go like that for you), and label and store your homemade clarified butter.
When sold in stores, clarified butter (or ghee) is often sold at room temperature. Technically, you can store yours at room temperature, too, but I keep mine refrigerated. It’s always best to err on the side of caution.
Uses for Clarified Butter
Beyond the fact that clarified butter is lactose- and casein-free, it is also very useful for cooking. It has a higher smoke point than regular butter, so it can be used for dishes that require high heat. It can sometimes be used as a butter substitute in baking, too, but it does have a different consistency to it.
Do you use clarified butter in your kitchen?
Tell us how you use it!
*******


I’ve read somewhere previously that this works only with unsalted butter as the salted tends to burn and does not have a stable temperature point when reusing. Do you find this to be true?
I’ve been making it for years and love it. I also whip butter and olive oil together and make my own spreadable butter. Ghee has a higher smoke point than butter too.
Thank you Matt,and Betsy for sharing how to make ghee.Being Indian I grew up on ghee.But in North America we don’t use it as much as you do in India.But things are changing,and people are much more health cautious now,and using eastern methods in cooking,health and beauty products.I always bought ghee as I thought it was much easier,but now that you have shared how to make it,I’ll try it.It’s much more economical and fresher,because you make it yourself.You can use ghee in pretty much anything from baking to frying.
I would be curious to know how the nutritional content of ghee varies from butter (fat, calories, other nutrients). Can anyone tell me?
This article goes pretty in depth on the benefits of ghee vs. butter : http://www.livestrong.com/article/435588-is-ghee-healthier-than-butter/
Hi Matt n Betsy
I liked your article on clarified butter(ghee), My mother has been making ghee through out her life and make it too,there are two ways you can make ghee which is either by collecting milk cream or by butter,you can directly put collected milk cream in a pan on low heat and wait for the ghee to separate ,just for some more insight ghee does not have any spices in it..just plain melted clarified ghee. pouring ghee in a container or jar would be less messy if from pan it is collected in a wide mouth jar or pot later on it can be stored in a jar.put lid on after cooling down otherwise it will collect water and will splutter every time one cooks.
thanks
Thanks for sharing this recipe! I have been making ghee at home for years, and use it in many different ways- including cooking and skincare :)..
1. Pour a teaspoon of ghee on cooked rice. It helps keep the rice from sticking.
2. Similarly use it on cooked pasta, lentils, bakes muffins, etc..Give a good flavor 🙂
3. Apply on toasted bread instead of butter.
4. Apply on my palms, when they get dry especially during winter season.
Hi Matt and Betsy,
This is pretty much exactly how I’ve been making ghee since early July. I’ve been cooking, more or less, 3 meals a day using it in the cast iron skillet. I’ve had some amazing health results (via Western medical labs) as well as via the bathroom scales. (Also cut out all grains/dairy for a bit. Dairy still out. Added short grain brown rice back in for extra B vitamins.)
Anyway, how you describe is how I make it. And yes, a fair amount went down the kitchen drain at first!
Thank you for sharing this simple explanation. I shared it on my social sites with friends to help take the mystery out of it for them!
I USE 2TSP OF GHEE WHEN I MAKE PUMPKIN PIE. I HAVE ONLY BOUGHT THE GHEE I HAVE NOT MAKE MY OWN.
I wonder if you could use a gravy separator to get the same product?