

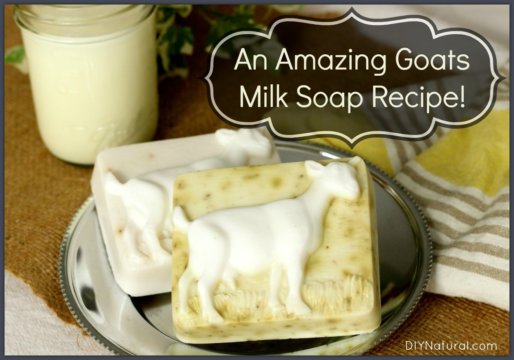
This goat milk soap recipe yields soap that is great for your skin! It works with other milk types too so follow the recipe and get started.
Goat Milk Soap Recipe
Since I’ve written other soap-making articles, I’ve been asked often, “How do you make milk-based soaps?” While there are a few shortcuts, milk-based soap is a bit more difficult than most other cold-process soaps, but the end result is well worth the extra effort.
For Beginners
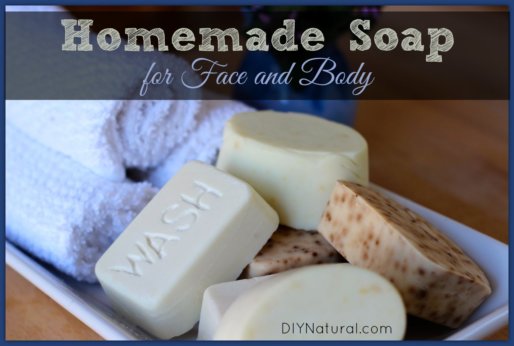
If you haven’t made soap before, we recommend you take a look at our other articles on soap making to familiarize yourself with the process before tackling this goat milk soap recipe. Here are some great recipes to help you learn:
- Homemade Soap for Face & Body
- Homemade Soap for DIY Cleaning Recipes
- 25 Amazing Soap Making Tips and Secrets
Goat Milk Soap Recipe (& Other Milk Types)
This goat milk soap recipe yields soap that is great for your skin! It works with other milk types too so follow the recipe and get started.
- Prep Time
- 30 minutes
- Active Time
- 30 minutes
- Resting and Curing Time
- 25 days
- Total Time
- 25 days 1 hour
- Servings
- 4 4 ounce bars
- Estimated Cost
- $5
Equipment
Ingredients
- 12 ounces coconut oil
- 15 ounces olive oil
- 13 ounces lard (you can also use sustainably-sourced palm oil, tallow, vegetable shortening, or another comparable oil: see "Additional Notes" section)
- 13 ounces goat milk
- 6 ounces lye (100% sodium hydroxide – also find at local hardware store)
- 1 ounce essential oils
- additives such as oatmeal or lavender flowers (optional)
Instructions
-
On the day before you make this goat milk soap recipe, you need to freeze your goat milk. Getting it very cold isn't good enough, it needs to be frozen. I put mine in zip-top bags in the freezer and keep it there until I need it. Each bag is pre-measured at 13 ounces so it's ready to use.
-
Then, you need a large glass or stainless steel bowl. (Avoid using plastic, as it may absorb odors.) Put this in a larger bowl or the sink and fill the outside bowl about half full with cold water and ice so it’s very cold. In the inside bowl, place your frozen chunks of milk.
-
Very slowly, add your lye and carefully squish it into the milk. A stainless steel potato masher works quite well for this step. Keep adding the lye until it is all incorporated. It will probably not get hot or even warm. Don’t worry about that, it doesn’t need to. If the ice in the outside bowl melts, keep replacing it. It needs to stay very cold. The milk may turn orange or even tan to light brown. This is normal. If it turns dark brown, you’ll need to start over. The milk is scorched at this point. The sugars in the milk are very sensitive and need to be kept very cold to keep them from scorching. And if you smell an ammonia-like smell, that is normal too – just keep going. This smell will fade while it is curing.
-
When your lye/milk is ready, keep it on ice while you get the oils ready. Measure your oils using a kitchen scale. Combine oils and heat them slightly until they are about 110° – 125°F.
-
When the oils are ready, slowly pour the lye/milk mixture into the oils. Mix by hand for the first 5 minutes and then use a stick (immersion) blender to bring it to trace. If you've never made soap before, this is where it gets quite thick, much like pudding. When it comes to a trace, add your essential oils and any additives and pour it into molds.
-
Wait 24 hours or more, remove from molds, and cut if desired. Wait 3-4 weeks, turning it every so often so all sides have been exposed to air. You can test the pH with test strips to make sure it’s cured (the desired pH is between 8-10), or use the old “touch your tongue to it” method. If you get any kind of tingle on your tongue, it’s not ready yet and will be too harsh on your skin if used at this point. (I’ve been doing this since 1995 and that tiny bit of lye on an uncured bar will not hurt you.) Wrap when completely cured.
Recipe Video
Notes
You could substitute milk for water in any soap making recipe, but certain types of milk are higher in fat, necessitating the use of more lye to make it work. I’ve used the following goat milk soap recipe and it works great. Depending on what kind of milk you use though, you may need to use a bit of additional lye. I made a goat milk soap recipe, and that has about the same amount of fat as whole cow’s milk. Others, such as buffalo, sheep, or yak (yes, yak!) have more fat. Increase your lye to 6.5 ounces for these milk types.
Goat Milk Soap Recipe Tips
- Always keep your milk frozen and the lye/milk mixture cold. This is extremely important to prevent scorching.
- Lye should be handled with extreme care as it is caustic and can burn your skin. Keep vinegar handy as it will neutralize any lye burns. I got burned yesterday by reaching for a paper towel. I brushed my arm across the lye jar and didn’t think I actually hit it until later when it started to itch. I wiped it with vinegar, put some ointment on, and it’s not even red today.
- Use only stainless steel or glass as plastic can pick up smells from the milk as it’s “working.”
- Your other oil can be any oil with a comparable SAP value. The SAP value is the amount of lye that it takes to make that oil into soap. (Actually, it’s more than that, but that’s the short version.) I tend to stick with oils like palm and grapeseed, which have benefits for the skin.
- Palm oil is a controversial subject. I have found that Spectrum Foods is the only company that produces sustainably harvested palm oil. (Find it here.) It comes from farmers and is not involved with the rainforest at all. They also make an organic vegetable shortening that works very well in soap.
- To make goat milk soap with a whiter color either use all clear oils or add small amounts of titanium dioxide. Read our article on how to make goat milk soap white.
- If your soap mixture doesn’t trace, don’t worry. As long as it is blended well, it will be fine. There have been a few times when my soap didn’t trace and it worked out despite this.
- It’s very common for your soap to turn gelatinous during the first part of the curing stage. (It’s actually a good thing.) If this happens, do not stir or you’ll upset the balance. Allow it to sit untouched and it will be fine.
Made this recipe?
Mention @diynatural or tag it #diynatural!
Alternative Milk Soap Method
When I’m teaching a class, it’s hard enough to keep everyone together without throwing frozen milk into the equation. So I give them an alternative. Prepare your soap as you typically would using a cold-process soap recipe. Then, at the trace, add a few teaspoons of powdered goat milk mixed with a bit of oil. I use oil, not water because it smooths out well and doesn’t get lumpy like when mixed with water. You may still get the orange color and some ammonia smell – remember that it’s normal for that to happen. You can still add whatever you want. The color will fade and become a nice creamy color.
I love making this goat milk soap recipe because it is so good for your skin. And it helps justify my love for my goats!
Do you have a favorite goat milk soap recipe? Share in the comments section below!
*******
Is anyone here in a position to recommend Tail Butt Plugs? Thanks xox
Love this recipe, it has become my go to for everyday soap!!
Helpful tips I would like to know how to run a recipe correctly on soap Cal for soaping please
I have found powdered goats milk at WalMart, but it’s in a 12 oz container. Will that be sufficient for this recipe?
Hi,
As a newbie having made soap successfully once and just seeing your soap recipe – looks great . . . question is how much “essential oil” to add? Thought rosemary would be good with flecks of rosemary leaves as per one suggestion.
Please advise. Would like to try.
Thanks.
This article was very helpful. As a soapmaker myself, I have had a goats milk soap batch burn a time or two and the ugly brown color is not at all appealing to my eyes, so I know it can’t be appealing to my customer’s eyes. I will freeze my milk next time and slow down when adding the lye. Great tips!
Thanks Brittany! Yes, the first time I made goat’s milk soap, it was a disaster! I didn’t know about the scorching, but soon learned. I’ve found now that if I do have a batch that turns an off color, I use that to my advantage. Some milk contains more sugars, so it can turn yellowish or orangey. For these I make my mocha soap, adding cocoa and coffee. It’s a big hit!
Hmmmmm, I got some goat milk mixed with herbs…it was really lovely and have been planning of how to make my own soap. Thank you so much but is there anything that can replace lye because we hardly get lye from this part of Africa.
THANK YOU FOR THE KNOWLEDGE
I’M GREATFUL OXOXOXOXOX
Two questions Debra: you mention that if the milk turns brown it Is scorched. I reread the article several times and saw nothing about applying heat to anything but the oils. Is it the lye that “heats” the milk? Please elaborate on this. Also, I have never heard the phrase “comes to a trace” so please explain this. A family member gave me a bar of her goat milk soap (from her own goats!) which had flecks of fresh mint and Rosemary. It is the most delightful soap! Now I’m keen to make it myself! Thank you so much!
Thanks so much Kristal!! I love knowing that I’ve helped people. And Marianne, you’re absolutely right. I neglected to clarify that information. Thanks for pointing it out. When you add lye to a liquid, it will heat up significantly. That’s why milk need to be kept very cold, so that the lye doesn’t scorch it. And as to the second question, the “trace” is where the soap thickens to the point of looking like vanilla pudding. When you use a regular recipe, the oils and lye solution create a oily combination that is quite liquid. Stirring for a while, sometimes up to an hour, will cause the lye particles to combine with the oils making it thicken. When it gets to this point, it’s ok to add essential oils, herbs and whatever else you want, and then pour it into molds. With milk based soaps, the “trace” might never happen, so it may not get thick like a cold process recipe would. It’s ok to add your ingredients, like the rosemary and mint, after a good 10 minutes of blending even if it doesn’t come to a trace. It’s possible that it might not. I hope this helps!
Hello
when you measure the oils on the kitchen scale do you do it in a bowl and can you use regular measure cups?
Hi Marie,
You can use any type of container to weigh your oils. Just be sure to weigh them, not measure. It can sometimes, be the same, but more often than not it’s very different. What I do is to place the container on the scale ans set it to zero. Then weigh your first oil and reset it to zero. Keep doing this until you have all of what you need.
I made my first batch of goatmilk soap. It turned out wonderfully. I used almond butter, so my soap turned brown, Like caramel. I tried it on my face, it feels nice and soft. I had fun adding any oil I choose. Next time I may go with a whiter bar and fragrance. It was fun, the hardest part is waiting for the soap to cure.