
Now that summer is finally here in my part of the country, most of the plants are leafed out and producing flowers and even some fruit already.
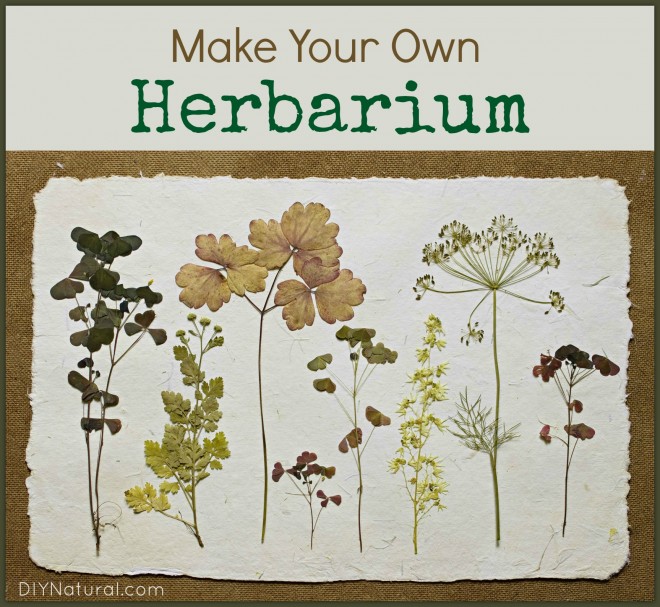
I’ve gone looking for black caps and black raspberries, and am finding them along with blackberries. And the blackberries come in 3-4 different species here. So how do I tell them apart? I’m creating an herbarium. An herbarium is an identification book that you can create from a collection of dried plants – it can be personalized to your tastes or area.
Why an Herbarium?
Identification books are great, but unless you have a hands-on guide, or someone to show you what the plants are, the books can have many photos or drawings that start to look very similar.
With an herbarium, you can take samples of the plants and find out what they are later. Or, if you are like me and have specific goals in mind, you can go looking for certain plants to put into your herbarium. This gives you a chance to look them up, take them to a nursery or Master Gardener, or maybe an herbalist who can give you and exact diagnosis.
Remember that some plants that look like one other can be good for you or poisonous, so be very sure in your identification. If you are unsure, always wash your hands well after collecting your plant matter and keep those species well away from those that are similar.
Preparing for Plant Collection
Before you get started collecting plant material, determine which types of plants you want to collect. I am making one with just mints, cultivated and wild, and another with wild plants of this region, both good and bad.
- Get your book ready. You can use a photo album with sticky pages and plastic overlay or a scrapbook that you can put laminated plants onto. My first book that I made when I was much younger was made from pressed and dried plants that were laid on clear plastic sticky sheets, like those for covering shelves. I then laid another sheet over the top and sandwiched them together. Then I cut around the plant and mounted it in my book.
- Once you decide what you want to do, then you can get your pages done. I’m going to use several native species, so I’ll find the information, compile it into a file, and hold it there until I’m ready for it. Then when I have the plants ready I can pull up a blank page in my computer, determine where my plant will go, and then put the text on the page around the plant. I can then laminate the entire thing.
- Get your collecting materials ready. This can be gloves (I use nitrile like these so there are no allergens that will come in contact with the plants), clippers or a knife, bags (such as zip top or other clear bags), and an old phone book. You can also get a portable flower press, but it’s not necessary. You’ll also want note paper and a few pens and maybe a good camera.
- Prepare a backpack with necessities. I would take sunscreen, insect spray, water, snacks, and baby wipes or something to clean up with. Pack clothing according to the weather and a small first aid kit. (Learn to make your own natural first aid kit to pack for the outing.)
Collecting the Plant Material
Certain plants, like plantain, jewelweed, yarrow, and chickweed, are easy for me to identify. But some plants, like the oak trees, are harder to tell apart. I pick some plants at the time they flower and some when they fruit. Still others look different when they first emerge than when they are adults. Jewelweed is a good example here. Whatever you collect, be sure to label it and possibly take a photo of the entire plant, maybe even including the area it grows in. There are several types of mountain mint that grow in several areas here. Some only grow in higher elevations and some prefer denser shade. Whatever the area, be sure to mark it down.
If you are unsure of a plant, as I was earlier this year with mugwort, take a specimen and press it and add your notes. You can identify it at a later time, or get help from an expert. I cut off about a foot of the top, being careful to protect the plant as much as I can. Then I place it between the pages of a phone book until I get home. This does several things: It keeps it safe while you are hiking, it starts the pressing process, and it also starts the drying process. You can slip your notes along side it on the same page so you don’t forget what it is.
If you are collecting potentially harmful plants, such as water hemlock, be sure to use gloves and wash well after collecting. Most people should not attempt this since there are species that can be harmful, but since there will be no consumption, it is relatively safe. If you are unsure, leave it alone.
Pressing the Plants
A very simple way to press your plants is to place them on clean paper and then place another sheet of clean paper on top. Then sandwich the whole thing with newspaper on both sides. This will absorb much of the moisture. You can switch out the clean paper and newspaper if necessary. You can do several plants at one time this way.
On the outsides, place two thin pieces of plywood and then several heavy rocks or bricks on top of that. (I used the end of my couch once!) After a few days to a week, check your plants. If they are dry, leave them a bit longer. Nothing spoils a good herbarium like mold from plants that are not dried thoroughly. Once they are dry, you can mount them and add your notes.
You can also buy a good flower press for this task. They can be quite expensive, but if you will be doing a lot of plants, it may be well worth the expense. Find one here on Amazon, or look around at Ebay and even Craigslist for deals.
Words of Caution
As with any outdoor activity, you need to be aware of your surroundings. I was looking at some Solomon’s Seal the other day when I came across a wide pipe. At the mouth of it was a coiled up rattlesnake. Had I not been aware, I could have been bitten.
You also need to watch out for harmful plants. Poison ivy is one of the worst to come in contact with, but there are many other plants that can irritate the skin.
Snakes and other creatures abound, such as spiders, mosquitoes, and chiggers. Be prepared by using insect repellent (learn to make homemade insect repellent) and carrying a snakebite kit (find one here).
Watch the weather as it can turn hot or cold quickly. Be sure you stop often to drink water, and when you need to use the “outdoor facilities,” be sure of where you are.
Respect other people’s property by not picking plants without permission and never pick on state or federal land unless it is permitted. I have seen Lady’s Slipper and Ginseng near me, but those plants are endangered. For plants like that, I use only photos.
Have you ever made an herbarium? If so, what tips can you share with the rest of the community?
*******


What a fun project! This would help to improve all of our plant identification skills, and I know my son would have a blast with it. Thanks for the suggestion.
Thanks Kariane! I may just start a kids class with some of the easy flowers and plants. Great idea!